
Leaderboard



Popular Content
Showing content with the highest reputation on 07/28/2023 in Advices
-
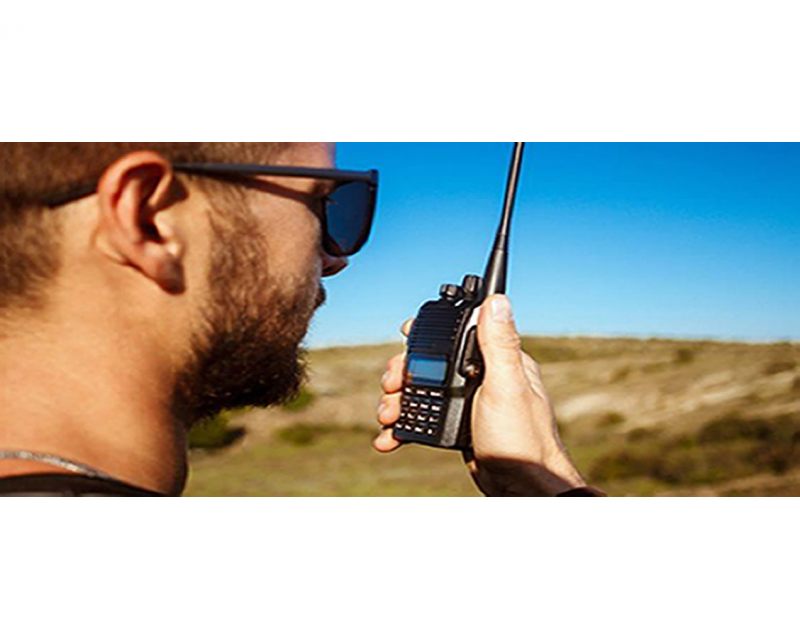 Two-Way Radio Guidelines A two-way radio is an essential safety device during every Carnity Offroad Club drive. It is the primary means of communication between the convoy members. Before the Drive Every participant must bring their own two-way radio. We highly recommend programming your radio with the Carnity frequencies listed below beforehand. We do not provide spare radios or program radios at the meeting point. For your very first club drive we can lend you a radio for that day only. Ensure your battery is fully charged before every drive. No radio = No drive. If you need help choosing, programming or operating your radio, simply create a topic on the Carnity website. Our community will gladly assist you. Radio Channels Carnity Offroad Club uses multiple radio channels so that several convoys can operate simultaneously without interfering with one another. Your Drive Lead will always announce the channel to use before the convoy starts. Recommended Radio Models and Brands UHF Two-Way Radio (400-470Mhz operating range). (VHF will not work). Handheld radio (built-in models can be purchased as extra but you need at least one handheld model. Recommended brands are: Baofeng (UV5R, UV5RH, UV5R Mini), Crony or Motorola MT777, TYT, Make sure it's equipped with a keypad so you can enter the frequency. Do not buy the models without keypad unless you are savvy enough to program with a separate USB cable and Chirp Software. Recommended Radio Settings For best compatibility with other convoy members, we recommend: Frequency Step: 6.25 kHz CTCSS / DCS: Disabled (unless instructed otherwise) VOX: Off Radio Etiquette Listen before transmitting. Keep messages short and clear. Do not interrupt emergency communications. Use the radio for convoy-related communication only. Follow the instructions of the Drive Lead and Marshals. The 10 radio frequencies are listed below: Technical Details STEP FREQUENCY: on the FM band, frequencies are spaced from each-other at a certain bandwidth. The Step frequency is basically the incremental change in your radio when you turn the rotary knob on top of your radio. When you program the radio to a certain frequency, you will need to make sure the appropriate step frequency has been set correctly. (see on the above frequency list). PTT: Short for PUSH-TO-TALK: This is the button on the side of your radio that you push when you want to broadcast a message. MON: Most radios have a Monitor button. When pushed you are basically monitoring the channel. If no-one is broadcasting you will just hear noise. But this is useful to set your desired volume. SQL or Squelch: To make sure that your radio does not pickup every little signal, the squelch acts as a gatekeeper to only allow a broadcast on your radio when it is strong enough or nearby enough. If you encounter a lot of noise that's being picked up by the radio, try changing the SQL setting a little bit. A higher setting makes the radio less sensitive to noise. RX and TX frequencies: RX stands for Receiving frequency, which TX stands for transmitting frequency. in Carnity we transmit and receive on the same channels. DCS / CT codes: These are basically encryption settings that allow a user to make sure only radios with exact same CT codes can listen in on the chatter. As these settings are confusing and complex, they should not be used (CT should not be showing on your display). Programming the Motorola/Crony MT777: Note: This radio has 2 operating modes called "Frequency" and "Channel". To switch between these modes, keep the ENTER button pressed while switching on the radio. Pressing the VFO/MR button while you're in Frequency mode will bring you to the combined mode, which is basically a screen that shows both the channel and the frequency. You can use either one of these modes during operation. To Program the Channels: 1. Make sure your radio is switched off. 2. Press the Moni (black button on top of the orange one on your left side), and MENU key together while switching on the radio. 3. Wait for the set to display SELF (which means manual setup). 4. Press Enter and it will show the Channel number. 5. You can choose which channel to program by selecting it from the rotary selector knob on the top of your device. 6. Once you have the desired channel, press ENTER. 7. Type your first frequency you want to program. 8. Press ENTER on every setting below to go through the advanced settings and verify if they are programmed as following: (If above settings are not correct they can be changed with the rotary knob on the top keep pressing enter until your set displays the next channel to be set). 03=OFF (if a number is showing here, push the *Lock button until OFF appears). 04= Enter the same frequency as the one you want to program. 05= OFF (if a number is showing here, push the *Lock button until OFF appears). 06= OFF 07= ADD 08= HIGH(H) 09= NARROW 10=-------- 9. Repeat from Step 5 to program the rest of your channels. Very useful Youtube video below: method for adding a single frequency later on, without going through the whole SELF programming mode again: 1. Make sure the radio is in Frequency Mode. Type in the frequency you want to program. E.g 446.00625 2. Press MENU and then press the VFO/MR button. The channel number will start to blink. 3. Use the rotary selector knob to select on which channel you want to save this frequency. 4. Press VFO/MR button again to confirm and exit. Keypad can be locked by pushing the * LOCK button for a few seconds. --------------------------------------------------------------------------------------------------------------------------------------------------- Programming the Crony CN888: Note: This radio has 3 operating modes called "Frequency", "VFO", and "Channel". You can toggle between these modes by pressing the orange Function button on the top left corner, followed by pressing 1 (Mode). Programming the radio as described below can only be done in VFO mode. 1. Switch on the radio. 2. Press the Function Key (orange button on top left corner). 3. Press 4 (STEP) until it shows 6.25. Press EXIT to confirm. 4. Now type the first frequency you want to program. Eg. 446.00625 5. Now press the # button. The Channel number in the corner of the display will start to blink. 6. Select with the A (up) or B(down) buttons to choose wich channel you want to save the frequency. 7. Press the C button. the radio will confirm by saying "SAVED AS RX FREQUENCY" 8. Press the # button again. The Channel number in the corner of the display will start to blink. 9. Press the D button. the radio will confirm by saying "SAVED AS TX FREQUENCY" Keypad can be locked by pushing the Function button, followed by the *F.L button. Programming the Baofeng UV5-R: When buying a radio like the Baofeng UV5R, many certain frequencies and channels are already programmed into the radio, but these are different from the ones we use in Carnity. As you will be programming 5 new channels onto Channel number 1 till 5, it is important to first delete these existing frequencies stored in those channels. You can do that as following: Step 1: Delete the existing channels from channel 1 till 5: 1- Switch on the radio 2- Press the MENU button followed by the buttons 2 and 8. (Menu 28). 3- Press MENU, and then use the UP/DOWN arrows to select which channel you want to clear. 4- Select CH1 and press MENU again, you will hear "delete channel, followed by confirmed". 5- Now go back to step 3 and do the same for the following channels (CH2-CH3-CH4-CH5). 6- Now all 5 channels are clear and ready to be programmed. Step 2: Set the step-frequency: - Switch on the radio - Press the MENU button and with the up and down buttons select STEP frequency. - Change this to 6.25 and press MENU to confirm. - Press EXIT to go back to the main menu. Step 3 Program the new frequencies in the radio: 1- Press the VFO button. You will hear the confirmation “frequency mode”. 2- Make sure the arrow is on the top line. If not, press the blue A/B button. 3- Type in the frequency you want to save. I.e 446.00625 4- Press MENU, followed by button 2 and 7 (menu 27). You will see MEM-CH. 5- Press MENU and now use the up and down buttons to select the channel you want to save it on. 6- Press MENU again to confirm. Your first frequency is now stored under channel 01. (receiving memory). 7- Press MENU TWICE again to confirm. Your first frequency is now stored under channel 01. (transmitting memory). 8- Press EXIT and repeat from step 3 onwards to program your remaining channels. Note: To program the Carnity backup frequency channel 5, you will need to set the step frequency to 12.5. When done, follow the same steps to program and save it under channel 05. You can either program these channels one by one into your radio, which is the easiest for you later on, or you can just enter the frequency without saving it. Some extra notes: Option 5 in your menu should be on Narrowband. Option 10 and 12 in your menu should be set to OFF (we are not using CT codes). BaoFeng_UV-5R_Manual_(1).pdf1 point
 -
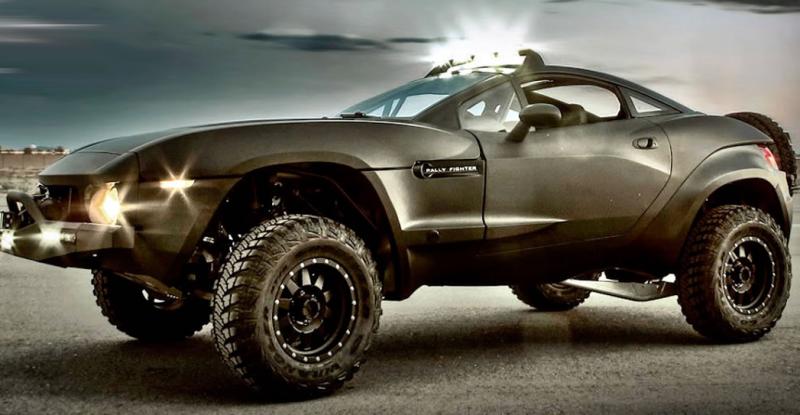 How to choose a capable off-road car? Off-road driving means different things to different people, and one of the most common, and potentially most expensive mistakes made by novice drivers is to think that SUV’s and Crossovers are off-road vehicles simply because they have some AWD capability or they look very similar in height and width. A current post on this forum is good case in point, since it asks if a Renault Duster is a capable off-road vehicle. The answer is simple; No, it is NOT a capable off road vehicle, and no serious off-road driver will ever see it, and other soft-roaders like it as a capable off-road vehicle. This article is not intended to bash Renault Dusters and other vehicles like it; it is intended to explain why they do not make a capable off-road vehicles. For the purpose of comparison, I will stick to why Renault Duster is not a capable as an off-roader, although the reasons listed here apply to all SUV’s and crossovers from almost all the brands and regions. It should have a low range Having a low range is of critical importance in any desert driving capable off-road vehicle. It may be true that a Duster has a specially geared first gear that provides a bit more torque to the driving wheels, but the gearing is not low enough to prevent wheel spin, which is an absolute requirement for driving in desert sand. A proper low range should reduce the gear ratio in first gear to the point where the maximum attainable road speed in first gear does not go over 8 - 10 km/h. The advantages of this should be obvious - the low gearing prevents the wheels from rotating fast enough to start wheel-spinning in sand or mud, so with suitable tyres, all of the rotation of the wheels is converted into traction. Soft-roaders like SUV’s do not have low enough gearing to prevent wheel spin, which is why they get stuck so easily. It should have way to disable ABS brakes ABS brakes can be dangerous in off road driving, since it increases stopping distances. This might sound strange, but the fact is that ABS was designed to work on paved roads, where traction is a lot higher than on even the best off road surfaces. On tarmac, the ABS allows the brakes to work at maximum efficiency because there is enough traction to slow the vehicle down effectively without skidding on any direction. However, in the off-road environment, and especially with tyres that are designed for on-road use, traction is reduced to only a very small fraction of what is available on a paved road. Thus, when a driver applies ABS brake when driving on loose surfaces, the wheels lock almost immediately, and before the vehicle has started to slow down. Moreover, as soon as the wheels lock, the ABS system releases the brakes until the wheels lock again, and so on and so forth. In practice, this means that the vehicle effectively has no brakes, and the vehicle could easily drive over a cliff because it cannot stop in time. Any capable off-road vehicle should not have ABS, or if it has, it must have a means to disable the ABS when it is not being driven on hard, paved roads. The most effective way to stop a vehicle on loose surfaces is to allow the wheels to lock, which causes them to dig into the ground, thereby creating increased rolling resistance, which is what stops a vehicle on any surface. It should have a proper diff locks For advance desert driving it should have the only differential locks that work reliably are those that lock mechanically. Almost all soft-roaders with some AWD capability have various kinds of viscous couplings that lock only the transfer case to supply torque to the diff that does not normally drive the vehicle. The problem with this is that viscous couplings can seldom handle high torque values over long periods on the one hand, and that the actual differentials on the driving axles are sometimes not locked. Although the Duster can be retrofitted with a rear differential that locks mechanically, there is no point in locking only the front differential in tricky or difficult driving conditions. With proper diff locks, all the wheels receive the same amount of torque but with soft-roaders, and especially those that do not have a low range, the torque that is supplied to the wheels is delivered at wheel rotation speeds that is too high for the tyres and suspension to maintain traction in deep sand or mud. Moreover, soft-roaders are often fitted with traction control systems that are based on the ABS brakes, which means that the system’s stored energy can run out before the vehicle is out of a sand or mud trap. If this happens, the automatic diff-lock control system cannot control wheel spin on an axle, which in turn means that the driver can lose traction on two or more wheels until the traction control system is recharged. On a proper off-road vehicle with mechanically locked diffs, torque is supplied to all wheels equally all of the time, and since momentum is the off-road driver’s best friend, there are no interruptions in power delivery that can cause the vehicle to sink into soft sand or mud. No diff- lock system that works with viscous couplings, and/or that depends on a brake-based traction control system can ever be effective in deep sand or mud, since it cannot supply torque to all four wheels for long period of time. Read more: 5 reasons to not use SUV's for off-road1 point
 -
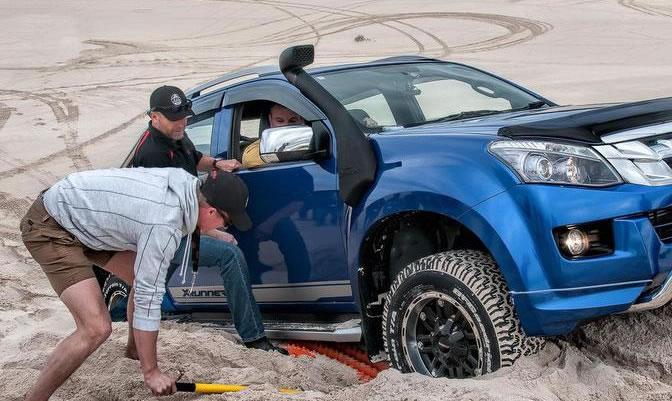 Top 3 off-road mistakes that driver makes in the UAE People assume driving off-road is a lot easier due to no rules and restrictions as compared to driving on the road. That may be true to a certain extent, but after a while it might get messy if certain rules aren’t followed. Off-road freedom is awesome, but you should always remember these three MAJOR off-road mistakes that every experienced and in-experienced off-road drivers come across in the UAE. By the way, all these 3 rules apply for desert, mountain, small drive - overnight drive, beach sand & sand dunes. So by remembering these 3 golden rules you will save yourself from 75% of the off-road threat that may spoil your enjoyment or cost you some expensive repairs. It's always good to read little bit more on how to drive off-road before you embark with your most capable 4x4 vehicle. If you are new to off-road then you should listen to people advice, see what others are doing and learn how to negotiate with various off-road obstacles. Deflate, deflate and deflate: No car in the world is capable of driving off-road without deflating. You might get away with few 100 meters without deflating, but eventually you will get stuck. Yes you need to deflate in sand and on rocks as well. For sand, ideal is to deflate to 15-18 PSI as per terrain difficulty and also as per the temperature (deflate more in summer, when sand is loose). Maximum you can deflate to 12 PSI (not lower) if you are in very challenging terrain like Liwa, Sweihan or Al Wagan sand dunes. For wadi's and rock crawling you need to deflate lesser up to 22-25 PSI as compare to sand. In wadi and rocks little deflation help in better traction by increasing the footprints while crawling and absorb LOT of shocks on loose gravel or rocky terrain, while driving. Plan your stop: About 90% of off-road stuck happen due to stopping in wrong places. Always choose the safe spot to stop, and stop slowly. People driving in sand dunes while climbing up and down the dune, get tempted to stop in amazing scenic spot, but when they start again they get stuck. Don't stop on uphill, sideways and on loose sand which will make it difficult for you to move the vehicle again. When in motion, use that momentum to choose the flat, hard spot (as much as possible) so that moving again is easy. Stopping hard with harsh brake will dig you in the sand and moving again will be even more difficult. In the inevitable situation if you brake hard, then go backwards few meter and gain momentum to drive further. As you advance more in desert driving in sand you will see it is very simple physics that needs common sense more than an ego of being an owner of "most powerful car" and "most expensive car". Take it easy and be ready to go back little bit and start again if you are stuck in a difficult spot, try to find work-around than forcing your way in because mother nature is sometimes more stubborn than you are. For rock climbing, crawling and wadi passage plan your stop carefully so that you can start back safely and avoid any excessive wheel-spin or slippage of your vehicle. In rocks while negotiating with big boulder (stones) you need more of patience and external help than too much gas and distractions. External help means to have your friend or family person outside the car who can guide your exact tire movement (very slowly) and help you step on safe spot and pass through. Don't panic when you are stuck: The beauty of off-road driving is EVERYONE will get stuck, whether you are a super sales achiever, manager, leader, CEO or the VP. The idea is to stay calm and "DO NOT PANIC". Majority of off-road stuck are very minor and you can recover yourself in less than a minute if you are calm. If you panic and give too much acceleration it will dig you deep in sand and might dislocate your vehicle more in rocks. When vehicle is not moving, first attempt is to try reversing immediately and seeing what is blocking so that you can avoid it. If reverse is not possible, then step out and identify the situation, have few sips of water and you will get creative in thinking different ideas to get out. If you are stuck in wadi's and mountains, you can probably move few smaller rocks aside by hand and make your way or sometime you can place smaller rocks under your tire and use them as a stepping stone. In sand stuck, if vehicle is not moving engage your Lo-Gear (4WD lo-gear) and start with little aggressive acceleration up to 2500 RPM (ONLY) and that too in quick short intervals (no full gas for long stretch). See if it helps moving your vehicle few meters or even centimeters, then repeat the same in front and reverse several times and make little movable path and when you have a good stretch, then take off with more acceleration up to 5000 RPM (sometimes even full gas). Idea here is to avoid full gas in beginning as that will dig you down and once you have little movable path and vehicle is in motion for 5-10 meters and you give more or full acceleration, it will help you cross that climb, loose-sand or uneven spot more easily. If everything fails as per self-recovery, call for help and don't dig yourself deeper by too much excessive self-recovery, as that will make the situation worse for other car to pull you out.1 point
This leaderboard is set to Dubai/GMT+04:00