-
5.0 Stars ⭐⭐⭐⭐⭐ 628 Google Reviews


Frederic
-
Posts
9,066 -
Joined
-
Last visited
-
Days Won
457 -
Country
Belgium -
Carnity Points
4,043 [ Donate ]
Content Type
Profiles
Forums
Advice
Business Listing
Car Deals
Recall
OBD II Car Diagnostics
Guest lead capture
STORE
Events
Gallery
Blogs
Everything posted by Frederic
-

AD47ED78-2F6E-46E7-85E2-92D2219279F2.jpeg
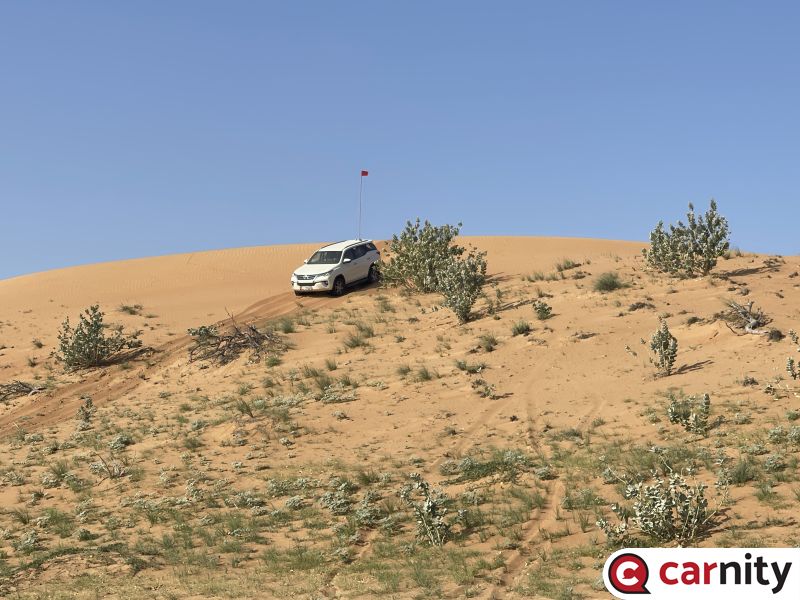
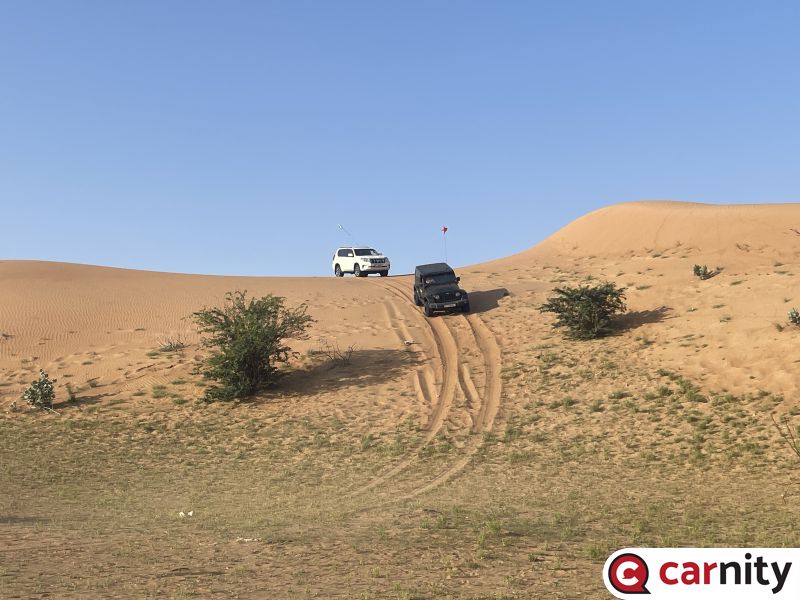
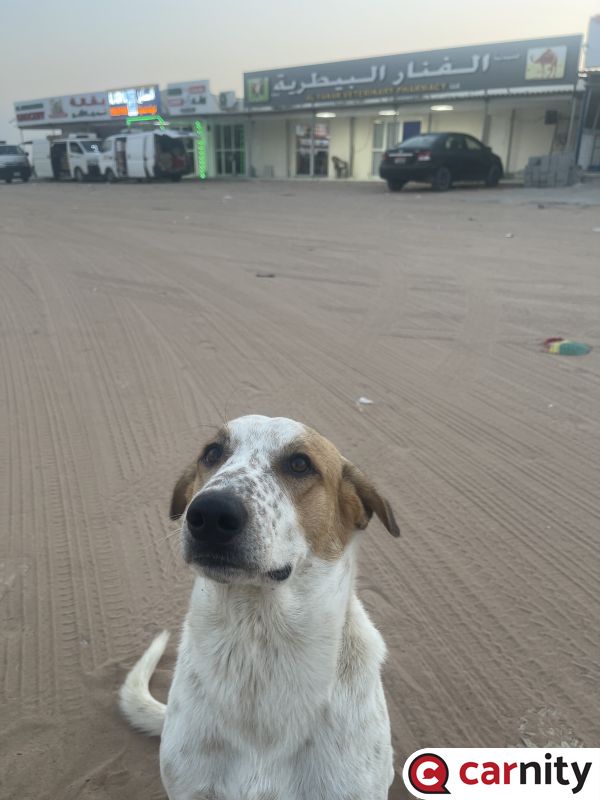
Frederic posted a gallery image in Newbie - Scenic UAQ and RAK Trails - RAK - 11 Mar 2023
-
1173F4AB-6CA7-4924-B7C6-ED1694689BA5.jpeg
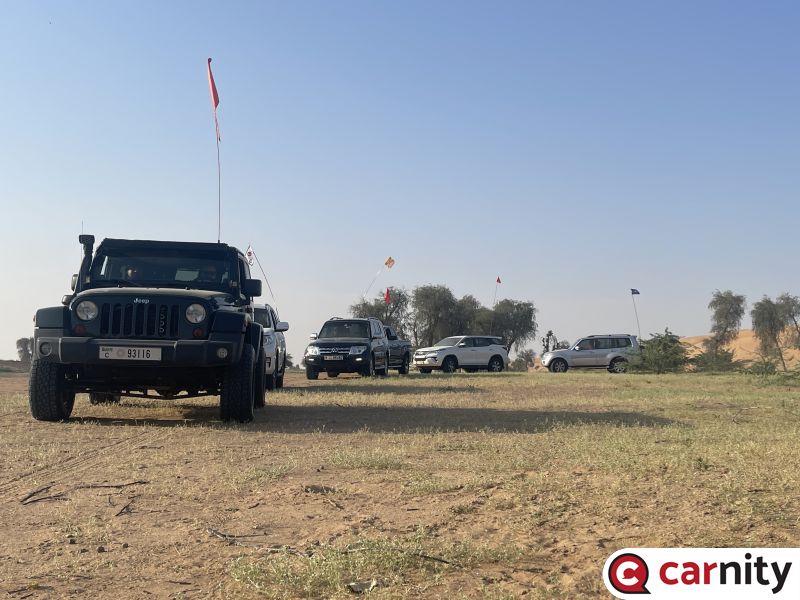
Frederic posted a gallery image in Newbie - Scenic UAQ and RAK Trails - RAK - 11 Mar 2023
-
B3360FCB-6266-4561-997A-A3452BDA9908.jpeg
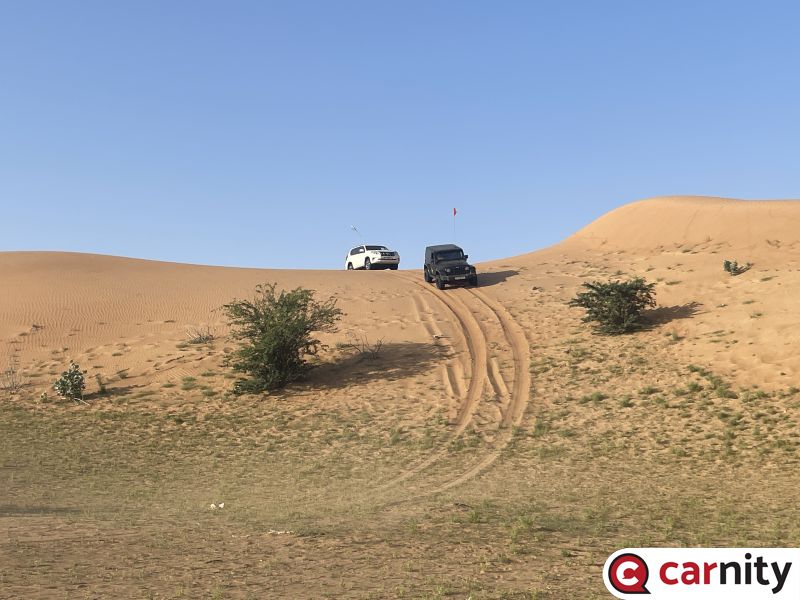
Frederic posted a gallery image in Newbie - Scenic UAQ and RAK Trails - RAK - 11 Mar 2023
-
4325DD96-A061-456F-BA35-311FD4AFA4A9.jpeg
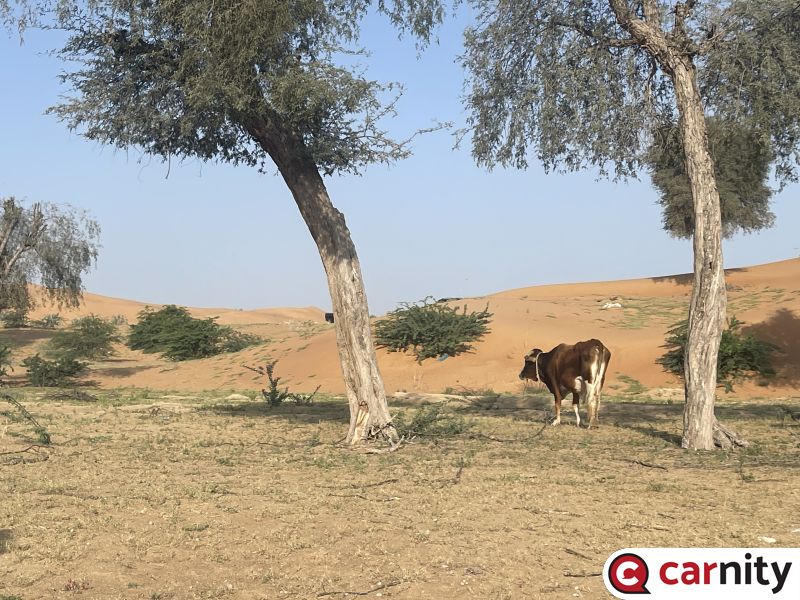
Frederic posted a gallery image in Newbie - Scenic UAQ and RAK Trails - RAK - 11 Mar 2023
-
ED3D6CE2-F9DF-441D-B985-08A2C77DC8CD.jpeg
Frederic posted a gallery image in Newbie - Scenic UAQ and RAK Trails - RAK - 11 Mar 2023
-
02A2C87F-6A43-459B-9A77-F54E493418BB.jpeg
Frederic posted a gallery image in Newbie - Scenic UAQ and RAK Trails - RAK - 11 Mar 2023
-
is that an emoji of a brain fart ?
-
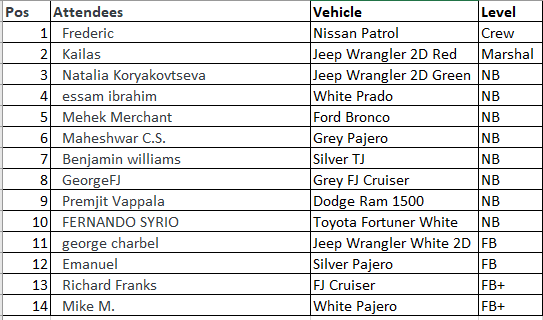
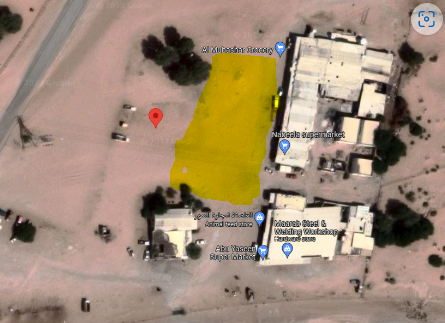
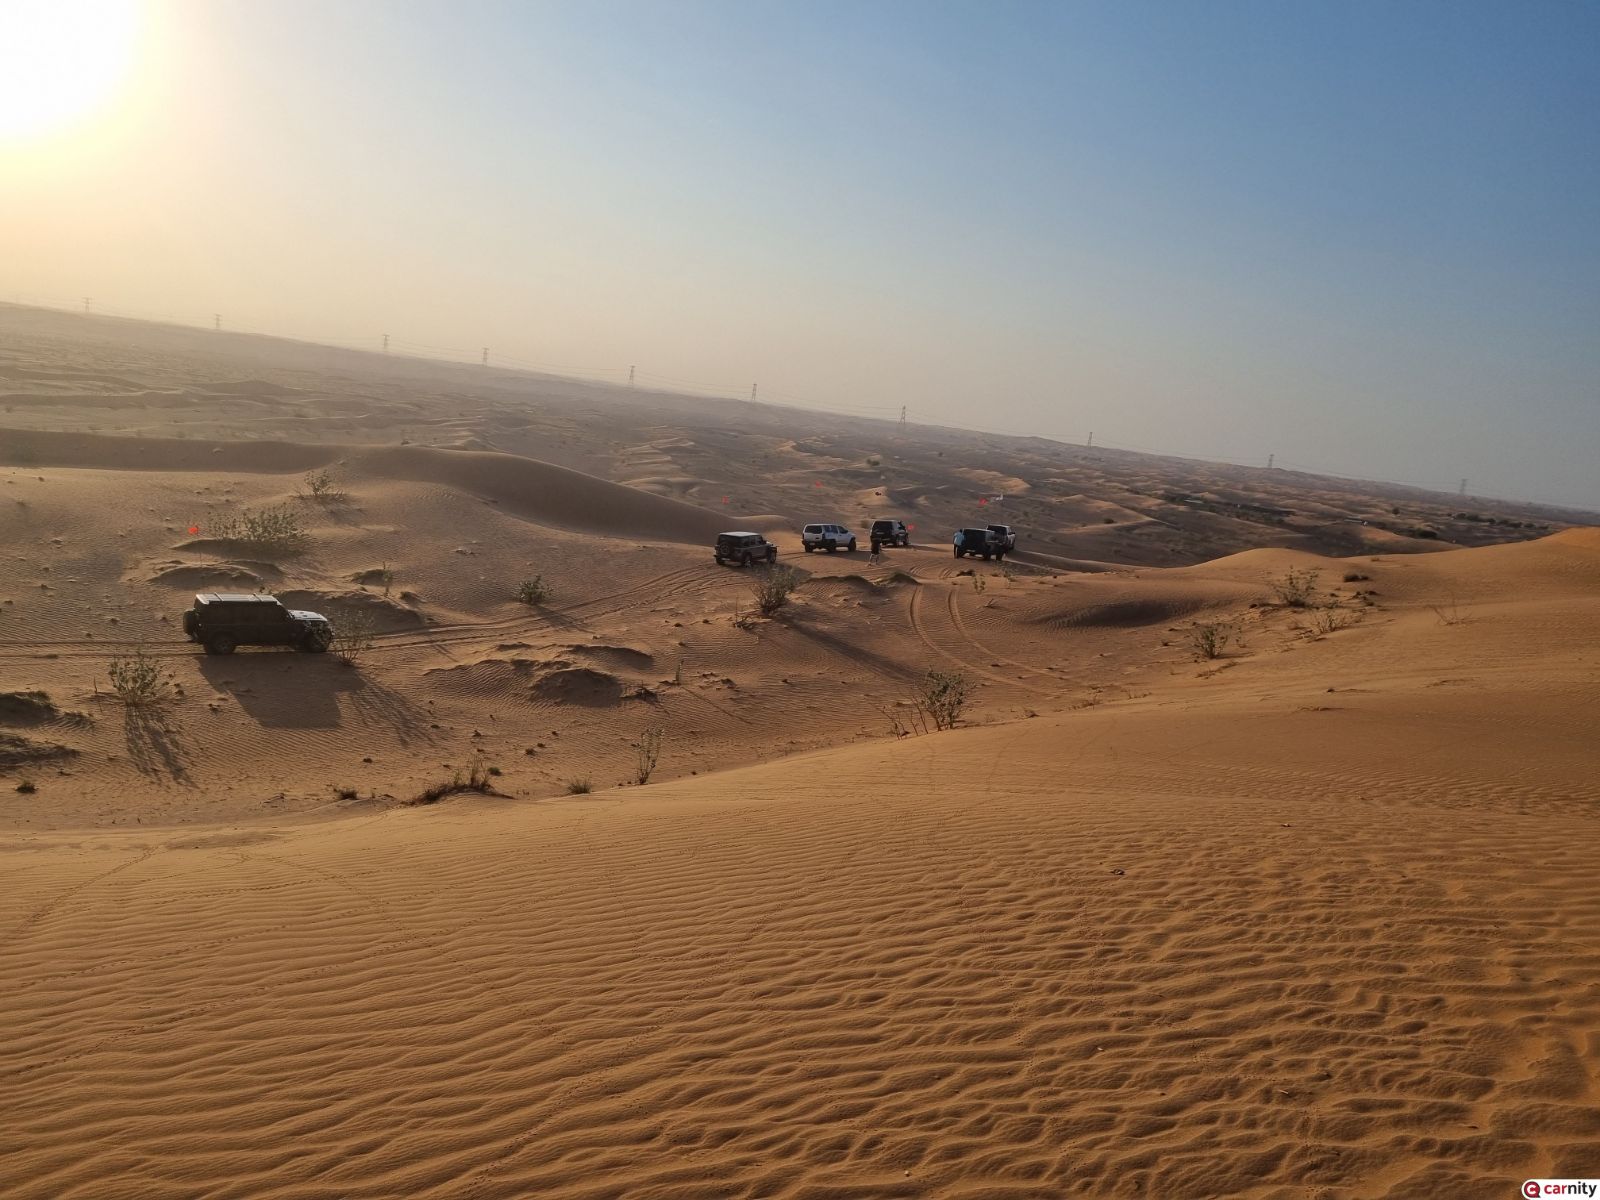
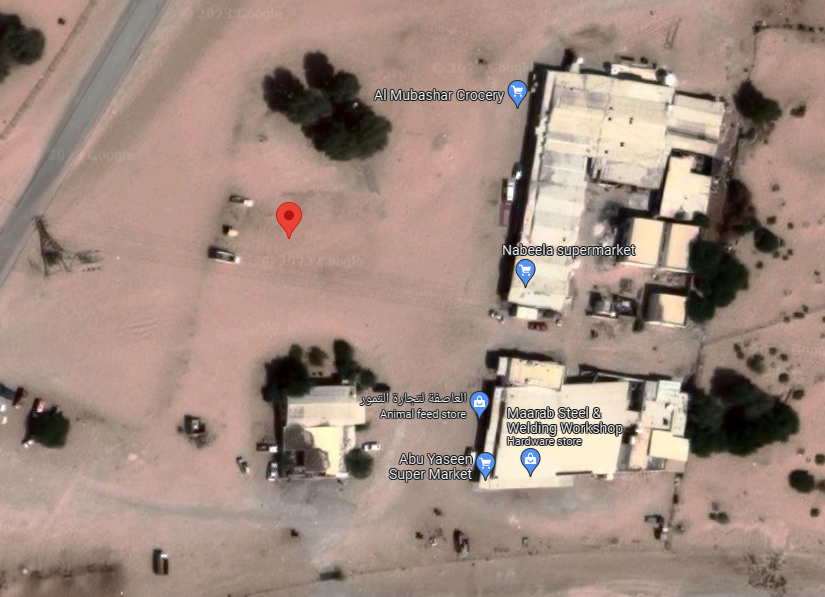
@Kailas@Natalia Koryakovtseva@essam ibrahim@Mehek Merchant@Maheshwar C.S.@Benjamin williams@GeorgeFJ@Premjit Vappala@FERNANDO SYRIO@george charbel@Emanuel@Richard Franks@Mike M. Good morning All ! I am really looking forward to this drive, and to explore the natural beauty of this area. This will not be a typical dune bashing drive, but more of a scenic easy-going drive with some technical dunes. If you fancy taking some photos, please do bring your camera along. We will be using Channel 2 - 446.031 Mhz, please make sure to bring along your radio, flag, shovel, and your compressor. Important point: When you arrive at the meeting point, please park the car in front of the small shops (area marked in yellow below) as we will see many camels on their way to the race track in the morning and we should not block their path. You will find me there from around 6.40AM (look for a silver Patrol Safari). See you tomorrow ! @Ahmed Wagdyif you are up for it i can still put you in, let me know.
-
Sam K has been promoted to Intermediate level
Frederic replied to Gaurav's topic in Off-Road Club's Announcements
Congrats @Sam K ! -
Jona has been promoted to Intermediate level
Frederic replied to Gaurav's topic in Off-Road Club's Announcements
Well done @Jona -
Tyre Change Advice Needed for LC200 On Road Use
Frederic replied to MisterPoet's topic in Toyota Land Cruiser Forum in UAE
If you want on road comfort and long life span, have a look at Michelin. -
Welcome to the club @Marketa Dobesova ! You received your first lesson from the best, but no doubt in time you’ll learn even more on our weekly off-road drives ! See you soon in the sand !
-
untilDrive Details Level: Newbie and above When: 11 Mar 2022, Saturday. Meeting time: 7:00 AM (SHARP - Without any exceptions) Meeting Point: AL LIBSA CAMEL TRACK ENTRY ROAD: https://goo.gl/maps/MZF2tCBPUeEx4Wjd9 Type of Car: Any proper 4x4 with front and back tow hooks and 8-10 inches of ground clearance. What to bring along: Loads of water, snacks (for yourself), enthusiasm and willingness to learn. Approximate finish time: 11:00 AM P.S. Only join if you have a compressor to inflate your tires after the drive. LIMITED SPOTS AVAILABLE Limited to 12 cars only. RSVP will close on Friday, 2 pm. If the RSVP is full and you wish to join, please mention your name on the drive thread to add on the waiting list. Latecomers will be returned back - without ANY EXCEPTIONS. Members without RSVP will be returned back - without ANY EXCEPTIONS. Please withdraw your RSVP, if you aren't joining, so your spot can be taken by others. Repeated no-show members after RSVP will have their account suspended for a month.
-
General Info This drive is suited to people who enjoy the scenic views the Northern UAE has to offer. Rather than a “dune bashing” experience, we want to offer a more relaxing drive experience where we can use existing farm trails to make our way through the various terrains, and where you’ll be transported back in time from seeing the farms, idyllic trees and shrubs, and spend a few joyful hours with Carnity buddies. MUST READ AND TOTALLY AGREE: Mandatory Safety Requirements Ban from Carnity Off-road Club Two Way Radio Guidelines Drive Details Level: Newbie and above When: 11 Mar 2022, Saturday. Meeting time: 7:00 AM (SHARP - Without any exceptions) Meeting Point: AL LIBSA CAMEL TRACK ENTRY ROAD: https://goo.gl/maps/MZF2tCBPUeEx4Wjd9 Type of Car: Any proper 4x4 with front and back tow hooks and 8-10 inches of ground clearance. What to bring along: Loads of water, snacks (for yourself), enthusiasm and willingness to learn. Approximate finish time: 11:00 AM P.S. Only join if you have a compressor to inflate your tires after the drive. LIMITED SPOTS AVAILABLE Limited to 12 cars only. RSVP will close on Friday, 2 pm. If the RSVP is full and you wish to join, please mention your name on the drive thread to add on the waiting list. Latecomers will be returned back - without ANY EXCEPTIONS. Members without RSVP will be returned back - without ANY EXCEPTIONS. Please withdraw your RSVP, if you aren't joining, so your spot can be taken by others. Repeated no-show members after RSVP will have their account suspended for a month. PLEASE RSVP ON THE CALENDAR
-
Running wire through the firewall Pajero GEN 4
Frederic replied to _luke_'s topic in Mitsubishi Pajero Forum in UAE
ill get you some stickers made buddy -
Running wire through the firewall Pajero GEN 4
Frederic replied to _luke_'s topic in Mitsubishi Pajero Forum in UAE
There should be a rubber grommet that leads to your glove compartment. But i have another question for you: - Will this be the only lights you will add ? or do you plan to have more in the future ? The reason is this, i recently came across the Auxbeam switch panel and must say although it is not super cheap, i was extremely impressed with how easy it was to install multiple lights or other external items. Have a look here: Auxbeam 8 Gang Switch Panel, Universal Circuit Control Relay System Box with Automatic Dimmable On-Off LED Switch Pod Touch Switch Box for Car Pickup Truck Jeep Boat UTV SUV, BA80 Blue 2 Year Warranty : Amazon.ae: Automotive So far i have always done my own installs by buying the relays, wiring, fuses, etc.. but even though i do my best, after a couple of years, and a lot of heat and sand, those wires became brittle, and the relays started to fail. The fact that this is a one-stop solution with IP65 rating really could be a life-saver. Installation over the weekend with a helper and a good beer -
Ignacio Quindós has been promoted to Intermediate level
Frederic replied to Gaurav's topic in Off-Road Club's Announcements
Well done @Ignacio Quindós !! -
PETELCZYC PAJERO - luke has been promoted to Fewbie level
Frederic replied to Gaurav's topic in Off-Road Club's Announcements
Well done Luke !! -
Ron.P has been promoted to Fewbie level
Frederic replied to Gaurav's topic in Off-Road Club's Announcements
Well done @Ron.P !! -
Tharun Kumar V has been promoted to Fewbie Plus level
Frederic replied to Gaurav's topic in Off-Road Club's Announcements
Congrats @Tharun Kumar V !! -
That is an amazing track @JeromeFJ ! Well done all !
-
Pajero 4th Generation Blinking Center Diff Lock Light
Frederic replied to Frederic's topic in Mitsubishi Pajero Forum in UAE
@AliArshad this is a very common and known (minor) issue. If the Pajero senses that the front wheels are not disengaged, it will throw this blinking light to notify you. As a first thing what you can do is go underneath the car where you will find the vacuum actuator looking like this: Verify if the vacuum hoses are not loose or broken off. This is the first thing you can check before taking it to any mechanic. If the hoses are intact, look for the below mentioned common reasons: Most common reasons: 1. Vacuum solenoids are stuck or defective. Around 250dhs in Habtoor and can be easily replaced yourselves. They are located next to the air filter box. Most mechanics who have worked on Pajeros can do this in 10mins. 2. Front differential sensor defective. Not so very common but easy to replace. 3.Stuck vacuum actuator: We are not allowed to advertise workshops here as we want to keep the forum bias-free. I would recommend to approach your nearest car mechanic and discuss with him if he has experience with this issue. As you can see this is an easy fix and won't cost you much. -
Pajero 2007-2011 Tiptronic Upshift Issue
Frederic replied to Frederic's topic in Mitsubishi Pajero Forum in UAE
Good thing you removed it…. It’s called a hack for a reason and was never a suitable option. Unless you like driving around with CEL on 😅 -
How many miles has your Landcruiser done ? Wheel bearings usually last 200k at least, but of course it depends how it was used before.
-
That’s nicely done !!