
Leaderboard

Popular Content
Showing content with the highest reputation on 07/17/2023 in Advices
-
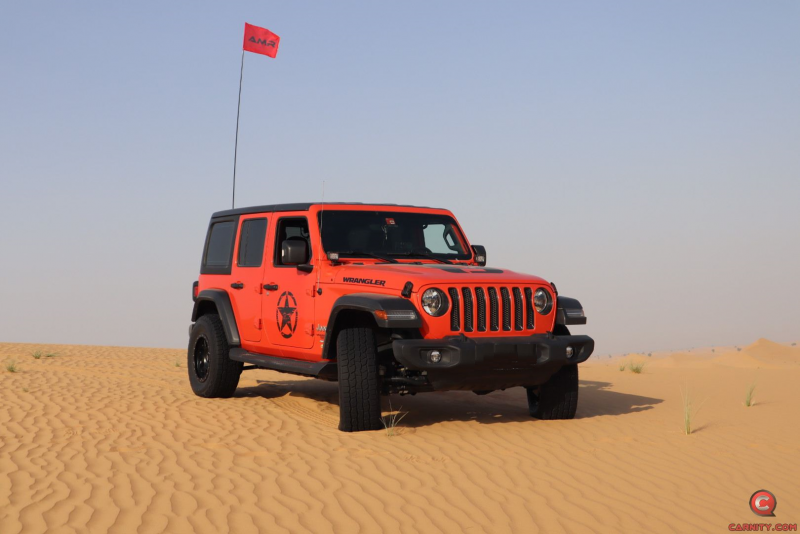 So you have decided to become an Offroad Enthusiast by either joining an Offroad-Club, or becoming a Solo Adventurer to explore the UAE deserts ? Then surely the time has come to start investing in the proper offroad gear. Good quality offroad gear will be your biggest help to be self-reliant and to enjoy this sport thoroughly. After all you don't want to be stranded in the middle of the desert with unsafe or unreliable equipment. We have compiled a list of essential tools you should have as per our club levels, and included some recommended gear which we have used in the club with good results. OFF-ROAD FLAG (NEWBIE AND ABOVE) A proper off-road flag is safely mounted with a bracket, or suction cup, and does not fall off on the first windy day. You can either buy a very decent flag like the AOR ones, or go to the nearest dune-buggy shop, or Dragon Mart. A fishing rod with flag also does the job. TYRE DEFLATOR AND PRESSURE GAUGE (NEWBIE AND ABOVE) Deflating your tyres will be a weekly practice, and the accuracy of your tyre-pressure gauge will make the difference between struggling in the sand or floating on it. You can buy them in ACE, Speedex, or Dragon Mart and it is advisable to buy two different models to double-check the accuracy. Most cheaper models work well on normal tyre pressures (35 psi) but start to give inaccurate readings below 15psi. Deflating your tyres can be done with a stem removal tool or a quick deflator. Whatever works for you. How to deflate your tyres is well documented here: FULL-SIZE SHOVEL (NEWBIE AND ABOVE) Next to your Carnity buddies, a proper shovel will be your best friend in the desert.You should get a full-size laborer shovel, and not a small foldable camping spoon/shovel. Buy a shovel with a handle, and a v-shaped tip, you will find them in general hardware shops. Example below is perfect, and will allow you to displace a lot of sand. TWO WAY RADIO (NEWBIE AND ABOVE) While driving with an offroad-club, a two-way radio is essential to communicate with the rest of the convoy and to receive instructions or guidance. In Carnity Off-Road Club, we use two-way UHF radios that are programmable to our frequency list that we have created. Make sure your radio is always fully charged for every drive, and if possible invest in having a second (spare) one. We can recommend the Crony/Motorola MT777 or the Baofeng UV5-R model as both are good radios with excellent price/quality ratio. You will find them in Dragon Mart. Do not buy a walkie talkie without a display, as these will be mostly pre-programmed and the frequencies cannot be changed unless you purchase programming software and cables. NOTE: THE BAOFENG 888 RADIOS THAT WE HAND OUT AS SPARE RADIOS WILL NOT WORK OUT OF THE BOX WHEN YOU BUY THEM AS THEY HAVE DIFFERENT FREQUENCIES. YOU CAN PROGRAM THEM BUT YOU WILL NEED PROGRAMMING CABLE, A LAPTOP, AND SOFTWARE CALLED CHIRP. IF YOU ARE NOT INTO THESE TECHNICAL THINGS, PLEASE STICK WITH BUYING THE CRONY/MOTOROLA MT777 or BAOFENG UV5R AS THESE CAN BE EASILY PROGRAMMED YOURSELF WITHOUT CABLES OR SOFTWARE. Instructions on how to program the Motorola/Crony and Baofeng you will find in below post: FIRE EXTINGUISHER AND MEDICAL KIT (NEWBIE AND ABOVE) Both items every vehicle should have, offroad or onroad. You will find DRY POWDER extinguishers at the petrol station or hardware shops, and a medical first aid kit at general hardware stores or pharmacies. Make sure they are immediately accessible in case urgently needed. 12V AIR COMPRESSOR (NEWBIE AND ABOVE) After every offroad drive you will need to re-inflate your tyres. If you are lucky to be nearby a petrol station you can slowly drive your way up there, but in many cases you will be miles away from one. You will find air compressors from 150 up to 2500AED as per your budget and liking, but if you are using it on a weekly basis you will find that sticking with a well-known brand like TJM, Bushranger, ARB really makes the difference. You can be lucky with the Camel branded compressors in Dragon Mart too, but do not expected any warranty on them. ACE, Speedex has the branded ones, and also a few cheaper options. GPS DEVICE (INTERMEDIATE AND ABOVE) From a dedicated GPS device such as the Garmin 276cx, or a smartphone with your favorite navigation app, it will be important from Intermediate level onwards that you start practicing navigation, putting waypoints, entry and exit points, and seeing the difference on your map between for example long range dunes and small technical dunes. Apps like MotionX for IOS, MyTrails, and GaiaGPS are very popular and allow you to properly prepare for your route / track beforehand. RECOVERY ROPE WITH 2 SOFT SHACKLES (INTERMEDIATE AND ABOVE) Recovering stuck vehicles in the desert is a skill, and from Intermediate level onwards you will be able to practice this. There are different types of ropes in the market, and finding the right one might be very confusing. - A Polyester Tow Rope is meant to tow a vehicle on the road, NEVER for off-road recovery. These are the basic tow ropes you will find at the petrol station. - A Webbing Sling is a Polyester rope that you can buy in hardware stores and is meant for industrial lifting, but can also be used as tow rope in specific cases (to re-direct a stuck vehicle with gentle tugs). This material does not stretch. - A Snatch rope (flat) or Kinetic Recovery Rope (round) is a rope made of Nylon that allows to stretch for about 20%, and is extremely useful for offroad recovery as the stretching creates a kinetic energy and the recoil effect helps in recovering vehicles stuck in the sand. When choosing a kinetic recovery rope, you should select a rope that has a breaking strength of 2-3 times the weight of the vehicle you will recover. For example; if you recover a Nissan Xterra which weighs 2 ton, the breaking strength of the rope should be at least 6 tons. Most recovery ropes have 10-15 Tons breaking strength. The reason for this is that the forces involved when a vehicle is completely stuck in the sand are far higher. Our club uses both the Viking Kinetic rope as well as the AOR Kinetic recovery rope with excellent results. The Viking rope costs about 350AED with a bag and 2 soft shackles included, while the AOR kinetic rope costs about 390AED without soft shackles. (AOR soft shackle cost 155 AED per piece). A shackle is a device that allows you to connect your rope to your tow point. These used to be mostly rated metal D-shackles, but nowadays the soft shackles, that were well known in the sailing world have become in offroading too. A soft shackle will be safer to use as the less metal involved the better during recoveries. More information on using these Kinetic recovery ropes and shackles can be found in below post: FLOOR JACK WITH WOODEN BOARD (ADVANCE AND ABOVE) A hydraulic floor jack in combination with a strong wooden board will allow you to safely lift a vehicle in the desert to replace a tyre or fix a pop-out. We do not advise using scissor jacks or bottle jacks, as these are only acceptable for on-road and will topple over in the sand or possibly even on a wooden board. A good hydraulic floor jack should be at least 2T capacity and a swivel neck (rotating handle) will allow you to put it further underneath the vehicle and still be able to lift it. JZX or YATO has good hydraulic jacks. Do not buy the cheapest one available as the consequences or risks when the floor jack collapses could be very serious. A strong wooden board should be at least 1 1/2 inches thick and made of natural wood and not MDF or plywood. A good example is scaffolding planks. It should be large enough to fit your hydraulic jack on it. TOOLKIT AND FLUIDS (ADVANCE OFF-ROADERS) A toolkit will come in handy for a multitude of reasons, in case a vehicle breaks down, to fix a loose exhaust, flag, or bumper, but can make you a hero if you are able to fix your vehicle instead of leaving it behind in the desert. Following items are recommended: A small basic multimeter, set of spanners up to size 24, some adjustable spanners, a hacksaw, hammer, set of screwdrivers, some electrical tape, duct tape, cable-ties, some spare car fuses, spare valves and stems, tie down straps, socket wrench set and some pliers. Also a tyre repair kit will be coming in handy, together with some thick gloves, and battery boost cables. Following fluids are recommended: - Engine oil: 1-2 liter - Coolant: 1-2 liter - ATF Transmission oil: 1 liter - A can of WD40 or penetrating oil - Spray-can with water to cool down an overheating engine.1 point
 -
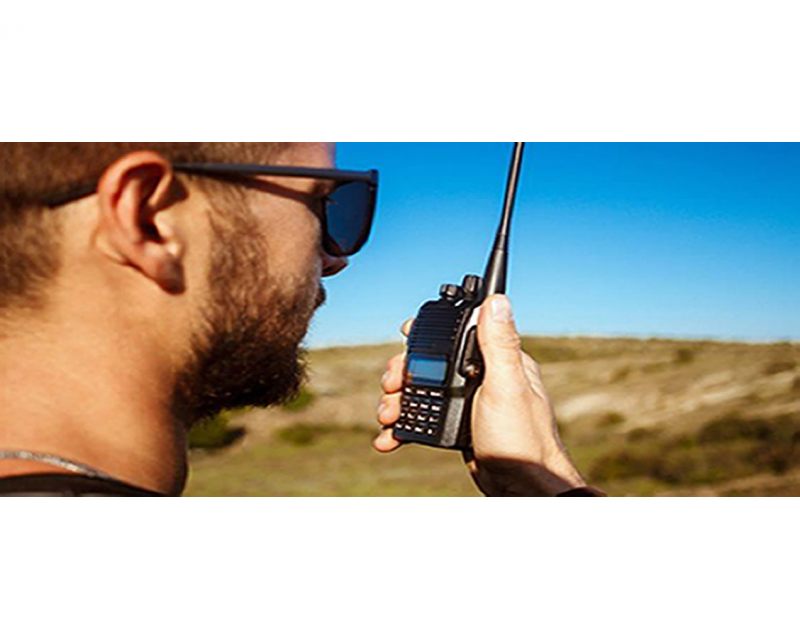 Two-Way Radio Guidelines A two-way radio is an essential safety device during every Carnity Offroad Club drive. It is the primary means of communication between the convoy members. Before the Drive Every participant must bring their own two-way radio. We highly recommend programming your radio with the Carnity frequencies listed below beforehand. We do not provide spare radios or program radios at the meeting point. For your very first club drive we can lend you a radio for that day only. Ensure your battery is fully charged before every drive. No radio = No drive. If you need help choosing, programming or operating your radio, simply create a topic on the Carnity website. Our community will gladly assist you. Radio Channels Carnity Offroad Club uses multiple radio channels so that several convoys can operate simultaneously without interfering with one another. Your Drive Lead will always announce the channel to use before the convoy starts. Recommended Radio Models and Brands UHF Two-Way Radio (400-470Mhz operating range). (VHF will not work). Handheld radio (built-in models can be purchased as extra but you need at least one handheld model. Recommended brands are: Baofeng (UV5R, UV5RH, UV5R Mini), Crony or Motorola MT777, TYT, Make sure it's equipped with a keypad so you can enter the frequency. Do not buy the models without keypad unless you are savvy enough to program with a separate USB cable and Chirp Software. Recommended Radio Settings For best compatibility with other convoy members, we recommend: Frequency Step: 6.25 kHz CTCSS / DCS: Disabled (unless instructed otherwise) VOX: Off Radio Etiquette Listen before transmitting. Keep messages short and clear. Do not interrupt emergency communications. Use the radio for convoy-related communication only. Follow the instructions of the Drive Lead and Marshals. The 10 radio frequencies are listed below: Technical Details STEP FREQUENCY: on the FM band, frequencies are spaced from each-other at a certain bandwidth. The Step frequency is basically the incremental change in your radio when you turn the rotary knob on top of your radio. When you program the radio to a certain frequency, you will need to make sure the appropriate step frequency has been set correctly. (see on the above frequency list). PTT: Short for PUSH-TO-TALK: This is the button on the side of your radio that you push when you want to broadcast a message. MON: Most radios have a Monitor button. When pushed you are basically monitoring the channel. If no-one is broadcasting you will just hear noise. But this is useful to set your desired volume. SQL or Squelch: To make sure that your radio does not pickup every little signal, the squelch acts as a gatekeeper to only allow a broadcast on your radio when it is strong enough or nearby enough. If you encounter a lot of noise that's being picked up by the radio, try changing the SQL setting a little bit. A higher setting makes the radio less sensitive to noise. RX and TX frequencies: RX stands for Receiving frequency, which TX stands for transmitting frequency. in Carnity we transmit and receive on the same channels. DCS / CT codes: These are basically encryption settings that allow a user to make sure only radios with exact same CT codes can listen in on the chatter. As these settings are confusing and complex, they should not be used (CT should not be showing on your display). Programming the Motorola/Crony MT777: Note: This radio has 2 operating modes called "Frequency" and "Channel". To switch between these modes, keep the ENTER button pressed while switching on the radio. Pressing the VFO/MR button while you're in Frequency mode will bring you to the combined mode, which is basically a screen that shows both the channel and the frequency. You can use either one of these modes during operation. To Program the Channels: 1. Make sure your radio is switched off. 2. Press the Moni (black button on top of the orange one on your left side), and MENU key together while switching on the radio. 3. Wait for the set to display SELF (which means manual setup). 4. Press Enter and it will show the Channel number. 5. You can choose which channel to program by selecting it from the rotary selector knob on the top of your device. 6. Once you have the desired channel, press ENTER. 7. Type your first frequency you want to program. 8. Press ENTER on every setting below to go through the advanced settings and verify if they are programmed as following: (If above settings are not correct they can be changed with the rotary knob on the top keep pressing enter until your set displays the next channel to be set). 03=OFF (if a number is showing here, push the *Lock button until OFF appears). 04= Enter the same frequency as the one you want to program. 05= OFF (if a number is showing here, push the *Lock button until OFF appears). 06= OFF 07= ADD 08= HIGH(H) 09= NARROW 10=-------- 9. Repeat from Step 5 to program the rest of your channels. Very useful Youtube video below: method for adding a single frequency later on, without going through the whole SELF programming mode again: 1. Make sure the radio is in Frequency Mode. Type in the frequency you want to program. E.g 446.00625 2. Press MENU and then press the VFO/MR button. The channel number will start to blink. 3. Use the rotary selector knob to select on which channel you want to save this frequency. 4. Press VFO/MR button again to confirm and exit. Keypad can be locked by pushing the * LOCK button for a few seconds. --------------------------------------------------------------------------------------------------------------------------------------------------- Programming the Crony CN888: Note: This radio has 3 operating modes called "Frequency", "VFO", and "Channel". You can toggle between these modes by pressing the orange Function button on the top left corner, followed by pressing 1 (Mode). Programming the radio as described below can only be done in VFO mode. 1. Switch on the radio. 2. Press the Function Key (orange button on top left corner). 3. Press 4 (STEP) until it shows 6.25. Press EXIT to confirm. 4. Now type the first frequency you want to program. Eg. 446.00625 5. Now press the # button. The Channel number in the corner of the display will start to blink. 6. Select with the A (up) or B(down) buttons to choose wich channel you want to save the frequency. 7. Press the C button. the radio will confirm by saying "SAVED AS RX FREQUENCY" 8. Press the # button again. The Channel number in the corner of the display will start to blink. 9. Press the D button. the radio will confirm by saying "SAVED AS TX FREQUENCY" Keypad can be locked by pushing the Function button, followed by the *F.L button. Programming the Baofeng UV5-R: When buying a radio like the Baofeng UV5R, many certain frequencies and channels are already programmed into the radio, but these are different from the ones we use in Carnity. As you will be programming 5 new channels onto Channel number 1 till 5, it is important to first delete these existing frequencies stored in those channels. You can do that as following: Step 1: Delete the existing channels from channel 1 till 5: 1- Switch on the radio 2- Press the MENU button followed by the buttons 2 and 8. (Menu 28). 3- Press MENU, and then use the UP/DOWN arrows to select which channel you want to clear. 4- Select CH1 and press MENU again, you will hear "delete channel, followed by confirmed". 5- Now go back to step 3 and do the same for the following channels (CH2-CH3-CH4-CH5). 6- Now all 5 channels are clear and ready to be programmed. Step 2: Set the step-frequency: - Switch on the radio - Press the MENU button and with the up and down buttons select STEP frequency. - Change this to 6.25 and press MENU to confirm. - Press EXIT to go back to the main menu. Step 3 Program the new frequencies in the radio: 1- Press the VFO button. You will hear the confirmation “frequency mode”. 2- Make sure the arrow is on the top line. If not, press the blue A/B button. 3- Type in the frequency you want to save. I.e 446.00625 4- Press MENU, followed by button 2 and 7 (menu 27). You will see MEM-CH. 5- Press MENU and now use the up and down buttons to select the channel you want to save it on. 6- Press MENU again to confirm. Your first frequency is now stored under channel 01. (receiving memory). 7- Press MENU TWICE again to confirm. Your first frequency is now stored under channel 01. (transmitting memory). 8- Press EXIT and repeat from step 3 onwards to program your remaining channels. Note: To program the Carnity backup frequency channel 5, you will need to set the step frequency to 12.5. When done, follow the same steps to program and save it under channel 05. You can either program these channels one by one into your radio, which is the easiest for you later on, or you can just enter the frequency without saving it. Some extra notes: Option 5 in your menu should be on Narrowband. Option 10 and 12 in your menu should be set to OFF (we are not using CT codes). BaoFeng_UV-5R_Manual_(1).pdf1 point
 -
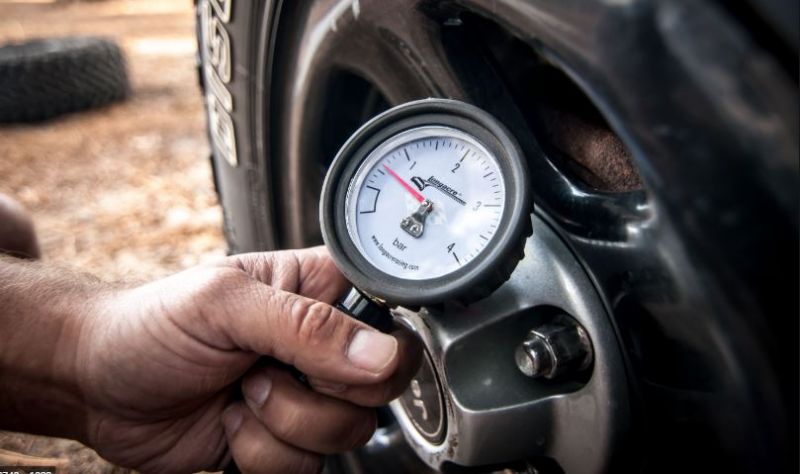 When starting as an off-roading enthusiast in UAE, you will come to hear about deflating your tyres, and setting your tyres to the right tyre pressure is one of the first things you will need to learn to master. The main reason for deflating your tyres is to obtain a longer footprint in the sand, and that enables you to drive on the sand, instead of digging into it. Tyre pressure is defined in PSI (pounds per square inch) or Bar. You will find both readings on your pressure gauge. In UAE most people use PSI, and the gas station compressors also use the PSI identification. Below you can see the corresponding PSI and Bar readings. As a beginner level offroader, you should reduce your tyre pressure to about 15 PSI. This is low enough to enable you to drive in the dunes without the risk of the tyre coming off the rim. This 15PSI is also perfect for on-road-tyres. After a few drives, and depending on the terrain, or if you have offroad tyres, you can slowly deflate further down to 10-12 PSI. Take note that the risk for having a pop-out will increase, so don't be afraid to post your questions on the Carnity website or consult one of the marshals if you are not sure about your tyre pressure. There are different ways of deflating your tyres, and each have their advantages and disadvantages. The more you will practice, the sooner you will find out what works best for you. How does a stem valve looks like ? The stem valve is consisting out of 3 pieces. The body, that is made of flexible rubber, the core, and the valve cap. Take note of the following: - The rubber valve body wears out over time. Once you start to see cracks, it is advisable to get it replaced at the nearest tyre center. - The valve core is a tiny component with a small rubber gasket. If you remove them on a weekly basis, the gasket slowly wears out or the core can even break. Carry 5-10 spares in your vehicle. The tyre center often give them for free. - The valve cap keeps dirt and sand from entering into the valve, so it's advisable to always screw the cap back on. The process of deflating / inflating goes by either pushing in the valve core, which allows air to be released, or by removing the valve core, which is a much faster option. How to check the tyre pressure ? Verifying your tyre pressure is really easy. Get yourself a pressure gauge, and push it against the tyre valve, or screw it on (depending on the model). You will see the reading in PSI or Bar. The digital ones are fine, but one day the battery will be empty, so a good old analogue is preferred to have as well. PS if you find that your gauge has difficulties reading the tyre pressure, and you really need to push it hard onto the valve, this is an indication that the valve core is worn out. Replace it with a new one and you will see that this will solve your problem. Which tools to deflate and how much time will it take ? 1) Set of keys, a rock, or anything you might find in your car (+/- 15 mins) PROS: CHEAP and plenty of stuff available CONS: Takes a very long time which you could use for a smoke or a chat and risk on damaging the valve stems. 2) Valve Chucks (4-5 minutes) Buy 4 of them and stick them on all tyres simultaneously and then wait about a few minutes (as per your type and size of tyre) to arrive at around 17-18 psi. Then take one tyre at a time and use your pressure gauge to further decrease and finetune the pressure of each individual tyre. PROS: Fast and Cheap CONS: none that i know off. 3) Stem removal tool (2-3 minutes) Available in most hardware shops. Enables you to remove the valve core stem so the tyre pressure comes down very fast. PROS: Very Fast and Cheap CONS: Be careful not to lose the stem as it can blow out. So taking some spare is advisable. Be careful not to deflate too much as it really goes fast. Use a stopwatch and learn to find the perfect timing when to screw it back in, and then double check with a pressure gauge. 4) Rapid Tyre deflator and pressure gauge ( 4-5 mins) This tool enables you to loosen the stem, quickly deflate and immediately take a pressure reading. PROS: Professional tool for reasonable price, pressure gauge and deflator in one tool. CONS: Might take a bit of practice to get the hang of it. The fake chinese ones are fairly unreliable. As with all tools and gear, we advise you to practice a bit at home to become familiar with them before your desert driving. It is also recommended to carry two pressure gauges, so you can compare them with each-other and double check your readings. Often we have seen pressure gauges giving accurate readings at high pressures (35) but very inaccurate results at 10-15 PSI.1 point
 -
This tutorial will describe the safest techniques to recover a vehicle from the desert. We will try to cover all scenarios and focus on the safety aspect. Although many offroaders have already learned the art of off-roading in the UAE desert, performing recoveries is a skill in itself and needs practice and clear understanding and respect of the dangers involved for the person recovering, the person being recovered, and bystanders. This is a skill that will require practice, and the more recoveries you do from different situations, the more experienced you will become. Whenever you have ANY doubt in during a recovery, you should assess the situation with other senior members and make the decision together. 2-3 people will most likely have a better total overview and will result in a safer recovery attempt. Team work is essential in this sport and all the more during recoveries. 4x4 Recovery Tools D-Shackle or Bow Shackle The D-shackle, also called a bow shackle, is the tool that you will use to connect your recovery rope to the tow-hook of the vehicle (both sides). Since the uprising of soft shackles, and the incidents that happened with poor quality D-shackles, most Off-roaders have now shifted to using soft shackles. A good quality, rated D-shackle can still be useful in some scenarios, and they are safe if the recovery is being done properly, but the risk of this projectile flying through the windshield and potentially killing people has made this shackle a tool only to be used by people who have 100% skill level and know what they are doing. Soft Shackles Soft shackles were first used in the marine/sailing world and have recently become very popular as the perfect shackle to use for off-road recoveries. They are easy to use, and in case they break they will not become a deadly projectile. They are more expensive than metal D-shackles but will last quite long and there is no compromise when it comes to safety. The shackle is made of UHMWPE, also known as Ultra High Molecular Weight Polyethylene, or Dyneema. This synthetic yarn is 10 times stronger than steel. Kinetic Recovery rope or Snatch Strap. A kinetic recovery rope is made of Nylon. The most useful characteristics of this rope is that it stretches about +/- 20% during a pull. This means the “tug” or “jerk” effect of the recovery will be dampened, resulting in less strain on the vehicle’s tow-points. The downside is that because of this characteristic, people sometimes have the tendency to start pulling much harder, which can result in breaking the vehicle’s tow-points or chassis. The recoil effect of this rope creates a massive force and that is why during a recovery we clearly instruct to not exceed 15km/h during recoveries, and to gradually build up the strength of the pull in 2-3 attempts. Do not use this rope for towing a vehicle. Due to the stretch effect it will be difficult to control the towing process, and furthermore you will damage the rope as it needs to recoil and settle after a recovery. When choosing a kinetic recovery rope, you should select a rope that has a breaking strength of 2-3 times the weight of the vehicle you will recover. For example; if you recover a Nissan Xterra which weighs 2 ton, the breaking strength of the rope should be at least 6 tons. Most recovery ropes have 10-15 Tons breaking strength. The reason for this is that the forces involved when a vehicle is completely stuck in the sand are far higher. Our club uses both the Viking Kinetic rope as well as the AOR Kinetic recovery rope with excellent results. The Viking rope costs about 350AED with a bag and 2 soft shackles included, while the AOR kinetic rope costs about 370AED without soft shackles. (AOR soft shackle cost 155 AED per piece). This rope is not the same as a Polyester Webbing sling that you will find in most hardware shops ! Kinetic recovery ropes will cost you about 350-400 AED. A Polyester webbing sling is far cheaper but does not stretch. Performing a Recovery When doing a recovery there will be tasks involved for both the person doing the recovery, and the person being recovered. It is essential that there is a clear communication established over the radio or verbally to make sure the recovery is being done professionally and safely. Bystanders should remain at a distance radius of at least 10m during the recovery process ! Scenario 1: A vehicle is crested Getting crested is an event that happens regularly during off-roading, and by following below steps you can recover a vehicle safely. The individual tasks for each person are mentioned below: # PERSON PERFORMING THE RECOVERY PERSON BEING RECOVERED 1 Will first inspect if the vehicle is front-heavy, back-heavy, and if the car can be maybe recovered without ropes. In many cases it is sufficient to clear the sand from the wheels, from underneath the body of the car, and try the self-recovery method and engage diff-locks. can help with clearing the sand from the wheels 2 When recovery with a rope is deemed necessary, he will attach the rope to a secure “recovery point” of the car. The recovery point needs to be strong enough and in perfect condition. He will not perform recoveries on worn out or heavily rusted towpoints. You need to keep approximately 2m free-play in the rope, so you have space to ramp up the vehicle before the pull starts. 3 Will step inside his car, put on his seatbelts, engage 4LO and put his car in First Gear forward or Reverse depending on the direction he will be recovered. He then announces on the radio that he is belted up, car is running in low gear, and he is ready for the recovery attempt. 4 Get inside his vehicle, engages 4LO, puts on the seatbelt, and asks the person being recovered if he is ready for the recovery attempt. Acknowledges the message and confirms he is ready for the pull. 5 Will drive a little bit forwards and backwards to create a firm track if needed, then starts off with a gentle pull. This is to test the waters and in some cases the vehicle will already come out. 6 If second attempt is needed, he will announce on the radio that he will try again. Acknowledges the message and confirms he is ready for the second pull. 7 Performs second attempt which is slightly more aggressive 8 The car comes out and is bring brought to flat ground where the rope can be safely removed. Follows the recovery vehicle to flat ground Scenario 2: a vehicle is bogged down When a vehicle is bogged down or in a ditch, and needs recovery with a rope, the same scenario as scenario #1 will be applied. You should always clear the wheels and shovel as much as you can to ease the recovery. It is also very important to properly position the vehicle to avoid sharp angles. Again, the rope should have at least 2m free play before starting the recovery. Make sure you position your rope in a zig-zag shape and verify it is not in a knot. Creating a knot in a kinetic rope will damage it beyond repair ! Scenario 3: a vehicle needs to be pulled upwards In the case that a vehicle needs to be pulled upwards, you need to be aware that the force that you will need to apply will be far higher. Some examples: - Towing a 2 Ton vehicle on the road results in a 100kg pull resistance. - Recovering a wheel-bogged down 2 Ton vehicle on flat sand results in 2000kg of pull resistance. - Pulling a chassid-bogged down 2 Ton vehicle on an upward slope of 15° results in 3500kg of pull resistance. (as photo below). This is the main reason why it is so important to clear the wheels from sand and shovel out the body of the vehicle as much as possible to reduce the resistance. Be aware that when pulling a vehicle upwards on a steep angle might damage the front bumper on the vehicle that is being recovered. Especially on slopes of 10° and more, the rope can hit the front bumper. Additional safety measures Safety Strap At a more advanced level of off-roading, safety strap is a very helpful tool to secure the rope or d-shackle during extreme recoveries. In that case it will avoid from becoming a projectile. Tow Point Essentials Most 4x4 vehicles are equipped with proper tow hooks which are welded to the chassis. In more modern SUV's which are less meant for heavy duty use, you will sometimes find a screw-in type of tow hook. These are generally ok for occasional use but for weekly recoveries they will not do as the threading will wear out and eventually they will fly out. Every Offroader should make sure he has proper recovery points on the front and back and that they are in perfect condition. During more extreme recoveries there are additional techniques we apply to distribute the load, such as a bridle rope. This rope basically distributes the load between both towpoints. In which direction should i put my vehicle when i recover someone ? This will depend on a case to case basis: When during the recovery you want to have FULL visual of the car that you are recovering, it will make more sense to attach your rope to your front recovery towpoints. In the case the recovery needs a bit more force, and you have a towbar or stronger recovery points at the back, then it makes more sense to attach your rope to the rear towpoints or tow bar. In the case that you really want to see where your own car is going (in difficult terrain with bushes for example), it will also make sense to perform the recovery by attaching the rope to the back of the car. Can i attach my shackle or rope to a tow ball receiver ? Tow balls are NEVER to be used for recovery purposes. There have been many incidents where the tow ball has come off and became a deadly projectile. DO NOT ever recover a vehicle by connecting to the tow ball !!!1 point
This leaderboard is set to Dubai/GMT+04:00