
Leaderboard

Popular Content
Showing content with the highest reputation since 07/08/2014 in Advices
-
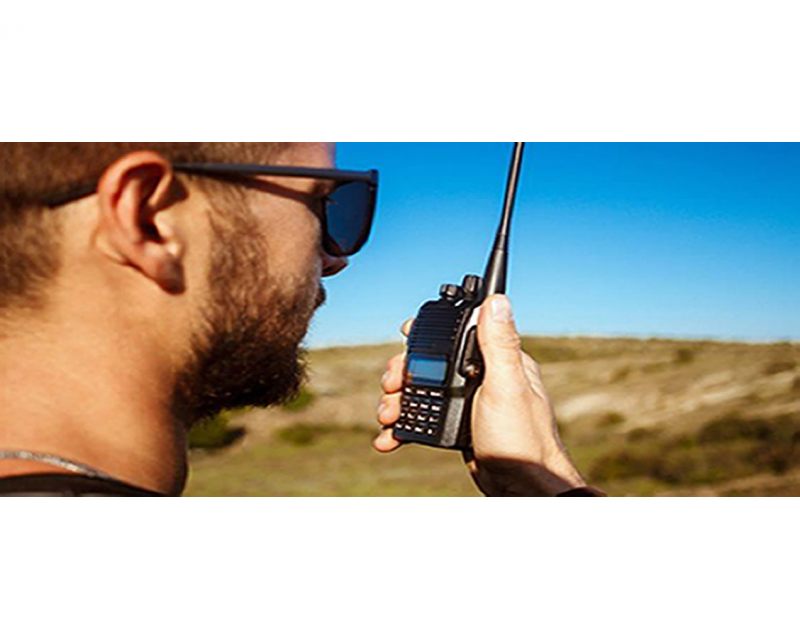 Two-Way Radio Guidelines A two-way radio is an essential safety device during every Carnity Offroad Club drive. It is the primary means of communication between the convoy members. Before the Drive Every participant must bring their own two-way radio. We highly recommend programming your radio with the Carnity frequencies listed below beforehand. We do not provide spare radios or program radios at the meeting point. For your very first club drive we can lend you a radio for that day only. Ensure your battery is fully charged before every drive. No radio = No drive. If you need help choosing, programming or operating your radio, simply create a topic on the Carnity website. Our community will gladly assist you. Radio Channels Carnity Offroad Club uses multiple radio channels so that several convoys can operate simultaneously without interfering with one another. Your Drive Lead will always announce the channel to use before the convoy starts. Recommended Radio Models and Brands UHF Two-Way Radio (400-470Mhz operating range). (VHF will not work). Handheld radio (built-in models can be purchased as extra but you need at least one handheld model. Recommended brands are: Baofeng (UV5R, UV5RH, UV5R Mini), Crony or Motorola MT777, TYT, Make sure it's equipped with a keypad so you can enter the frequency. Do not buy the models without keypad unless you are savvy enough to program with a separate USB cable and Chirp Software. Recommended Radio Settings For best compatibility with other convoy members, we recommend: Frequency Step: 6.25 kHz CTCSS / DCS: Disabled (unless instructed otherwise) VOX: Off Radio Etiquette Listen before transmitting. Keep messages short and clear. Do not interrupt emergency communications. Use the radio for convoy-related communication only. Follow the instructions of the Drive Lead and Marshals. The 10 radio frequencies are listed below: Technical Details STEP FREQUENCY: on the FM band, frequencies are spaced from each-other at a certain bandwidth. The Step frequency is basically the incremental change in your radio when you turn the rotary knob on top of your radio. When you program the radio to a certain frequency, you will need to make sure the appropriate step frequency has been set correctly. (see on the above frequency list). PTT: Short for PUSH-TO-TALK: This is the button on the side of your radio that you push when you want to broadcast a message. MON: Most radios have a Monitor button. When pushed you are basically monitoring the channel. If no-one is broadcasting you will just hear noise. But this is useful to set your desired volume. SQL or Squelch: To make sure that your radio does not pickup every little signal, the squelch acts as a gatekeeper to only allow a broadcast on your radio when it is strong enough or nearby enough. If you encounter a lot of noise that's being picked up by the radio, try changing the SQL setting a little bit. A higher setting makes the radio less sensitive to noise. RX and TX frequencies: RX stands for Receiving frequency, which TX stands for transmitting frequency. in Carnity we transmit and receive on the same channels. DCS / CT codes: These are basically encryption settings that allow a user to make sure only radios with exact same CT codes can listen in on the chatter. As these settings are confusing and complex, they should not be used (CT should not be showing on your display). Programming the Motorola/Crony MT777: Note: This radio has 2 operating modes called "Frequency" and "Channel". To switch between these modes, keep the ENTER button pressed while switching on the radio. Pressing the VFO/MR button while you're in Frequency mode will bring you to the combined mode, which is basically a screen that shows both the channel and the frequency. You can use either one of these modes during operation. To Program the Channels: 1. Make sure your radio is switched off. 2. Press the Moni (black button on top of the orange one on your left side), and MENU key together while switching on the radio. 3. Wait for the set to display SELF (which means manual setup). 4. Press Enter and it will show the Channel number. 5. You can choose which channel to program by selecting it from the rotary selector knob on the top of your device. 6. Once you have the desired channel, press ENTER. 7. Type your first frequency you want to program. 8. Press ENTER on every setting below to go through the advanced settings and verify if they are programmed as following: (If above settings are not correct they can be changed with the rotary knob on the top keep pressing enter until your set displays the next channel to be set). 03=OFF (if a number is showing here, push the *Lock button until OFF appears). 04= Enter the same frequency as the one you want to program. 05= OFF (if a number is showing here, push the *Lock button until OFF appears). 06= OFF 07= ADD 08= HIGH(H) 09= NARROW 10=-------- 9. Repeat from Step 5 to program the rest of your channels. Very useful Youtube video below: method for adding a single frequency later on, without going through the whole SELF programming mode again: 1. Make sure the radio is in Frequency Mode. Type in the frequency you want to program. E.g 446.00625 2. Press MENU and then press the VFO/MR button. The channel number will start to blink. 3. Use the rotary selector knob to select on which channel you want to save this frequency. 4. Press VFO/MR button again to confirm and exit. Keypad can be locked by pushing the * LOCK button for a few seconds. --------------------------------------------------------------------------------------------------------------------------------------------------- Programming the Crony CN888: Note: This radio has 3 operating modes called "Frequency", "VFO", and "Channel". You can toggle between these modes by pressing the orange Function button on the top left corner, followed by pressing 1 (Mode). Programming the radio as described below can only be done in VFO mode. 1. Switch on the radio. 2. Press the Function Key (orange button on top left corner). 3. Press 4 (STEP) until it shows 6.25. Press EXIT to confirm. 4. Now type the first frequency you want to program. Eg. 446.00625 5. Now press the # button. The Channel number in the corner of the display will start to blink. 6. Select with the A (up) or B(down) buttons to choose wich channel you want to save the frequency. 7. Press the C button. the radio will confirm by saying "SAVED AS RX FREQUENCY" 8. Press the # button again. The Channel number in the corner of the display will start to blink. 9. Press the D button. the radio will confirm by saying "SAVED AS TX FREQUENCY" Keypad can be locked by pushing the Function button, followed by the *F.L button. Programming the Baofeng UV5-R: When buying a radio like the Baofeng UV5R, many certain frequencies and channels are already programmed into the radio, but these are different from the ones we use in Carnity. As you will be programming 5 new channels onto Channel number 1 till 5, it is important to first delete these existing frequencies stored in those channels. You can do that as following: Step 1: Delete the existing channels from channel 1 till 5: 1- Switch on the radio 2- Press the MENU button followed by the buttons 2 and 8. (Menu 28). 3- Press MENU, and then use the UP/DOWN arrows to select which channel you want to clear. 4- Select CH1 and press MENU again, you will hear "delete channel, followed by confirmed". 5- Now go back to step 3 and do the same for the following channels (CH2-CH3-CH4-CH5). 6- Now all 5 channels are clear and ready to be programmed. Step 2: Set the step-frequency: - Switch on the radio - Press the MENU button and with the up and down buttons select STEP frequency. - Change this to 6.25 and press MENU to confirm. - Press EXIT to go back to the main menu. Step 3 Program the new frequencies in the radio: 1- Press the VFO button. You will hear the confirmation “frequency mode”. 2- Make sure the arrow is on the top line. If not, press the blue A/B button. 3- Type in the frequency you want to save. I.e 446.00625 4- Press MENU, followed by button 2 and 7 (menu 27). You will see MEM-CH. 5- Press MENU and now use the up and down buttons to select the channel you want to save it on. 6- Press MENU again to confirm. Your first frequency is now stored under channel 01. (receiving memory). 7- Press MENU TWICE again to confirm. Your first frequency is now stored under channel 01. (transmitting memory). 8- Press EXIT and repeat from step 3 onwards to program your remaining channels. Note: To program the Carnity backup frequency channel 5, you will need to set the step frequency to 12.5. When done, follow the same steps to program and save it under channel 05. You can either program these channels one by one into your radio, which is the easiest for you later on, or you can just enter the frequency without saving it. Some extra notes: Option 5 in your menu should be on Narrowband. Option 10 and 12 in your menu should be set to OFF (we are not using CT codes). BaoFeng_UV-5R_Manual_(1).pdf54 points
 -
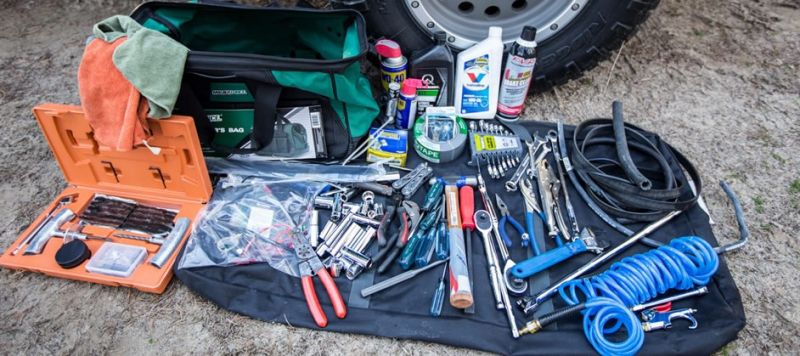
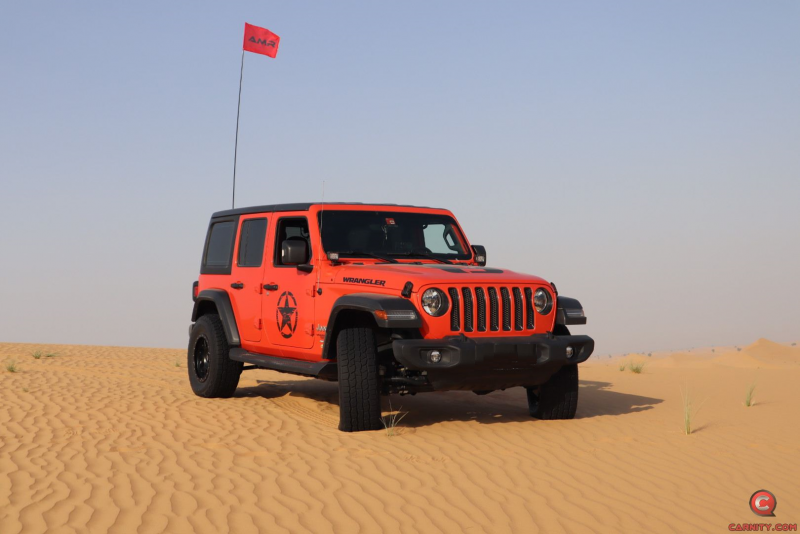 So you have decided to become an Offroad Enthusiast by either joining an Offroad-Club, or becoming a Solo Adventurer to explore the UAE deserts ? Then surely the time has come to start investing in the proper offroad gear. Good quality offroad gear will be your biggest help to be self-reliant and to enjoy this sport thoroughly. After all you don't want to be stranded in the middle of the desert with unsafe or unreliable equipment. We have compiled a list of essential tools you should have as per our club levels, and included some recommended gear which we have used in the club with good results. OFF-ROAD FLAG (NEWBIE AND ABOVE) A proper off-road flag is safely mounted with a bracket, or suction cup, and does not fall off on the first windy day. You can either buy a very decent flag like the AOR ones, or go to the nearest dune-buggy shop, or Dragon Mart. A fishing rod with flag also does the job. TYRE DEFLATOR AND PRESSURE GAUGE (NEWBIE AND ABOVE) Deflating your tyres will be a weekly practice, and the accuracy of your tyre-pressure gauge will make the difference between struggling in the sand or floating on it. You can buy them in ACE, Speedex, or Dragon Mart and it is advisable to buy two different models to double-check the accuracy. Most cheaper models work well on normal tyre pressures (35 psi) but start to give inaccurate readings below 15psi. Deflating your tyres can be done with a stem removal tool or a quick deflator. Whatever works for you. How to deflate your tyres is well documented here: FULL-SIZE SHOVEL (NEWBIE AND ABOVE) Next to your Carnity buddies, a proper shovel will be your best friend in the desert.You should get a full-size laborer shovel, and not a small foldable camping spoon/shovel. Buy a shovel with a handle, and a v-shaped tip, you will find them in general hardware shops. Example below is perfect, and will allow you to displace a lot of sand. TWO WAY RADIO (NEWBIE AND ABOVE) While driving with an offroad-club, a two-way radio is essential to communicate with the rest of the convoy and to receive instructions or guidance. In Carnity Off-Road Club, we use two-way UHF radios that are programmable to our frequency list that we have created. Make sure your radio is always fully charged for every drive, and if possible invest in having a second (spare) one. We can recommend the Crony/Motorola MT777 or the Baofeng UV5-R model as both are good radios with excellent price/quality ratio. You will find them in Dragon Mart. Do not buy a walkie talkie without a display, as these will be mostly pre-programmed and the frequencies cannot be changed unless you purchase programming software and cables. NOTE: THE BAOFENG 888 RADIOS THAT WE HAND OUT AS SPARE RADIOS WILL NOT WORK OUT OF THE BOX WHEN YOU BUY THEM AS THEY HAVE DIFFERENT FREQUENCIES. YOU CAN PROGRAM THEM BUT YOU WILL NEED PROGRAMMING CABLE, A LAPTOP, AND SOFTWARE CALLED CHIRP. IF YOU ARE NOT INTO THESE TECHNICAL THINGS, PLEASE STICK WITH BUYING THE CRONY/MOTOROLA MT777 or BAOFENG UV5R AS THESE CAN BE EASILY PROGRAMMED YOURSELF WITHOUT CABLES OR SOFTWARE. Instructions on how to program the Motorola/Crony and Baofeng you will find in below post: FIRE EXTINGUISHER AND MEDICAL KIT (NEWBIE AND ABOVE) Both items every vehicle should have, offroad or onroad. You will find DRY POWDER extinguishers at the petrol station or hardware shops, and a medical first aid kit at general hardware stores or pharmacies. Make sure they are immediately accessible in case urgently needed. 12V AIR COMPRESSOR (NEWBIE AND ABOVE) After every offroad drive you will need to re-inflate your tyres. If you are lucky to be nearby a petrol station you can slowly drive your way up there, but in many cases you will be miles away from one. You will find air compressors from 150 up to 2500AED as per your budget and liking, but if you are using it on a weekly basis you will find that sticking with a well-known brand like TJM, Bushranger, ARB really makes the difference. You can be lucky with the Camel branded compressors in Dragon Mart too, but do not expected any warranty on them. ACE, Speedex has the branded ones, and also a few cheaper options. GPS DEVICE (INTERMEDIATE AND ABOVE) From a dedicated GPS device such as the Garmin 276cx, or a smartphone with your favorite navigation app, it will be important from Intermediate level onwards that you start practicing navigation, putting waypoints, entry and exit points, and seeing the difference on your map between for example long range dunes and small technical dunes. Apps like MotionX for IOS, MyTrails, and GaiaGPS are very popular and allow you to properly prepare for your route / track beforehand. RECOVERY ROPE WITH 2 SOFT SHACKLES (INTERMEDIATE AND ABOVE) Recovering stuck vehicles in the desert is a skill, and from Intermediate level onwards you will be able to practice this. There are different types of ropes in the market, and finding the right one might be very confusing. - A Polyester Tow Rope is meant to tow a vehicle on the road, NEVER for off-road recovery. These are the basic tow ropes you will find at the petrol station. - A Webbing Sling is a Polyester rope that you can buy in hardware stores and is meant for industrial lifting, but can also be used as tow rope in specific cases (to re-direct a stuck vehicle with gentle tugs). This material does not stretch. - A Snatch rope (flat) or Kinetic Recovery Rope (round) is a rope made of Nylon that allows to stretch for about 20%, and is extremely useful for offroad recovery as the stretching creates a kinetic energy and the recoil effect helps in recovering vehicles stuck in the sand. When choosing a kinetic recovery rope, you should select a rope that has a breaking strength of 2-3 times the weight of the vehicle you will recover. For example; if you recover a Nissan Xterra which weighs 2 ton, the breaking strength of the rope should be at least 6 tons. Most recovery ropes have 10-15 Tons breaking strength. The reason for this is that the forces involved when a vehicle is completely stuck in the sand are far higher. Our club uses both the Viking Kinetic rope as well as the AOR Kinetic recovery rope with excellent results. The Viking rope costs about 350AED with a bag and 2 soft shackles included, while the AOR kinetic rope costs about 390AED without soft shackles. (AOR soft shackle cost 155 AED per piece). A shackle is a device that allows you to connect your rope to your tow point. These used to be mostly rated metal D-shackles, but nowadays the soft shackles, that were well known in the sailing world have become in offroading too. A soft shackle will be safer to use as the less metal involved the better during recoveries. More information on using these Kinetic recovery ropes and shackles can be found in below post: FLOOR JACK WITH WOODEN BOARD (ADVANCE AND ABOVE) A hydraulic floor jack in combination with a strong wooden board will allow you to safely lift a vehicle in the desert to replace a tyre or fix a pop-out. We do not advise using scissor jacks or bottle jacks, as these are only acceptable for on-road and will topple over in the sand or possibly even on a wooden board. A good hydraulic floor jack should be at least 2T capacity and a swivel neck (rotating handle) will allow you to put it further underneath the vehicle and still be able to lift it. JZX or YATO has good hydraulic jacks. Do not buy the cheapest one available as the consequences or risks when the floor jack collapses could be very serious. A strong wooden board should be at least 1 1/2 inches thick and made of natural wood and not MDF or plywood. A good example is scaffolding planks. It should be large enough to fit your hydraulic jack on it. TOOLKIT AND FLUIDS (ADVANCE OFF-ROADERS) A toolkit will come in handy for a multitude of reasons, in case a vehicle breaks down, to fix a loose exhaust, flag, or bumper, but can make you a hero if you are able to fix your vehicle instead of leaving it behind in the desert. Following items are recommended: A small basic multimeter, set of spanners up to size 24, some adjustable spanners, a hacksaw, hammer, set of screwdrivers, some electrical tape, duct tape, cable-ties, some spare car fuses, spare valves and stems, tie down straps, socket wrench set and some pliers. Also a tyre repair kit will be coming in handy, together with some thick gloves, and battery boost cables. Following fluids are recommended: - Engine oil: 1-2 liter - Coolant: 1-2 liter - ATF Transmission oil: 1 liter - A can of WD40 or penetrating oil - Spray-can with water to cool down an overheating engine.32 points
 -
 When joining Carnity Off-road Club, there will come a time that you’ll need to start looking for deflators, pressure gauges, compressors, flag, etc... Dragon Mart is a wonderful shopping paradise but finding the item you need is indeed sometimes a daunting task. So I listed below some shops and their locations that might be of help: Off-road Flag Section: EA Address: EA01 Shop: S&D Autoparts Deflator tool and pressure gauge Section: EB Address: EBD05 Shop: Taizhou Yian Trade Two Way Radio Lots of options, but the BA section has the most shops. Look out for the big CRONY labeled shop. They have the Motorola MT777 = 120 - 150 AED. Crony MT777 = 80 - 120 AED Also the Baofeng UV-5R is still popular and easy to find. Costs about 75 AED. Floor Jack & Tools JZX shop in section EA, no. EAA25 2 Ton floor jack with swivel neck = 120 - 150 AED (Recommended) Tool kit = 50-100 AED Compressor Mainly available in BA section. Have a walk and haggle a bit. The Camel logo brand is pretty good. Available in single or twin cylinder model. Single cylinder = 100 -150 AED Twin Cylinder = 150 -200 AED (Recommended) Please take note that we are not affiliated with these shops nor do we give any guarantees about their items. We solely provide the location where you can find these most common items to save your time.29 points
 -
This tutorial will describe the safest techniques to recover a vehicle from the desert. We will try to cover all scenarios and focus on the safety aspect. Although many offroaders have already learned the art of off-roading in the UAE desert, performing recoveries is a skill in itself and needs practice and clear understanding and respect of the dangers involved for the person recovering, the person being recovered, and bystanders. This is a skill that will require practice, and the more recoveries you do from different situations, the more experienced you will become. Whenever you have ANY doubt in during a recovery, you should assess the situation with other senior members and make the decision together. 2-3 people will most likely have a better total overview and will result in a safer recovery attempt. Team work is essential in this sport and all the more during recoveries. 4x4 Recovery Tools D-Shackle or Bow Shackle The D-shackle, also called a bow shackle, is the tool that you will use to connect your recovery rope to the tow-hook of the vehicle (both sides). Since the uprising of soft shackles, and the incidents that happened with poor quality D-shackles, most Off-roaders have now shifted to using soft shackles. A good quality, rated D-shackle can still be useful in some scenarios, and they are safe if the recovery is being done properly, but the risk of this projectile flying through the windshield and potentially killing people has made this shackle a tool only to be used by people who have 100% skill level and know what they are doing. Soft Shackles Soft shackles were first used in the marine/sailing world and have recently become very popular as the perfect shackle to use for off-road recoveries. They are easy to use, and in case they break they will not become a deadly projectile. They are more expensive than metal D-shackles but will last quite long and there is no compromise when it comes to safety. The shackle is made of UHMWPE, also known as Ultra High Molecular Weight Polyethylene, or Dyneema. This synthetic yarn is 10 times stronger than steel. Kinetic Recovery rope or Snatch Strap. A kinetic recovery rope is made of Nylon. The most useful characteristics of this rope is that it stretches about +/- 20% during a pull. This means the “tug” or “jerk” effect of the recovery will be dampened, resulting in less strain on the vehicle’s tow-points. The downside is that because of this characteristic, people sometimes have the tendency to start pulling much harder, which can result in breaking the vehicle’s tow-points or chassis. The recoil effect of this rope creates a massive force and that is why during a recovery we clearly instruct to not exceed 15km/h during recoveries, and to gradually build up the strength of the pull in 2-3 attempts. Do not use this rope for towing a vehicle. Due to the stretch effect it will be difficult to control the towing process, and furthermore you will damage the rope as it needs to recoil and settle after a recovery. When choosing a kinetic recovery rope, you should select a rope that has a breaking strength of 2-3 times the weight of the vehicle you will recover. For example; if you recover a Nissan Xterra which weighs 2 ton, the breaking strength of the rope should be at least 6 tons. Most recovery ropes have 10-15 Tons breaking strength. The reason for this is that the forces involved when a vehicle is completely stuck in the sand are far higher. Our club uses both the Viking Kinetic rope as well as the AOR Kinetic recovery rope with excellent results. The Viking rope costs about 350AED with a bag and 2 soft shackles included, while the AOR kinetic rope costs about 370AED without soft shackles. (AOR soft shackle cost 155 AED per piece). This rope is not the same as a Polyester Webbing sling that you will find in most hardware shops ! Kinetic recovery ropes will cost you about 350-400 AED. A Polyester webbing sling is far cheaper but does not stretch. Performing a Recovery When doing a recovery there will be tasks involved for both the person doing the recovery, and the person being recovered. It is essential that there is a clear communication established over the radio or verbally to make sure the recovery is being done professionally and safely. Bystanders should remain at a distance radius of at least 10m during the recovery process ! Scenario 1: A vehicle is crested Getting crested is an event that happens regularly during off-roading, and by following below steps you can recover a vehicle safely. The individual tasks for each person are mentioned below: # PERSON PERFORMING THE RECOVERY PERSON BEING RECOVERED 1 Will first inspect if the vehicle is front-heavy, back-heavy, and if the car can be maybe recovered without ropes. In many cases it is sufficient to clear the sand from the wheels, from underneath the body of the car, and try the self-recovery method and engage diff-locks. can help with clearing the sand from the wheels 2 When recovery with a rope is deemed necessary, he will attach the rope to a secure “recovery point” of the car. The recovery point needs to be strong enough and in perfect condition. He will not perform recoveries on worn out or heavily rusted towpoints. You need to keep approximately 2m free-play in the rope, so you have space to ramp up the vehicle before the pull starts. 3 Will step inside his car, put on his seatbelts, engage 4LO and put his car in First Gear forward or Reverse depending on the direction he will be recovered. He then announces on the radio that he is belted up, car is running in low gear, and he is ready for the recovery attempt. 4 Get inside his vehicle, engages 4LO, puts on the seatbelt, and asks the person being recovered if he is ready for the recovery attempt. Acknowledges the message and confirms he is ready for the pull. 5 Will drive a little bit forwards and backwards to create a firm track if needed, then starts off with a gentle pull. This is to test the waters and in some cases the vehicle will already come out. 6 If second attempt is needed, he will announce on the radio that he will try again. Acknowledges the message and confirms he is ready for the second pull. 7 Performs second attempt which is slightly more aggressive 8 The car comes out and is bring brought to flat ground where the rope can be safely removed. Follows the recovery vehicle to flat ground Scenario 2: a vehicle is bogged down When a vehicle is bogged down or in a ditch, and needs recovery with a rope, the same scenario as scenario #1 will be applied. You should always clear the wheels and shovel as much as you can to ease the recovery. It is also very important to properly position the vehicle to avoid sharp angles. Again, the rope should have at least 2m free play before starting the recovery. Make sure you position your rope in a zig-zag shape and verify it is not in a knot. Creating a knot in a kinetic rope will damage it beyond repair ! Scenario 3: a vehicle needs to be pulled upwards In the case that a vehicle needs to be pulled upwards, you need to be aware that the force that you will need to apply will be far higher. Some examples: - Towing a 2 Ton vehicle on the road results in a 100kg pull resistance. - Recovering a wheel-bogged down 2 Ton vehicle on flat sand results in 2000kg of pull resistance. - Pulling a chassid-bogged down 2 Ton vehicle on an upward slope of 15° results in 3500kg of pull resistance. (as photo below). This is the main reason why it is so important to clear the wheels from sand and shovel out the body of the vehicle as much as possible to reduce the resistance. Be aware that when pulling a vehicle upwards on a steep angle might damage the front bumper on the vehicle that is being recovered. Especially on slopes of 10° and more, the rope can hit the front bumper. Additional safety measures Safety Strap At a more advanced level of off-roading, safety strap is a very helpful tool to secure the rope or d-shackle during extreme recoveries. In that case it will avoid from becoming a projectile. Tow Point Essentials Most 4x4 vehicles are equipped with proper tow hooks which are welded to the chassis. In more modern SUV's which are less meant for heavy duty use, you will sometimes find a screw-in type of tow hook. These are generally ok for occasional use but for weekly recoveries they will not do as the threading will wear out and eventually they will fly out. Every Offroader should make sure he has proper recovery points on the front and back and that they are in perfect condition. During more extreme recoveries there are additional techniques we apply to distribute the load, such as a bridle rope. This rope basically distributes the load between both towpoints. In which direction should i put my vehicle when i recover someone ? This will depend on a case to case basis: When during the recovery you want to have FULL visual of the car that you are recovering, it will make more sense to attach your rope to your front recovery towpoints. In the case the recovery needs a bit more force, and you have a towbar or stronger recovery points at the back, then it makes more sense to attach your rope to the rear towpoints or tow bar. In the case that you really want to see where your own car is going (in difficult terrain with bushes for example), it will also make sense to perform the recovery by attaching the rope to the back of the car. Can i attach my shackle or rope to a tow ball receiver ? Tow balls are NEVER to be used for recovery purposes. There have been many incidents where the tow ball has come off and became a deadly projectile. DO NOT ever recover a vehicle by connecting to the tow ball !!!24 points
-
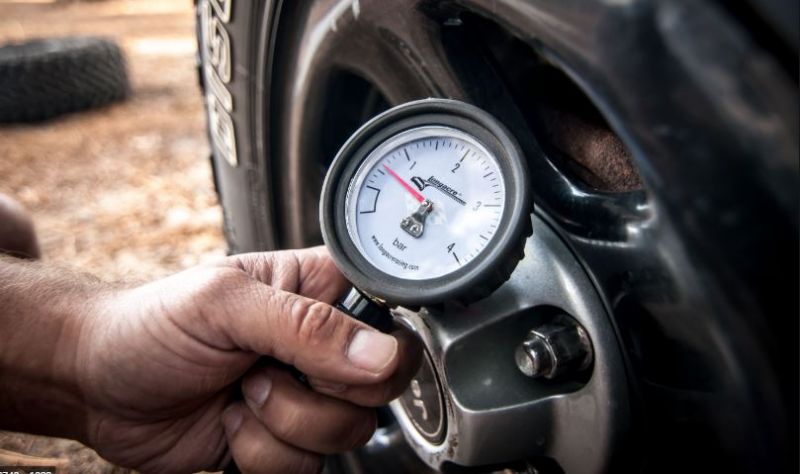 When starting as an off-roading enthusiast in UAE, you will come to hear about deflating your tyres, and setting your tyres to the right tyre pressure is one of the first things you will need to learn to master. The main reason for deflating your tyres is to obtain a longer footprint in the sand, and that enables you to drive on the sand, instead of digging into it. Tyre pressure is defined in PSI (pounds per square inch) or Bar. You will find both readings on your pressure gauge. In UAE most people use PSI, and the gas station compressors also use the PSI identification. Below you can see the corresponding PSI and Bar readings. As a beginner level offroader, you should reduce your tyre pressure to about 15 PSI. This is low enough to enable you to drive in the dunes without the risk of the tyre coming off the rim. This 15PSI is also perfect for on-road-tyres. After a few drives, and depending on the terrain, or if you have offroad tyres, you can slowly deflate further down to 10-12 PSI. Take note that the risk for having a pop-out will increase, so don't be afraid to post your questions on the Carnity website or consult one of the marshals if you are not sure about your tyre pressure. There are different ways of deflating your tyres, and each have their advantages and disadvantages. The more you will practice, the sooner you will find out what works best for you. How does a stem valve looks like ? The stem valve is consisting out of 3 pieces. The body, that is made of flexible rubber, the core, and the valve cap. Take note of the following: - The rubber valve body wears out over time. Once you start to see cracks, it is advisable to get it replaced at the nearest tyre center. - The valve core is a tiny component with a small rubber gasket. If you remove them on a weekly basis, the gasket slowly wears out or the core can even break. Carry 5-10 spares in your vehicle. The tyre center often give them for free. - The valve cap keeps dirt and sand from entering into the valve, so it's advisable to always screw the cap back on. The process of deflating / inflating goes by either pushing in the valve core, which allows air to be released, or by removing the valve core, which is a much faster option. How to check the tyre pressure ? Verifying your tyre pressure is really easy. Get yourself a pressure gauge, and push it against the tyre valve, or screw it on (depending on the model). You will see the reading in PSI or Bar. The digital ones are fine, but one day the battery will be empty, so a good old analogue is preferred to have as well. PS if you find that your gauge has difficulties reading the tyre pressure, and you really need to push it hard onto the valve, this is an indication that the valve core is worn out. Replace it with a new one and you will see that this will solve your problem. Which tools to deflate and how much time will it take ? 1) Set of keys, a rock, or anything you might find in your car (+/- 15 mins) PROS: CHEAP and plenty of stuff available CONS: Takes a very long time which you could use for a smoke or a chat and risk on damaging the valve stems. 2) Valve Chucks (4-5 minutes) Buy 4 of them and stick them on all tyres simultaneously and then wait about a few minutes (as per your type and size of tyre) to arrive at around 17-18 psi. Then take one tyre at a time and use your pressure gauge to further decrease and finetune the pressure of each individual tyre. PROS: Fast and Cheap CONS: none that i know off. 3) Stem removal tool (2-3 minutes) Available in most hardware shops. Enables you to remove the valve core stem so the tyre pressure comes down very fast. PROS: Very Fast and Cheap CONS: Be careful not to lose the stem as it can blow out. So taking some spare is advisable. Be careful not to deflate too much as it really goes fast. Use a stopwatch and learn to find the perfect timing when to screw it back in, and then double check with a pressure gauge. 4) Rapid Tyre deflator and pressure gauge ( 4-5 mins) This tool enables you to loosen the stem, quickly deflate and immediately take a pressure reading. PROS: Professional tool for reasonable price, pressure gauge and deflator in one tool. CONS: Might take a bit of practice to get the hang of it. The fake chinese ones are fairly unreliable. As with all tools and gear, we advise you to practice a bit at home to become familiar with them before your desert driving. It is also recommended to carry two pressure gauges, so you can compare them with each-other and double check your readings. Often we have seen pressure gauges giving accurate readings at high pressures (35) but very inaccurate results at 10-15 PSI.22 points
 -
When using your vehicle in the desert, certain electronic aids like Active Stability Control (ASC) or ABS need to be disabled, as the soft and slippery sand will make the traction aids kick in and you won't be able to spin the wheels, which is something that is unavoidable when driving in the sand. Below i will describe the easiest two methods to disable your ABS and Stability Control (ASC) at the same time. You can choose either method 1 or method 2 as per your own preference. Method 3 describes the installation of a kill switch, which will require some work as seen in the video. Method 1: Removing the ABS relay 1) Switch off the engine and open the hood. 2) Locate the relay box and open it. 3) Locate the ABS relay on the upper right hand. Remove it by pulling it out. 4) Close the cover and hood, and switch on your engine. You will have no specific alarms on the dashboard but they will start to flicker after a while (ABS light, ASC light, etc...) and eventually they will stay on which indicates they are completely disabled. Method 2: Unplugging the ABS connector This method obtains the same result, but faster. After unplugging you will have immediately disabled ABS and ASC, hence you will have no restrictions. After your drive, there could be some sand inside the connector, so carefully remove it with some compressed air or a small brush. After your offroad drive, you can open the hood, plug the relay or connector back in, and restart your car. The ABS and ATC dashboard lights will be off again. Method 3: Installing a Kill Switch If you are handy, you can do this yourselves by following below steps. If you are in doubt, get it done by a professional workshop. The most advanced method includes the installation of a special "double functionality" kill switch. These can be bought online but are rather expensive. See functionality below:16 points
-
 This comprehensive used car buying guide covers the complete spectrum from the day you first thought of buying a used car till the day you bring that car home. It is designed with clear headlines in a sequential manner so that you can jump to any stage with a quick scroll. We have spent a lot of time and effort in compiling this used car buying guide based on several senior members, experts, mechanics, and technicians advice with their years of experience in buying a used cars, fixing them, and spotting the dodgy repair work. I hope this wealth of knowledge helps you and your family in driving a safer car eventually. 1. Research and prepare your budget If you want to be successful in picking up that perfect deal, you will first need to build a target list of used cars that you are looking for. If you aren't sure about what you want, then check these 7 Car types you should know before buying. Once you have chosen the car(s) that you want to purchase, do some research online and try to find the model/year that suits your budget. Whichever car you shortlist, the very first step you need to check if that car's year model has any recalls safety alerts and bulletin. You can check most of the GCC vehicle recalls, safety alerts and TSB here, and also you can search all newspaper websites one by one for recalls verified by the United Arab Emirates Ministry of Economy. You should check the theoretical fuel consumption of the car with the distance you travel every month to factor in your fuel estimate. Be prepared that based on your driving style, this could be at least 15-20% higher. If fuel cost is a concern for you, then you can check 30 Fuel Saving Tips For Saving Over 30 Percent On Fuel Cost called Hypermile: Extreme Energy Efficient Driving. Apart from the car cost and fuel consumption, there are a few more costs involved that you need to know before making up your mind about which impact the Real cost of car ownership. Once you select your car based on your needs, research, and liking, it's always advisable to take a second opinion from a genuine car expert or a person who has owned a similar car in carnity car forums. Look how Avinash took the real good advantage of discussing his car buying need with unbiased car experts and owners and finally changed his mind from buying a Jeep Wrangler TJ to Nissan Xterra. The people who have owned a similar vehicle are the best persons to advise instead of your social friends, family, or salesperson at a car dealership. Buying a used car will probably mean that it needs some attention to bring it back to the condition that you really want. Consider replacing tires, having the full maintenance done, and bringing in the car for detailing and polishing will add to your total expenditure, so be prepared when setting your budget. When going for luxury cars like BMW, Mercedes, and Porsche, be prepared to put aside a bit more than if you’d buy a Japanese or US car. Maintenance and parts on luxury cars cost a lot more. Same way when considering a 4x4, there are more parts involved and higher fuel consumption you need to factor too. To have some guidelines on your budget, check these 3 Key factors for assigning next car budget. 2. Where to search and how to proceed Without any doubt, it is always recommended to buy a used car from a car owner than any car dealer or private seller as a middleman. The reason is that you will be able to have a clear understanding of the car’s history, and reason for selling, and as there are no other parties involved, both will get the most benefit from the deal. Always prefer Car Classifieds that have real car owners used cars and not from the car dealers. If you search car classified sites, always make sure to filter the ads from the car owner. Also, be careful because many so-called private sellers are in fact dealers on most of the car classifieds websites. If you don't see the seller's name on the car registration card or hear a story that I am helping my friend/brother then 90% chances are of a middleman acting as a private seller. You can find 5 Best places to buy clean used cars at good price here. The major problem with car dealers or the middlemen is that they are flipping cars for business and if the car has no service history records then it must have gone under a lot of compromised repair or quick fix recently. This sub-standard repair or cost-cutting will cost you dearly in the first 6 months of ownership. UAE has many used car dealerships, the Ras Al Khor auto market in Dubai is enormous, Mussafah in Abu Dhabi, Abu Shagara and Souq al haraj in Sharjah are a few of the big and famous used car markets here in UAE. Be very careful when buying a car from a dealer or auto market. The inspection steps mentioned below are to be followed even more rigorously to avoid ending up with an imported or salvaged lemon! Once you found a good prospective vehicle, don’t immediately jump to view the car, but call the seller or dealer first to make sure if it is still available. At the same time, you can go through the first basic questions like why the car is being sold, if it’s still available, how long it has been up for sale, and if it had any unmentioned issues or accidents in the past. Do not discuss the prices on the phone yet. Keep that for when you are face to face with the seller and once you have fully assessed the car’s condition. The reason for not discussing or negotiating the car price on the phone will set you aside as a real buyer as 90% of car dealer phone call starts with "what's the last price?" which is pretty sad and painful for any car seller that buyer wants to knock down 50% of asking value without even looking at the car or its condition. So with this strategy, you will have a better head start compared to other viewers and this approach might help you know a lot more about car history when the owner is at ease and not furious with bargain hunters. When you set up an appointment to view the car, make a preference to see the car in daylight hours. If it's not possible, then bring a good torchlight and ask the seller to head to any fuel station. This will help you in assessing the paint and bodywork. 3. Seeing the car and service history Once you go and see the car that you have prospected, it is very normal to be excited. But please do not ever show this to the seller, as you would give him the signal that you REALLY want the car, and that puts him at the competitive edge in the upcoming discussion about the price. Keep a poker face, stay friendly, and stick to the facts. Do not disclose too much information on why you are interested in this type of car. The less the seller knows about you, the less ammunition he has that he would use to ask for higher prices. It is ALWAYS recommended to bring a friend on the visit, he might see things that you don’t see. If that friend is a bit technically inclined, or even a mechanic, all the better! The car's mileage should represent what the seller tells you. While in theory, it is always better to have a car with low mileage, this depends on how the car was maintained and driven. Many high mileage cars are sometimes in better condition than that low mileage driven cars that have been standing still for years or are poorly maintained! Ideally, the car should have complete service history, preferably from the dealership or a reputable garage. If nothing is available, walk away from this vehicle or buy it at your own risk if you are technically inclined. This should ring alarm bells! Verify if the car is GCC specs or not. A GCC car will have the metal sticker on the driver sill containing vehicle info and has Arabic written on it then which means it is GCC specs. It is recommended to go for GCC specs vehicles in the UAE or GCC countries, but you’ll also find plenty of American and Japanese imports that will be a lot cheaper. Buying a non-GCC car is a big risk as most of these cars have been written off (accidental), stolen, or have unknown damages or issues. Ask for the previous RTA inspection documents and valid insurance and registration card to avoid problems when doing the official handover in the RTA offices. Check the mileages mentioned on the documents to see what the yearly increment was and whether it is in line with the current mileage of the car. If the car is on a loan or lease, the seller will need to settle that first otherwise transfer of ownership cannot take place. Ask him to check with his/her bank for the procedure and timeline required. Check for recent repairs and verify if the maintenance schedules were properly followed. Check when the next big maintenance is coming up, as that might include expensive parts like timing belts and suspension parts. Those are quite expensive maintenance jobs and if they are almost due, you should reduce the asking price accordingly. A VIN Number is an international Standard code on every vehicle. On most cars, you will find it on the dashboard driver's side. When cars are written off by the insurance due to a heavy accident or flooding, it will appear in the International VIN Database. For imported vehicles, you can use a website like carvertical.com that allows you to enter the VIN code and for a small payment receive a full report on the car. For checking the accident records inside the UAE, there are the following options: https://portal.moi.gov.ae/eservices/PublicServices/AccidentsInquiry.aspx?Culture=en https://www.evg.ae/_layouts/EVG/trafficaccidents.aspx?language=en 4. Exterior and bodywork inspection As mentioned, make sure you see the car in daylight, or if not possible, bring a torch with you and ask the seller to put the car underneath the streetlights or at a fuel station. Dodgy paint job A good way to tell if a certain car has been involved in an accident is to check for signs that it has been repainted and the way to do that, is to look at the reflection of the paint. The surface may look clear and smooth when viewed straight on, but sit by the side of the car and you may spot some unevenness or wavy lines with dips. If you do, there’s a good chance that the car has got a body repair job after the accident. Walk around the car and see if the color on all the panels matches — if it doesn’t then you know some patchwork has been done too to the car. Many cars that are 6 years and older, will have some scratches left and right. That is perfectly normal and does not mean the car is not worth buying. If the scratches are small, a decent polishing job can hide them again, and you can use it to push down the price a little bit. Misaligned panels When the doors, boot and bonnet are closed they ought to be perfectly flush with other panels. If the alignment isn’t right, it could be a sign that the car has been involved in an accident. Similarly, the front and rear bumper should fit straight but if you notice it’s at a slight angle or the gap between left and right doesn't match, chances are high that the car had an impact. Open and close all the doors once, there should be no rattles and they should align perfectly. Check the tyres Get your hands on your knees and give the tyres a good close look. If the tread seems uneven, it could be because of a misaligned wheel or even possibly caused by damage to the chassis. While you are down there it’d be a good idea to have a good look at the underbody and the wheel wells – if you see a fresh application of a rubberized undercoat it could be because of recent structural repairs and this was a quick way to cover that up. Windshield Inspect the windshield for cracks. Even the smallest crack can suddenly cause a complete crack a few weeks or months later. If the crack is smaller than a coin, there are companies that can repair it and make it structurally intact again, so it does not crack in the future. Inspect the windshield rubbers too, many cars that have been parked in the bright sun for a long time might have dried up windshield rubbers. Headlights Most modern cars now have plastic headlights, which become yellow after long exposure to UV radiation (in sun). When they become too hazy, RTA will make note of that and might not pass the car. If both headlights do not have a similar level of haze, then either the headlights were replaced after an accident, or the careful owner got them polished (and that means the owner is a bit perfectionist 😊), or kept the car in the shade at all times. Chassis Try to look under the car and see if there are any noticeable damages to the chassis. You can spot the recent damage by seeing the color differences on the repaired areas compared with the original paint. For older chassis damage you'll need to consult the proper technician who can check the chassis with computer alignment, including RTA Tasjeel selected branches. Have a look underneath the car's engine bay and sides to search for any wet markings of oil drops or pools of oil. Minor few drops or stains are acceptable to some extent if they are occasional, but regular drops or a pool of oil or any other fluid will require an immediate checkup! Clearwater dripping when the car is on = AC condensation - nothing to worry about. Clearwater droplets coming out from the exhaust = it's a sign of a healthy engine. Front side underneath - golden or brown oil = Engine Oil leaking - Immediate check needed. Front side underneath - green or red water-based fluid = Engine Coolant leaking - Immediate check needed. Under front driver or passenger side - red or brown oil = Gear Oil leaking - Immediate check needed. 5. Interior and minor detailing When entering the car, you might be either put off by the mess, or pleasantly surprised about the cleanliness. Both are possible impressions and be careful not to make an early judgment. Car dealers will get the interior professionally cleaned by third-party companies, so it looks super clean. When buying from a private owner you would hope that he shows you the car in a clean external and internal condition. If not, then better to walk away from a dirty interior car, which is expensive to restore. Damp smells If you notice that the dash light, or the power windows or indeed other electronical equipment doesn’t seem to be working right, it could be a sign of flood damage. Too many air fresheners in the cabin should sound the alarm bells – is the owner trying to cover up any damp smells caused by water damage? Visual signs of aging A car interior should match the km driven even if the car has a full service history. For cars with mileage below 50,000 km, you shouldn’t be seeing any broken knobs, faded buttons, worn-out brake or accelerator rubber, or loose and shaky gear levers. Car seats should not have too much play when you sit. Pull the seat belt out and see how smoothly it rolls back, if it doesn’t or gets stuck halfway then either car is accidental or driven over 100,000 km. Look on the driver's door sill, to spot any fuel station service oil change stickers to contradict the full-service history. Not all dashboard warning lights are serious, the one in yellow is an indication and orange is a warning and red is the problem. Still all lights are having different meanings for different brands, so worth checking further with the owner’s manual what any existing light points to and then decide to make a purchase. Try all functionalities such as an electric folding roof, electric seats, lights, indicators, radio, fans, and others before starting the car. Listen for squeaky noises or rattles. 6. Test drive, warning light and feedback Finally, the time has come to start the engine and focus on how the car drives and behaves on the road. The engine should start with a single crank and have a stable RPM after a first 15-30 seconds of warming up. Any dancing rpm is a sign of an engine that's not in good health. Although it might not be a big concern or issue, you should know that it will require some tune-up or minor repair work for changing spark plugs, coils, HT leads, etc. in the very near future. In idle, when you hit the gas, the engine response should be instant without any lag, unless it’s a turbo engine that has turbo kicking lag (not engine lag). NO check engine light on the dashboard is acceptable. Period. Use your nose. Do you smell gas, burning oil, or anything amiss? If you hear a loud ticking noise from the engine bay (engine head), there might be a problem with the valve lifters inside the engine head. Some cars are known to be prone to this, but have it checked by a skilled mechanic before you decide to buy as it could be a more serious and very expensive repair. Hitting the wide-open road: Start off with giving the car enough time to warm up. During that time you can keep the windows open and listen for abnormal noises as the revs slowly dropdown. Once on the highway, drive it at 120 km/h for at least 5-10 minutes. Listen for wind noises as this could mean the door panels or rubbers do not match up. How are the brakes? Are they doing the job of stopping the car? Do they squeak? If while braking there is a shudder, brake rotors might need to be replaced. Is the steering wheel centered, and does the car goes straight when releasing the steering wheel? Might need an alignment. Does the steering go smooth? If not, then the servo pump might be defective. Transmission and Drive train: In an automatic gearbox, ideally, a gearshift should not be noticeable. The best to pay attention is from the 1st to 2nd gear shift and see how smoothly it shifts. As in any aging gearbox that is the first starting point to show little to moderate jerk while shifting. Minor jerk could be because of stale oil and filter that is manageable but worth getting it checked further with the proper technician. In a manual gearbox, the firmer the gear lever shifts the better it is. Loose or soft shifting gear lever needs further inspection. Try to shift gears manually as fast as you can and see how the engine, clutch, and gear respond to your fast movement: If you see any hesitation or delay in engine response in fast-shifting need to be further diagnosed. If the clutch pedal feels loose or spongy, then you might be having a worn clutch that will soon need to be replaced. At an extremely slow speed (in a quiet area), pay attention to any rubbing, grinding, and metal shaking noise. It usually shows when a drivetrain has some issue from the driveshaft or loses couplings often resulting in humming or vibrations or low-speed rattling. Go slowly over the speed bumps and listen carefully. Try all gears, including the reverse gear. If the car is a 4X4, pay extra attention to the transfer box, and try all settings (2H, 4H, 4L). If any blinking lights appear when changing the settings, this could mean mechanical problems, but could also be an easy fix like a sensor or vacuum solenoid. Get it verified by a skilled mechanic in that case. 7. Close the deal and register Does the idea of "talking numbers" fill you with dread? It shouldn't. Negotiating doesn't have to be a traumatic experience. If you are reasonable and have a plan, chances are you can make a deal pretty quickly and easily: Decide ahead of time how much you're willing to spend to get the car. But don't start with this number in your discussion. Make an opening offer that is lower than your maximum price, but in the ballpark based on your average price research. If you and the seller arrive at a price that sounds good to you and is near the average price paid, you're probably in good shape. And remember, the people on the other side probably hate negotiating too (even if it's their job). Transferring ownership in UAE is easy, thanks to the RTA Tasjeel inspection centers. Some are even open 24/7 so you can meet up with the seller in the center to get all the paperwork done. Be careful with the insurance sellers in these offices. Prices will be significantly higher than if you enquire in advance at a regular insurance company. When you buy from the Ras Al Khor auto market, there is an RTA center on site so you can quickly settle the deal. When the car passes the RTA inspection, this does not necessarily mean that the car is in perfect condition. It merely means that the vehicle has no serious structural damage and is considered "roadworthy" by them.10 points
 -
.jpeg.59d634ef9b62cd2270f16323b00a2d97.jpeg) Joining an off-road club for the first time can be both exciting and a little nerve-wracking. You might have plenty of questions about your vehicle, equipment, what to expect, and how your first drive will work. This guide takes you through the process step by step, so you can arrive at your first Carnity drive prepared, comfortable, and ready to enjoy the experience. Before joining your first drive, we expect all new members to read through this guide and complete the steps below. 1. Subscribe to Carnity Off-Road Club Joining Carnity Off-Road Club requires a monthly or yearly subscription, completed securely online. Choose the subscription that works best for you: View Carnity Subscriptions If you're joining for the first time: Select New Member. Create your Carnity login profile. Choose your subscription. Complete the online payment. Once your payment is completed, you'll receive an email containing your Off-Road Joining Instructions. This onboarding email contains important information to help you prepare for your first drive, so please take the time to read it carefully. Join the Off-Road Club After creating your account, make sure you also join the Carnity Off-Road Club. Important: Click JOIN CLUB in the upper-right corner of the club page. 2. Complete the Must-Reads Before your first drive, please familiarize yourself with Carnity's essential safety, driving, and club guidelines. MUST READS Environmental Policy Offroad Flag Guideline Two-Way Radio Guideline Off-Road Driving Etiquette Emergency Details for All Off-Roaders Off-Road Driving — Roles & Responsibilities Off-Road Club Grading Structure V3.0 Team Carnity Grading Structure V1.0 These guidelines help keep our drives safe, organized, respectful, and enjoyable for everyone. 3. RSVP for Your First Newbie Drive When you're ready, RSVP for a Newbie Level Drive. After RSVPing, introduce yourself in the drive topic and provide the following information: Your 4x4 make, model, and year Your current off-road experience, if any Confirmation that your 4x4 has front and rear recovery points Confirmation that you have the required Newbie off-road gear Required Newbie Gear Programmable two-way radio Safety flag Tire pressure gauge Tire deflator Air compressor Shovel 4. Watch the Newbie Drive Briefing Before attending your first drive, please watch our Carnity Newbie Drive Briefing. Carnity Newbie Drive Briefing This briefing will help you understand what to expect and how to prepare for your first experience with the club. 5. Get Notified About New Drives Join our WhatsApp group to receive weekly event notifications: Join the Carnity WhatsApp Group New drives are generally: Announced: Monday around 11:00 AM RSVP opens: Monday at 7:00 PM Frequently Asked Questions Is my car suitable for off-roading? We recommend using a proper 4x4 vehicle with: At least 8–9 inches of ground clearance Front and rear tow/recovery points — factory recovery points are fine A low-range transfer case (4L) For EV and PHEV vehicles, low-range gearing may be limited or unavailable. If you're unsure whether your vehicle is suitable, please contact us before purchasing a subscription. Do I need to modify my vehicle? Not at all. We strongly recommend driving your vehicle in stock condition first so you can understand its capabilities before deciding whether modifications are necessary. After completing a few drives, you'll have a much better understanding of what your particular vehicle may—or may not—need. Common desert-driving upgrades can include: All-terrain (AT) tires Bash/skid plates to protect the radiator and bumpers Bumper trimming to improve approach and departure angles Lift kits Every vehicle is different, and modifications aren't automatically necessary. Unlike many off-road clubs supported by garages, Carnity does not sell or promote vehicle modifications. We encourage members to learn what works for their vehicle and use our community discussions to make informed decisions. What do I need for my first drive? You'll need: A valid UAE driving license A basic understanding of your vehicle's 4x4 settings Minimum Required Equipment Tire pressure gauge — example Tire deflator — example Air compressor — example UHF two-way radio — Baofeng UV5R, UV5RH, Crony MT777, or equivalent Safety flag — bracket or suction-cup mounted Shovel — example First-aid kit — this should be standard equipment in every vehicle Fire extinguisher — this should also be standard equipment in every vehicle Two-way radios and other equipment can also be found at Dragon Mart 1. For convenience, we've put together a starter equipment list: View the Carnity Starter Kit Can I bring family or friends? Absolutely. You're welcome to bring friends and family members as passengers without any additional charges or subscriptions. For your very first drive, however, we recommend driving alone where possible. This helps minimize distractions and allows you to concentrate fully on your vehicle, the convoy, and the instructions from the drive team. Can I pay cash at the drive location? No. For safety and organization, all drives must be booked in advance. Your subscription and RSVP confirmation therefore need to be completed online before the drive. We only accept secure online payments through the Carnity website. Can I try before committing? Absolutely. You have 30 days to try Carnity. If you're not satisfied for any reason, simply submit a refund request. No explanation is required. Visit the Contact Us page and let us know you'd like a refund. Refund requests are processed on the same day and are typically credited back to your card within 3 working days. Can I transfer my previous off-road experience? Yes. If you already have desert-driving experience, you may be eligible for fast-track promotion to Fewbie Level after completing one Newbie drive. Our marshals will assess your driving during your first Newbie drive, taking into consideration both your self-declared previous experience and your demonstrated driving skills. The final level assessment will be made by the Carnity team. REQUEST YOUR PROMOTION HERE Ready for Your First Carnity Drive? Follow the steps above, prepare your 4x4 and required equipment, complete the Newbie briefing, and RSVP for your first drive. Welcome to Carnity. Drive safe, keep learning, and enjoy the adventure. If you need further assistance, send us a message at CONTACT3 points
Joining an off-road club for the first time can be both exciting and a little nerve-wracking. You might have plenty of questions about your vehicle, equipment, what to expect, and how your first drive will work. This guide takes you through the process step by step, so you can arrive at your first Carnity drive prepared, comfortable, and ready to enjoy the experience. Before joining your first drive, we expect all new members to read through this guide and complete the steps below. 1. Subscribe to Carnity Off-Road Club Joining Carnity Off-Road Club requires a monthly or yearly subscription, completed securely online. Choose the subscription that works best for you: View Carnity Subscriptions If you're joining for the first time: Select New Member. Create your Carnity login profile. Choose your subscription. Complete the online payment. Once your payment is completed, you'll receive an email containing your Off-Road Joining Instructions. This onboarding email contains important information to help you prepare for your first drive, so please take the time to read it carefully. Join the Off-Road Club After creating your account, make sure you also join the Carnity Off-Road Club. Important: Click JOIN CLUB in the upper-right corner of the club page. 2. Complete the Must-Reads Before your first drive, please familiarize yourself with Carnity's essential safety, driving, and club guidelines. MUST READS Environmental Policy Offroad Flag Guideline Two-Way Radio Guideline Off-Road Driving Etiquette Emergency Details for All Off-Roaders Off-Road Driving — Roles & Responsibilities Off-Road Club Grading Structure V3.0 Team Carnity Grading Structure V1.0 These guidelines help keep our drives safe, organized, respectful, and enjoyable for everyone. 3. RSVP for Your First Newbie Drive When you're ready, RSVP for a Newbie Level Drive. After RSVPing, introduce yourself in the drive topic and provide the following information: Your 4x4 make, model, and year Your current off-road experience, if any Confirmation that your 4x4 has front and rear recovery points Confirmation that you have the required Newbie off-road gear Required Newbie Gear Programmable two-way radio Safety flag Tire pressure gauge Tire deflator Air compressor Shovel 4. Watch the Newbie Drive Briefing Before attending your first drive, please watch our Carnity Newbie Drive Briefing. Carnity Newbie Drive Briefing This briefing will help you understand what to expect and how to prepare for your first experience with the club. 5. Get Notified About New Drives Join our WhatsApp group to receive weekly event notifications: Join the Carnity WhatsApp Group New drives are generally: Announced: Monday around 11:00 AM RSVP opens: Monday at 7:00 PM Frequently Asked Questions Is my car suitable for off-roading? We recommend using a proper 4x4 vehicle with: At least 8–9 inches of ground clearance Front and rear tow/recovery points — factory recovery points are fine A low-range transfer case (4L) For EV and PHEV vehicles, low-range gearing may be limited or unavailable. If you're unsure whether your vehicle is suitable, please contact us before purchasing a subscription. Do I need to modify my vehicle? Not at all. We strongly recommend driving your vehicle in stock condition first so you can understand its capabilities before deciding whether modifications are necessary. After completing a few drives, you'll have a much better understanding of what your particular vehicle may—or may not—need. Common desert-driving upgrades can include: All-terrain (AT) tires Bash/skid plates to protect the radiator and bumpers Bumper trimming to improve approach and departure angles Lift kits Every vehicle is different, and modifications aren't automatically necessary. Unlike many off-road clubs supported by garages, Carnity does not sell or promote vehicle modifications. We encourage members to learn what works for their vehicle and use our community discussions to make informed decisions. What do I need for my first drive? You'll need: A valid UAE driving license A basic understanding of your vehicle's 4x4 settings Minimum Required Equipment Tire pressure gauge — example Tire deflator — example Air compressor — example UHF two-way radio — Baofeng UV5R, UV5RH, Crony MT777, or equivalent Safety flag — bracket or suction-cup mounted Shovel — example First-aid kit — this should be standard equipment in every vehicle Fire extinguisher — this should also be standard equipment in every vehicle Two-way radios and other equipment can also be found at Dragon Mart 1. For convenience, we've put together a starter equipment list: View the Carnity Starter Kit Can I bring family or friends? Absolutely. You're welcome to bring friends and family members as passengers without any additional charges or subscriptions. For your very first drive, however, we recommend driving alone where possible. This helps minimize distractions and allows you to concentrate fully on your vehicle, the convoy, and the instructions from the drive team. Can I pay cash at the drive location? No. For safety and organization, all drives must be booked in advance. Your subscription and RSVP confirmation therefore need to be completed online before the drive. We only accept secure online payments through the Carnity website. Can I try before committing? Absolutely. You have 30 days to try Carnity. If you're not satisfied for any reason, simply submit a refund request. No explanation is required. Visit the Contact Us page and let us know you'd like a refund. Refund requests are processed on the same day and are typically credited back to your card within 3 working days. Can I transfer my previous off-road experience? Yes. If you already have desert-driving experience, you may be eligible for fast-track promotion to Fewbie Level after completing one Newbie drive. Our marshals will assess your driving during your first Newbie drive, taking into consideration both your self-declared previous experience and your demonstrated driving skills. The final level assessment will be made by the Carnity team. REQUEST YOUR PROMOTION HERE Ready for Your First Carnity Drive? Follow the steps above, prepare your 4x4 and required equipment, complete the Newbie briefing, and RSVP for your first drive. Welcome to Carnity. Drive safe, keep learning, and enjoy the adventure. If you need further assistance, send us a message at CONTACT3 points -
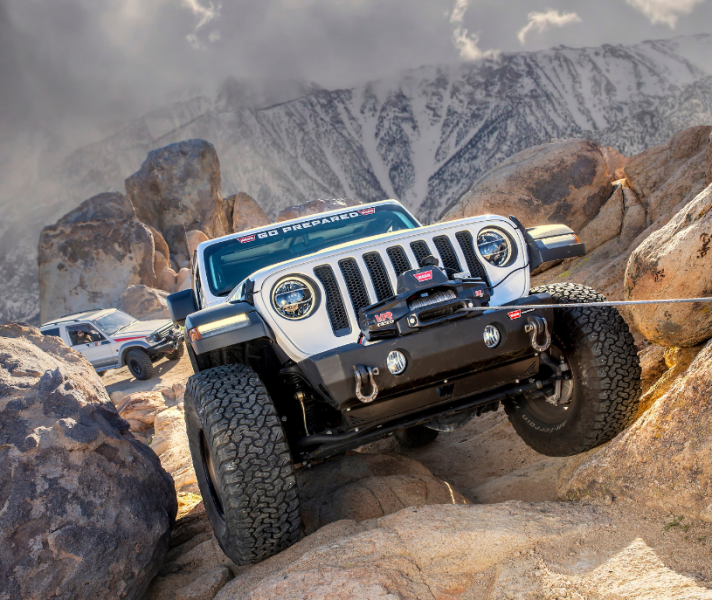 This tutorial is aimed at providing you a basic understanding of your winch and the proper way of using it, with an emphasis on safety. As every winch recovery is different, it is impossible to describe every possible scenario. But with providing you the basic techniques you will be able to understand how to operate your winch, and in the case of an assistant/buddy , know what to do when assisting during the recovery process. The main important aspect of winching is to THINK through each situation BEFORE jumping into action. Applying a bit of common sense goes a long way and remaining calm is ESSENTIAL. WHICH ACCESSORIES SHOULD I HAVE Hook Strap The Hook Strap is used to hold the hook and keep fingers away from the fairlead as the rope is being spooled in. Snatch Block The multi-purpose snatch block allows you to: (1) increase your winch’s pulling power. A double line rope pull will halven the load on your winch. (2) change your pulling direction without damaging the rope. Rope gloves Having proper gloves is essential to perform winching. On a steel rope you can easily cut yourself, while with a synthetic rope there is risk of burning your hands if you hold on to the rope. D-Shackles or Soft Shackles Will be used to connect your winch to the object that need to be winched. If your winch has a hook, then you can use the hook directly. WORDS OF CAUTION -Never attach a recovery strap to the winch hook to increase the length of a pull. -Never use kinetic straps that develop tremendous and potentially dangerous amounts of force when stretched. -Never operate winch with less than 5 wraps of rope around the drum. Rope could come loose from the drum, as the rope attachment to the drum is not designed to hold a load. -STAY CLEAR FROM THE ROPE AT ALL TIMES WHEN IT IS UNDER LOAD. STRETCHING YOUR WINCH ROPE FOR THE FIRST USE The life of a wire rope is directly related to the use and care it receives. Tensioning the wire rope is critical to ensure a long product life. Tensioning the wire rope will prevent outer layers of wire rope from pinching and deforming the inner layers. During its first use, a new wire rope must be spooled onto its drum under a load of at least 500 lbs. (227kgs). Use the following instructions toproperly stretch the wire rope onto the winch drum: BEFORE YOU PULL Practice using your winch before you get stuck. A real situation is no time to be learning how to use your winch. Whether you’re recovering another vehicle or pulling a stump from the ground, knowing the proper winching techniques can help keep you and others around you safe. And perhaps the most important part of the winching process, regardless of the situation, is what you do BEFORE you pull. 1. Always take your time to assess your situation and plan your pull carefully. 2. Always take your time when using a winch. 3. Use the right equipment for your situation. 4. Always wear gloves and do not allow the rope to slide through your hands. 5. You and only you should handle the rope and operate the remote control switch. 6. Think safety at all times. 7. Practice. Practice and practice the steps. RIGGING FOR THE PULL The following steps describe how to recover your vehicle with rigging a single line pull. Double or multiple line rigging techniques follow the same basic steps,but use a snatch block to assist the process. Step 1: PUT ON GLOVES. Step 2: DISENGAGE CLUTCH. To allow free spooling of the winch drum, rotate the clutch lever on the winch to Disengage. Freespooling conserves battery power. Step 3: FREE THE WINCH HOOK AND ATTACH HOOK STRAP. Free the winch hook from its anchor point. Attach hook strap to the hook (if not attached). Step 4: PULL ROPE TO THE STUCK VEHICLE Pull out enough rope. Be sure to keep certain amount of tension in the wire as it can become twisted and overwrap when slackened, leading to rope damage. To prevent loosing the end, hold the winch hook in the hook strap while you work. Step 5: SECURE TO THE STUCK VEHICLE. Use Soft Shackles or a rated D-Shackle. Step 6: LOCK THE CLUTCH. Lock the winch drum by rotating the clutch lever on the winch to Engage. Step7 : CONNECT THE REMOTE CONTROL. Be careful not to let the remote control cord dangle in front of the winch. Always disconnect the remote control when not in use. Step 8: PUT ROPE UNDER TENSION. Using the winch switch, slowly wind the rope until no slack remains. Once the rope is under tension, stand well clear, and never step over it. Step 9: CHECK THE VEHICLE THAT WILL BE PULLED. Communicate with the vehicle owner about your course of action, and ask him to put the vehicle in 4LO. Do a last inspection of the connection before starting the pull. Step 10: CHECK ROPE. The ropeshould be neatly wound around the spooling drum. Improper winding can cause damage to the rope. Step 12: LAY SOMETHING OVER THE ROPE, if you decide it is necessary, midway between the winch and the anchor point to absorb energy should the rope snap loose. Tree limbs, heavy jackets, chain, back pack and the like may be used for this purpose. Step 13: MAKE YOUR INTENTIONS CLEAR. Be sure that everyone in the immediate vicinity surrounding the winching operation is completely aware of your intentions before you pull. Declare where the spectators should not stand — never behind or in front of the vehicle and never near the rope or snatch block. Your situation may have other “no people” zones. Step 14: BEGIN WINCHING. With the winching vehicle’s engine on and light tension already on the rope, begin winching slowly and steadily. Be sure that the rope is winding evenly and tightly around the spooling drum. The vehicle may be steered while winching but not driven. Driving vehicle causes rope to become slack and entangled. It is advisable to winch in "blips" by pushing the button for 2-3 seconds, followed by a pause of 5-10 seconds. This helps to keep the winch motor cool and during this time you can keep inspecting if the rope loops well on the winch or if no damage is occuring to the stuck vehicle. The stuck vehicle can also give gently blips of throttle to help the recovery process. During desert recovery of another vehicle, it is not advisable to keep the winching vehicle in (P) Park, as this causes a huge load on the transmission and might even damage the transmission. Use your handbrake, stay inside the vehicle, and keep your brake pedal pressed in hard. Use the remote to control the winching process, and have a buddy standing on a safe distance to act as a spotter. Use your radio to communicate with the stuck vehicle and your spotter. SOME LAST HINTS: A winch is very powerful, yet you should ALWAYS try to reduce the stress of the recovery, by deflating the stuck vehicle further down, and shoveling/creating a path where the vehicle can drive out with assistance of the winch. So make sure the wheels are free and can freely rotate. A winch recovery should always be done straight, and not under an angle as this will severely increase the risk of damage to the rope or stuck vehicle. If you need to pull from an angle you can use a snatch block.1 point
This leaderboard is set to Dubai/GMT+04:00