
Leaderboard



Popular Content
Showing content with the highest reputation since 10/08/2026 in Posts
-
Learning to turn down early is one of the most important skills to learn, once this in ingrained then the higher-level skills can be built from this base.6 points
-
Wasn’t sure which section of the forum to post this on but here we are. I have spent the last 6 months working on this. It started with a collection of notes written in many notebooks over many years and I decided to combine it into one document. Knowledge is meant to be shared. And before anyone asks, yes I used AI for editing but all is from my own brain and experience. I also have 20+ years of notes on restoring classic cars and planning to do the same with it soon. Feel free to download, to use, to share. If anyone learned something new, say hi! https://drive.google.com/file/d/1wulT8I2P2FRKoixpPqMWU936CaBvq04q/view?usp=drivesdk5 points
-
@Enrico - Mountain yes definitely. I believe in this scenario he was riding a ridge that was not straight: it was turning to the right. The lateral forces pushed the vehicle off the ridge and he was fighting for a while to stay on the ridge but turned down too late.5 points
-
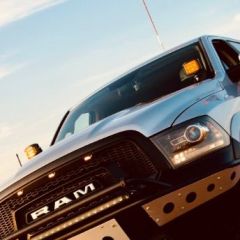
Sure @Frederic On the RAM, @Imran Asghar you should have two separate kill switches, and I believe that’s what you have installed: Kill Switches 1. Airbag – a separate kill switch. 2. Traction Control/ABS – a separate kill switch. For the airbag, the connection can be taken from the seatbelt circuit or another airbag related wire. For traction control/ABS, it can be taken from: Traction/ABS 1. Fuse box (This works for my car) 2. Directly from an ABS sensor. (This doesn't work for most of the cars) On some RAMs, taking the connection directly from the ABS sensor can prevent you from engaging 4WD totally. I actually tried this on mine once, when I was investigating a thudding sound that eventually turned out to be coming from the front differential. But when I connected it through the ABS sensor, I couldn’t engage 4WD at all. However, in your case, if you have two separate kill switches and you have (Traction/ABS done through the fuse box) the truck only drops back into 2WD when you’re stuck or applying a lot of power, I would be more suspicious of an issue with the transfer case or the 4WD system itself. My thinking is that if the kill switch were the main issue, you’d expect to see problems engaging 4WD totally or while during normal 4WD driving as well, rather than it happening only under heavy load. When you try to push harder may be it slips. That said, it’s difficult to rule out an electrical issue without checking the fault codes and wiring, especially with the check engine light on. I’d get those checked before concluding that it’s the transfer case.5 points
-
Congratulations with your birthday @Myrko and being our Member in the Spotlight for this week! You've mastered that beautiful Defender of yours and it's always a pleasure having you in our drives. All the best!
 3 points
-
Hi Fred, A friend in Ireland said the same thing to me. People these days have short attention spans. Personally, I like books. I can check the index and go to what I need to know. But I totally agree with what you are saying. I do like your idea. Way back in the early days there was a technical article section on Carnity where I used to write about topics like how to diagnose faults on your own vehicle. No idea what happened to it. I’m open to doing something like that again if you’re interested but this time maybe concentrate more on the 4x4 side of things. Hit me up and we can discuss further. Zubail, thank you for your kind words. I have spent my whole life working on cars. People taught me, now it my turn to pass it on.2 points
-
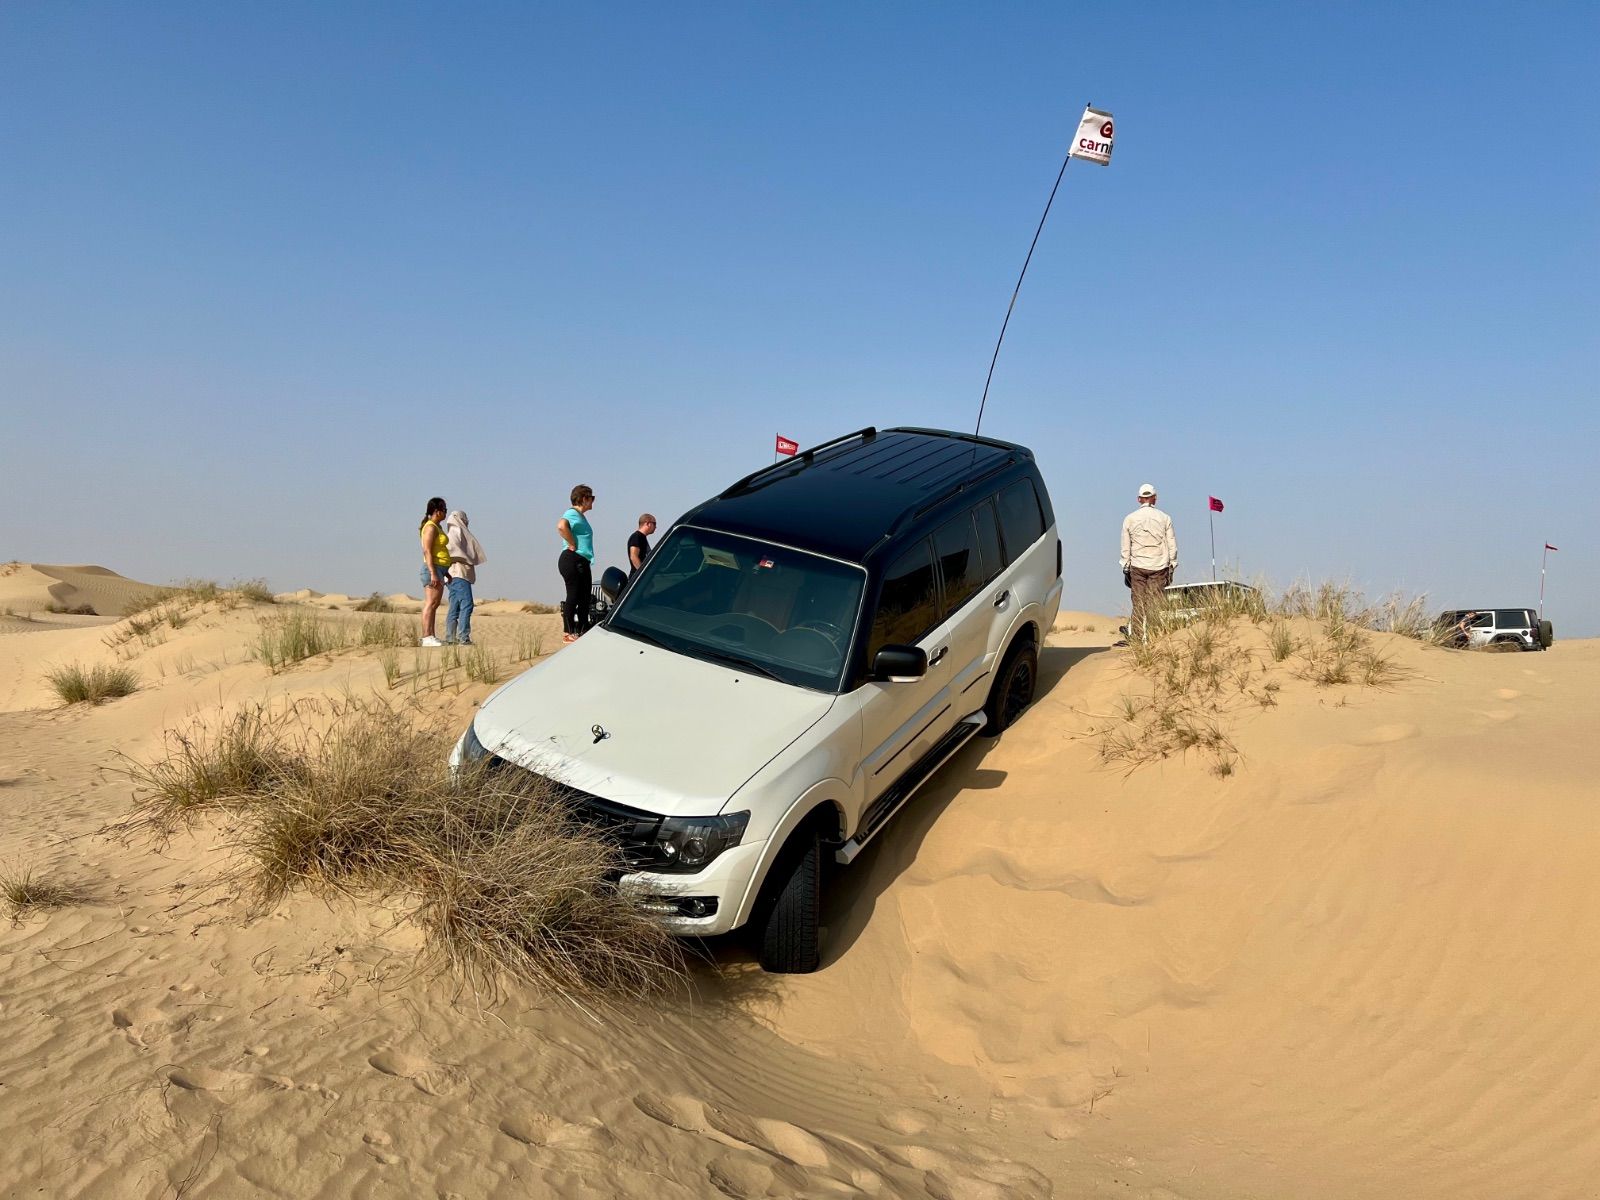
Sure @Rachid it is easy.. just like this Or like this
 2 points
-
@Barry Barry, this is absolutely brilliant! Hats off to you! I've always admired people who can put together something so incredibly useful and well thought out. Truly impressive work! Thanks so much for sharing it with the community!2 points
-
Thank you @Frederic for the kind words and the trust! I’m honoured to join the Support Team and grateful to everyone who has guided and encouraged me throughout my Carnity journey. I’ve learned so much from this community, and I’m excited to give back, support fellow members and continue learning alongside you all. Looking forward to many more great adventures together. See you on the dunes! 🏜️2 points
-
Thanks everyone for this amazing journey and fun moments. I have never had so much fun in sand since I was building castles on a beach when I was 5 🤣2 points
-
Nice write up @Infaz. One other note @Imran Asghar how have you determined that you need a kill switch for ABS? A lot of the trucks these days have specific modes for offroading (specifically sand/mud) that will 'almost' disable all traction controls.. except in instances where a lot of one wheel slipping is detected. In those cases the ABS can often apply brakes to one wheel to allow the other to get traction. (Think fake front diff lock) Assuming you dont have a dedicated factory front locker? Worth investigating what drives modes you have, and what changes they effect on the overall system before trying to trick the computer into disabling ABS etc through shorts. FWIW, many people install kill switch with various levels of success in the ford ranger, whereas i have left it be. I find that engaging certain offroad modes,.. plus long press on traction off.. gives me more than enough offroad performance without having to go down paths of messing with the wiring to put car into disabled modes..2 points
-
https://youtube.com/shorts/AmCq8_Mj8Vk?si=yEJN3EXRe_-WoVd7 Here, nothing went wrong because it was a Bronco Raptor?2 points
-
@Frederic this is a very poignant example of exactly what I asked you about on Sunday's drive, and the importance of steering down early.2 points
-
Well done, and well deserving, Congratulations @Infaz !2 points
-
You’re right @_Herman_! Getting back in the game and will be seeing you very soon in the sands!2 points
-
Great news ! You had the DNA from day one . Congrats @_Herman_ !!2 points
-
Thank you @Frederic! And thank you all @_luke_, @Infaz, @khurramm and@Sam Selim. Really looking forward to adding to this welcoming and supportive community and finding out what this step will teach me. See you all in the sand soon, more adventure ahead!2 points
-
Really happy to hear this...congrats @_Herman_ 🎉🎉2 points
-
Well deserved!! Conggrats @_Herman_ Carnity support team is getting stronger!! 💪2 points
-
Congratulations @Waqarㅤ looking forward to driving with you soon!1 point
-
Thank you @Mahesh_ Much appreciated. Thank you @Rasna Looking forward to driving with you soon! Thank you Professor @Ishak looking forward to learning your Fewbie tips and tricks on the next drive!1 point
-
ongratulations @Lukas Wii for reaching Fewbie Plus Level with Carnity Offroad Club! Looking forward to seeing you growing further and helping others to learn the art of offroading in a safe environment. Well done! FEWBIE PLUS Drives Attended (Indicative) Minimum 10 Fewbie drives are required within last 6 months for Fewbie Plus promotion. What you'll learn Advance dune and sand reading Advance recovery techniques Rocking and crawling to make path Learn to flatten/compact soft sand patch Self recovery from crest Advance side sloping and long hill climb Advance ridge riding and criss crossing Advance control over technical dunes Slightly faster pace desert driving FULLY control and avoid fishtailing Never fight or challenge gravity Skills required Enthusiastic and positive attitude Willingness to learn and help others Extremely attentive and focused while driving Car Worthiness Any 4x4 vehicle with low range gearing Suitable approach and departure angle Bash plate and skid plate protected Off-road gear required Safety flag, tire deflator, tire pressure gauge, shovel, fire extinguisher, medical kit, radio (walkie-talkie), air compressor. Drive teamwork Manage second lead and sweep positions upon request Intuitive and proactive to support Trip Lead Observe recoveries and offer help, when needed Drive Joining Join Newbie, Fewbie and Fewbie Plus drives Forum participation Active participation on the forum Share drive experience + feedback Share drive pictures in the gallery Post trip report after the drive1 point
-
Congratulations @Waqarㅤ!1 point
-
Congrats @Waqarㅤ🎉1 point
-
Congratulations @Waqarㅤ, welcome to team Carnity!1 point
-
congrats @Waqarㅤ1 point
-
Congratulations @Rachid on your promotion to Fewbie level, it is well deserved.1 point
-
Thank you !!!🎉😊1 point
-
@_luke_ thanks cant wait to join yours.1 point
-
Congrats @Pierre-andre Nutte🎉1 point
-
Congrats @Pierre-andre Nutte1 point
-
@Fredericthank you. And big thanks to team carnity.1 point
-
..... What went wrong? https://www.instagram.com/reel/DeuL0ySPySN/?xtok=bmx6YzNzcDNnOWkz1 point
-
Congratulations @Infaz for joining the Support Team with Carnity Offroad Club! From early on we could see your enthusiasm and your willingness to help people during the drives. That's why it comes as no surprise that a Support Team role is a perfect fit for you! We are proud and happy to have you joining Team Carnity and look forward for your future growth in Carnity! SUPPORT TEAM Pre-requisite 1) Minimum 10 any level "Carnity" drives are required after your Intermediate promotion to become eligible for the Support Team. Once you decide to join Team Carnity to excel further with your off-roading, people, and commanding skills, you will be extensively trained by the whole Team Carnity from Expert - Marshal - Crew at various stages by supporting different levels drives. Activities for Support Team Members Support different Marshals and Crew at Newbie level drives to demonstrate: Your ability and willingness to support new off-roaders. Ability to gain control of commanding situations. And clear communication skills to help manage the convoy. Possible progress toward becoming an Advisor Once you have proved to be a regular Supporting Team member and have supported different trip leads on several Newbie and Fewbie drives, we will gather your periodic feedback. Based on this feedback and reviews you might receive an invitation to become a Carnity Advisor for further advancement within our community. You will also need to have completed a minimum of 5 Intermediate Level drives, and be a regular club member (minimum supporting 6 Newbie or Fewbie drives per quarter) to become eligible. Being invited to an Advisor role means we put our faith in you as a passionate club member who displays maturity and passion to carry your knowledge on to new off-roaders who are still progressing through the ranks.1 point
-
Congratulations @Infaz. very well deserved.1 point
-
Best news of the week @Infaz, really looking forward to having you on support soon.1 point
-
welcome on board @Infaz. looking forward to more drives with u1 point
-
Congrats @Infaz 💥💥1 point
-
Mabroook Brother, you deserve it. Looking forward for the days where ul lead eventually.1 point
-
Congrats @Infaz, well deserved.1 point
-
Thank you @Frederic and thank you to everyone who has supported and guided me throughout this journey. A very proud moment for me and I’m genuinely happy to be part of the Carnity Support Team. Grateful for the encouragement and all the support along the way. Looking forward to learning more and contributing to the community!1 point
-
@Imran Asghar let's try to tackle the issue you faced yesterday and update this topic. @Infaz as you are driving high level drives with the RAM, could you clarify how you disable the airbags and traction control? Imran had kill switches installed for disabling both but found the car going back in 2WD during a stuck situation. Check Engine Light was also on, so we suspect the kill switches (installed by dealer) are throwing the RAM into a tantrum.1 point
-
Congratulations @_Herman_ well deserved.1 point
-
Well-done @_Herman_ and welcome to the team.1 point
-
Congrats @herman, welcome to the team! You are a great addition1 point
-
Nice one, @herman! Guess I have a new target now ;-)1 point
-
Congratulations @_Herman_, welcome to team Carnity!1 point
-
Great to have you onboard @_Herman_1 point
-
another Spanish stallion rising! well done1 point
-
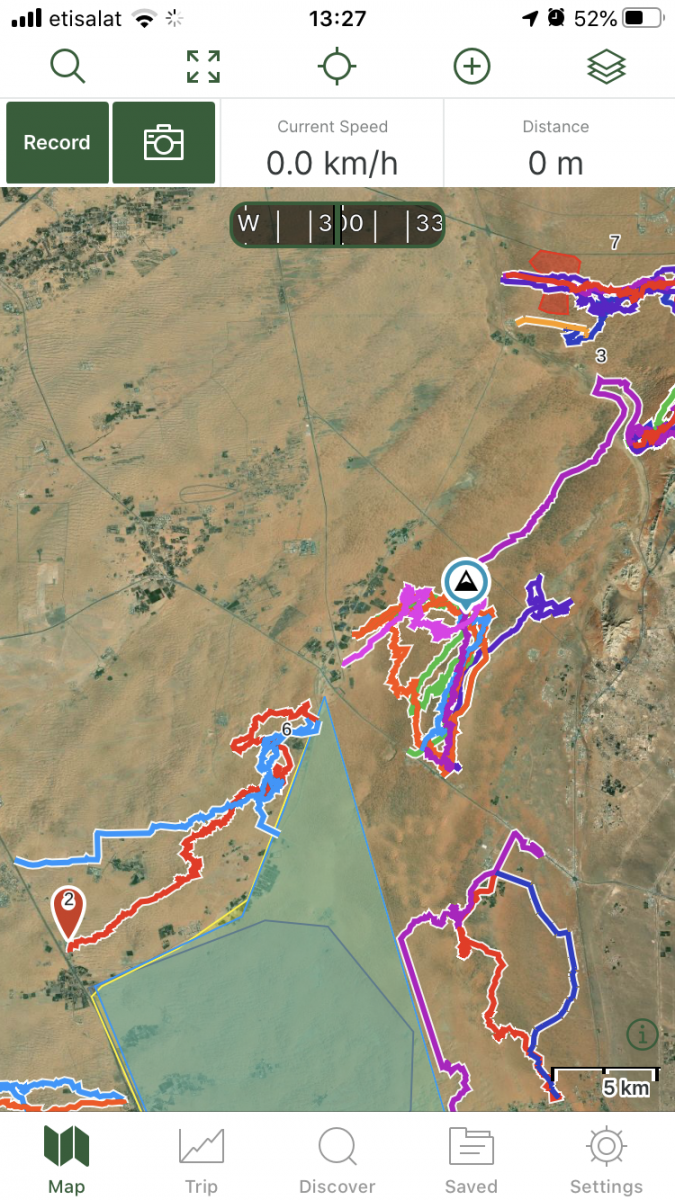
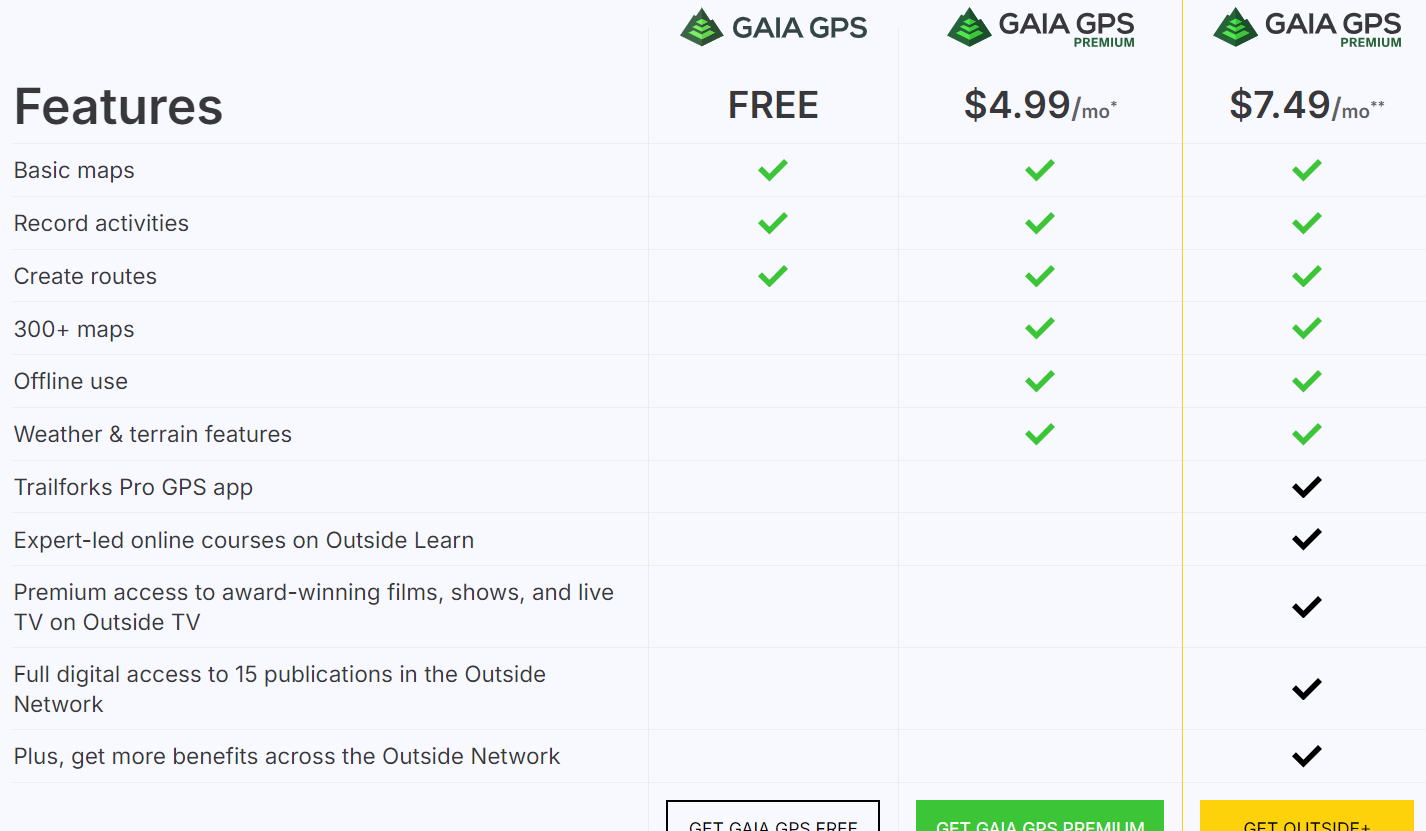
For many offroaders, navigation looks like a scary thing, and finding your way in the desert used to be a daunting task with old obsolete maps, navigation with sun or stars, and many other old tricks of crossing the deserts. Until 5-6 years ago, companies like TomTom and Garmin were ruling the world navigation software and hardware, until our phones became smarter and smarter, and nowadays there are tons of free or paid navigation software programs available which are tailored for hiking, off-roading, cycling, or other outdoor activities where you would like to record your tracks. In this post i will give some basic essential advice on how to get started with navigating by using GaiaGPS, which is an amazing app that allows you to: 1) Create routes at home via your desktop/tablet through the GaiaGPS website. 2) Use different types of maps like topographic maps, sattelite maps, to find your perfect route you'd like to explore. 3) Save and manage all your tracks, waypoints, areas. 4) Automatically sync all this data with the GaiaGPS Mobile App that is being used to record your track or follow the route you have created beforehand. 1) Registering for GaiaGPS account https://www.gaiagps.com/membership/ You can choose for a FREE account, which works fine for basic topographic and satellite maps, but will not allow to use them offline. The PREMIUM membership is recommended for around 60USD per year. The Outside+ subscription is useless as this is mostly for US based customers. Their Trailforks Pro App is very similar to Wikiloc. Once you have become a member, you can head over to Gaiagps.com, login with your account name, and have a look at the basic functionalities. I've posted a short video below that gives a small demo on how to use the GaiaGPS website functionalities. As you can see in the screen, there are many tracks i've recorded with my phone that remain saved in the website. You can remove these or hide them. The red zones i have marked are called "areas" where you can identify tricky areas that you would like to avoid. They will appear on your phone app as well so you can easily avoid them. Waypoints Waypoint, or pins, could be points of interest, landmarks, entry and exit points, or any place where you want to mark the location and save for later reference. They will appear as a "pin" on your map. You can assign a color to them as you like. This might be useful as you can categorize them. Next to the classic PIN icon, you can choose different other ones, like fences, skulls, forest, or anything that will help you in identifying the waypoint. Satellite Images Having crisp detail in the satellite images you are looking, is essential so you can create a route which focuses on the nice bigger dunes instead of the small technical or bushy areas. Gaia comes standard with the Mapbox "Sattelite with Labels" Imagery which is not bad, but the best one i have found so far is the ESRI Sattelite Imagery Map. Below you will find some information on how to add custom maps. The map called "WORLD IMAGERY" in the Premium version is the same as the ESRI Sattelite Imagery Map. Which phone ? Gaia GPS will work on any smartphone that has a decent GPS antenna built-in. In my case i purchased a separate dedicated Android phone which is mounted in my car that i solely use for navigation. This allows me to keep using my own phone as backup device. That dedicated phone has the offline maps downloaded on it, so i don't need cellphone coverage (no sim card). App functionality On an Iphone, this is how the app looks like. The buttons like "RECORD" and "PICTURE" are customizable, and by keeping your finger on it you can select something else you would like to see on the home page. The Magnifying Glass allows you to enter coordinates. You can copy them from within Google Maps. this button toggles between full screen or normal screen. The crosshair button is very important. Click on it once and it will appear green and bring you to your live location and follow you while keeping NORTH up. Click on it again and another logo appears, looking like two reversed triangles. This is the mode that keeps your live location but constantly rotates the map based on your direction. You can experiment with both modes to see what suits you best. I like to stick to the first mode because it allows me to see in which compass direction i am heading. The + Button contains all your other useful functionalities, like adding a waypoint, creating a route, download an offline map, or create an area. Once you hit the record button, the app will start recording your track. Once you finish, click again on it and select "Finish Track" It will then be saved. (and also appear on your GaiaGPS website once you have synced). On the bottom, you can see your trip details, open the list of saved tracks, or go to your settings. Note: In the settings you can put your units/distances in miles or kilometers (whatever you prefer). You can also enable or disable the autosync function, but better to keep it on. So as soon as you have Wifi/Internet on your phone it will automatically sync your tracks between the app and your GaiaGPS account (website). These things will take a bit of practice, and i can recommend you use your Gaia mobile app for a while on your daily commute and experiment a bit with the settings until you have tailored it to your own needs. Exporting Maps Most navigation software use .gpx or .kml files which you can import in Google Earth / Maps or any other navigation program. On the GaiaGPS website, and also on the app you can choose to "export" your track. It will create a .GPX file that you can share with fellow offroaders or import in the Relive app Adding Custom Maps Adding a TMS Map Source – Gaia GPS for the GaiaGps app users, the Google Maps like Satellite, Terrain, or Hybrid, are not standard built in, but can easily be added by using the GaiaGps website. This is the procedure to add for example Google Terrain. 1) While logged into Gaiagps.com, add a custom map source via TMS here: https://www.gaiagps.com/mapsource/add/ 2) Fill in this TMS URL to get Google Terrain: https://mt0.google.com/vt/lyrs=p&hl=en&x={x}&y={y}&z={z}&s=Ga 3) Give it the name "Google Terrain" 4) Set the Min and Max Zoom level on 4 and 19. 5) Click on "Add this Map Source" The next time you will login it will appear in your mobile app. Some other map links. To add them, follow the same steps as above: Google Maps: https://mt1.google.com/vt/lyrs=r&x={x}&y={y}&z={z} Google Satellite:https://www.google.cn/maps/vt?lyrs=s@189&gl=cn&x={x}&y={y}&z={z} Google Satellite Hybrid:https://mt1.google.com/vt/lyrs=y&x={x}&y={y}&z={z} Google Terrain:https://mt1.google.com/vt/lyrs=t&x={x}&y={y}&z={z} Google Roads:https://mt1.google.com/vt/lyrs=h&x={x}&y={y}&z={z} ESRI Sattelite Imagery:https://server.arcgisonline.com/ArcGIS/rest/services/World_Imagery/MapServer/tile/{z}/{y}/{x} Open Topo Maps: https://a.tile.opentopomap.org/{Z}/{X}/{Y}.png Others can be found here: Folder: / (arcgisonline.com) 15 Free Satellite Imagery Data Sources - GIS Geography


 1 point







This leaderboard is set to Dubai/GMT+04:00