-
4.9 Stars ⭐⭐⭐⭐⭐ 450 Google Reviews


Barry
-
Posts
2,895 -
Joined
-
Last visited
-
Days Won
253 -
Country
Singapore -
Carnity Points
141 [ Donate ]
Content Type
Profiles
Forums
Advice
Business Listing
Car Deals
Recall
OBD II Car Diagnostics
Guest lead capture
STORE
Events
Gallery
Blogs
Everything posted by Barry
-
@parkarnoor Why did you have to visit the dealer? What went wrong with your car?
-

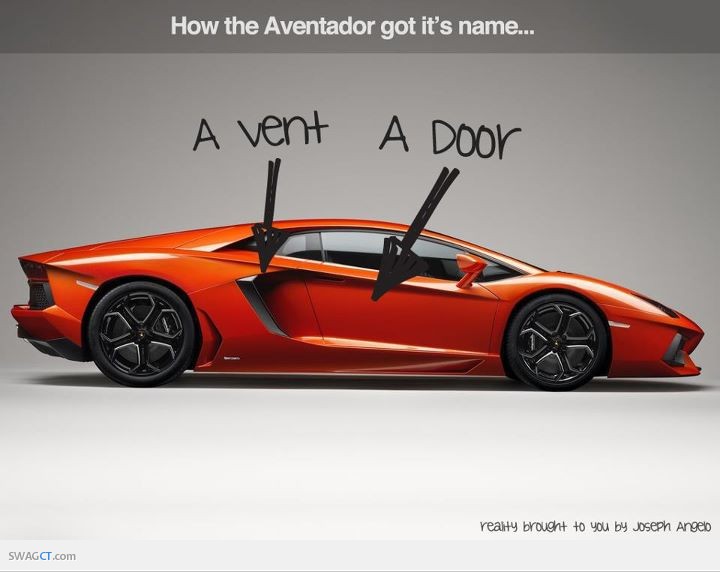
Interesting facts about car names in different countries
Barry replied to Barry's topic in General Discussions
Haha very true! I once bought an old seized engine from an Alfasud because I wanted the carbs and linkages to modify for a Beetle project. When I went to pick it up, the engine still had the mounts on it and two little pieces of tin hanging off each side. I asked the guy what that was all about and he told me that was all that was left of the car. -
Interesting facts about car names in different countries
Barry replied to Barry's topic in General Discussions
I had an Ascona once. Had loads of fun on damp roundabouts with it but I think it came with factory fitted rust. -
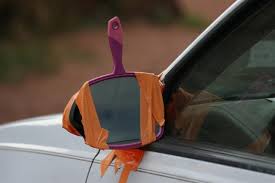
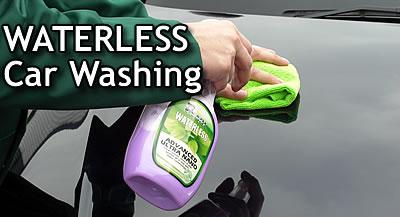 Waterless Car Washing Imagine that a hose uses 40-50 litres of water per minute. Within ten minutes, you have used 400-500 litres. With water being such a precious commodity in the desert you may ask yourself how to wash your car. It is possible to simply rub the dirt off with a cloth but in doing so, you will scratch the paint. To wash your car without water, you will need four or five high quality microfiber cloths depending on the size of your car and a spray bottle of waterless cleaner. One bottle of cleaner should be enough to wash your car approximately 4 times, again depending on the size of the car. There are many different waterless cleaners available on the market such as Meguiars Ultimate Wash, Ecotouch WCW, Griots Spray On etc. I’ll leave it up to you to read the reviews of different products online and decide which one is right for you. Clean the car one panel at a time, starting from the roof and work your way down. There’s no point starting at the bottom and working your way up as the cleaner will run down onto the bit you have already cleaned and you will be constantly chasing your tail. Simply spray the waterless cleaner onto the panel you are cleaning, then use a clean towel and wipe the dirt off. Don't use so much pressure on the cloth that you rub the dirt deep into the paint and create scratches. When the piece of towel you are using becomes dirty, fold it and use a clean part until it is completely dirty, then use a new towel. When you have cleaned the panel, wipe it entirely with a clean towel to remove any leftover moisture or dirt. Once you have finished cleaning the entire car, it helps to apply a good coat of wax. Not only will this keep a good shine to your paint but it will also help you to remove dirt next time you wash. **DISCLAIMER** I accept no responsibility for any harm or damage caused by anyone cleaning their car. This is only a simple guide on waterless cleaning. Always use high quality products and follow the manufacturers recommended instructions.
-
- 5
-

-
- waterless
- waterless car wash
- (and 1 more)
-
Interesting facts about car names in different countries
Barry posted a topic in General Discussions
When the Toyota MR2 was released in France they renamed it the MRS. When you say MR2 in French it is M R Deux, which sounds exactly like merde, the French word for shit. The Mitsubishi Starion was originally supposed to be named the Mitsubishi Stallion. When you say Stallion in a Japanese accent, it sounds like Starion. Someone in Mitusbishi heard the car being called the Starion, wrote it down wrong and the name stuck. The Mitsubish Pajero had to be renamed as the Shogun for the Spanish speaking market. When Pajero is translated from Spanish, it literally means wanker. The Vauxhall/Opel Nova was rebranded as the Corsa for the Spanish speaking market. Nova translated means not going, as in always broken. The Mazda LaPuta was not released in the Spanish speaking market. Translated, it means the whore. The Nissan Moco was also not released in the Spanish speaking market. Translated, Moco means booger. See a pattern developing here? Then there’s also the Opel Ascona. Translated from Spanish, Ascona means female genitalia. You’ll never see a Honda Fitta in Sweden. In Swedish, Fitta is a word for female genitalia. The Ford Pinto was marketed in Brazil but failed to sell in any numbers. Pinto is the Brazilian word for penis. People weren’t exactly keen to buy one and say hey, come and look at my new penis. And finally the Mazda Light Dump and Titan Dump. I think they speak for themselves. -
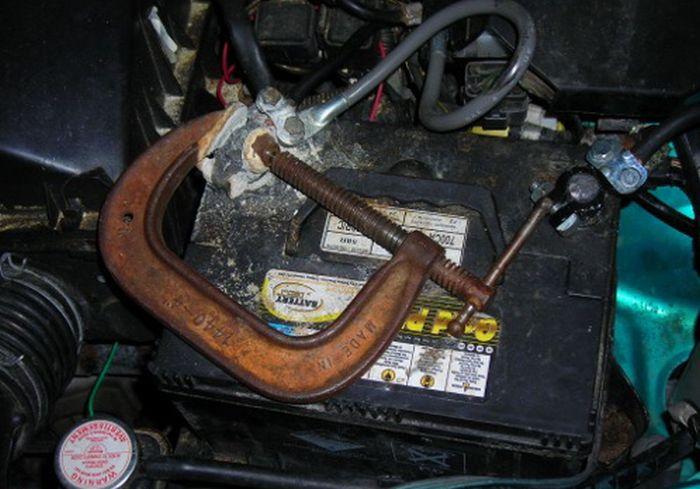
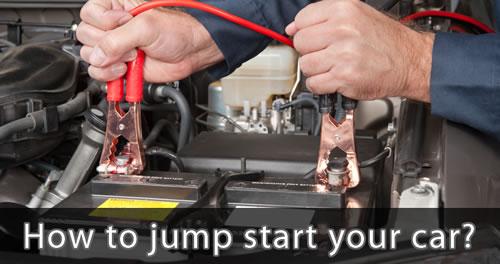 How to jump start your car when car battery dies? A car with a flat battery can be a real pain. Maybe you left the interior light on overnight, you go to start the car to go to work in the morning but nothing happens. You haven't got time to wait to call a mechanic or breakdown service, you need to be at that important meeting. This is where it comes in handy to always have a set of jump leads in the boot. Especially in a place like Dubai where most cars are automatic and it's not possible to simply push start them. If you haven't already got a set and are going to purchase some, make sure you buy good quality ones made from heavy welding cable. Some of the cheaper, light leads can overheat, melt, short and start a fire which will only add to your misery. If you spend the money on a decent quality item, it should last you for the rest of your days. Park both cars close to each other so the jump leads will reach both batteries without being stretched but do not let the cars touch. Ensure both vehicles are in neutral with the handbrake on or in park if automatic. Also ensure both vehicles are switched off with the keys out of the ignition. Check the terminals on both batteries for corrosion or damage. If there is a problem it will need to be addressed. Attach one end of the red lead to the positive terminal on the battery of the dead car then attach the other end to the positive terminal on the battery of the good car. Attach one end of the black lead to the negative terminal of the battery on the good car and attach the other end to an unpainted metal part under the bonnet of the dead car such as a large bolt or engine bracket. You're almost ready to jump start the dead car. First check that the ends of the cables are all secure and that they will not get caught in any moving parts such as fan, alternator belt etc. Start the engine of the car with the good battery and let it run for a few minutes whilst keeping a light rev on then try to start the car with the bad battery. If it starts, all is well and good. If it doesn't, let the car with the bad battery run for another few minutes and try again. If it still doesn't work, check your connections and if it still doesn't work, you may need to change the battery or call a mechanic. With both engines running, disconnect the leads in reverse order from which you connected them. If the battery in the car which was previously dead is ok, the alternator will charge it up again fairly quickly but if you're still having starting problems, you will need to address them. **Disclaimer** I accept no responsibility for any harm or damage caused by anyone jump starting their own car. This is merely a simple guide on how to do it.
-
- 1
-
-
- car not starting
- car battery jump start
- (and 3 more)
-
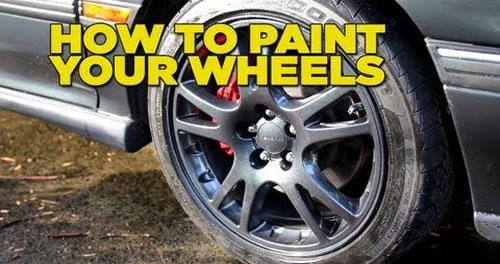 DIY: How to paint your wheels? A fresh looking set of wheels can make a big difference when it comes time to sell your car or maybe you just fancy a change of color to make your car that little bit more unique. As with any work involving painting, surface preparation is the most important part. Even more so than the actual painting. Runs and drips in paint etc. can be sanded and polished out but if the surface below the paint isn’t good, you’ll never achieve a good finish. How to: With the wheels removed from the car, give them a good wash and remove as much dirt as you can. Use a wire brush if the dirt is baked on or stubborn. If there are any really rough bits on the wheel, kerbing damage, corrosion etc. use 80 grit sandpaper to dress them down nicely. If there are large dents or scrapes, you can use some body filler to fill them up. When the body filler is dry, use some 400 grit sandpaper to make it nice and flat, the same level as the metal. Next comes the boring part. Sand the entire surface of the wheel with 400 grit sandpaper. The purpose of this is to ‘key’ the surface. Paint only sticks to rough surfaces. If you were to paint onto the original smooth finish of the wheels, chances are that it wouldn’t last and the paint would flake off. Make sure everywhere has been keyed, in all the little nooks and crannies. The next stage is very important. You need to make sure the surface is completely dry and free of water. Use a heat gun to dry everything nicely. If you don’t have one, a hairdryer will do just fine. Now you need to mask the tyre with tape so that it doesn’t get covered in paint. I find that if you wipe the tyre with thinners, it helps the masking tape to stick. Also mask the tyre valve and remove the wheel centre caps if you don’t want them painted. Now you’re ready to paint. There’s two ways you can do it, silver and cheap or different colour and slightly more expensive. I’ll explain the silver method first. You will need two tins of silver wheel paint. This doesn’t need primer or lacquer and will pretty much stick to anything you spray it on. Shake the can before you start and spray it on in nice smooth coats. Take your time, don’t make the coats too thick or the paint may run which will cause you headaches later. You can use the heat gun on a low setting or a hairdryer between coats to help them dry out. Leave the wheels for a few hours for the paint to harden, remove the masking tape and refit to the car. If you are painting the wheels a different colour, you will need two tins of primer. Shake the tins well and spray it on in nice light coats, using the heat gun or hairdryer on each coat. Leave the primer to harden for a few hours. This will make it easier to sand and prevent the sandpaper from clogging up then you rub it down. Rub the entire wheel surface down with 600 or 800 grit sandpaper to key the surface for the colour coat. You will need two tins of your preferred colour. Shake the tins well and spray on, again using the heat gun or hairdryer between coats. When finished, leave the wheels to dry overnight. This step is very important or the lacquer and paint may react leaving you with a terrible finish. You will need three cans of lacquer. Start with a nice light dusting of the lacquer. Leave this to dry for an hour and build up the coats. You don’t want the lacquer to dry out completely between coats as each layer will gel together and eventually form one thick layer. If you want a really nice smooth finish, it will help to leave the wheels to dry for a few days before you fit. When the lacquer is sort of dry but sticky to the touch, you can leave them out in the sun and the lacquer will bake nice and hard. **DISCLAIMER** I accept no responsibility for any harm, damage or poor paint finish caused by people painting their own wheels. This is just a guide to show you how simple it can be.
 -
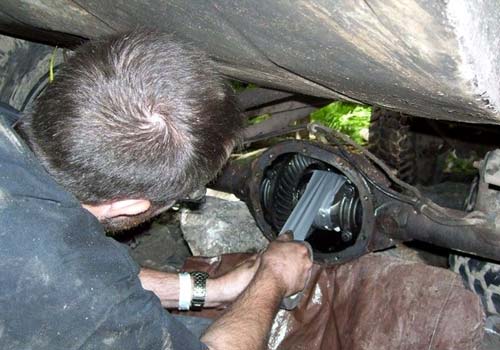
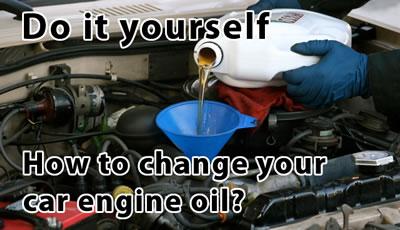 Do it yourself: How to change your car engine oil? Changing your car engine oil is one of the simplest jobs you can do it yourself and can save you both time and money. Before you start you will need to make sure you have the correct engine oil, correct engine oil filter, correct tools and empty container to collect the old engine oil . Your motor factor/parts shop will advise you on these. The first thing you need to do is run the engine for 5 minutes to warm the oil. Cold oil takes forever to drain and you'll never get it all out. Place chocks behind the rear wheels, jack the front of the car up and support it with axle stands. Never get underneath a vehicle that isn't properly supported. You may think it will never happen to you but I personally know two people who have been crushed and killed by falling cars. If the car has a plastic cover or metal bash plate underneath the engine, remove this. Keep the screws together in a small box, this will save them from getting kicked around the floor and being lost. Now you're ready to remove the sump bung. Place your empty container underneath and slowly screw the bung out. Be ready to move the container to catch the stream of oil and be careful as it will be warm. Also make sure the container will be large enough to hold all the engine oil. When the engine oil has finished draining, clean the bung, replace the copper washer (there should be one supplied with the new filter or ask your motor factor for one) and screw the bung back into the sump and tighten. Do not over tighten or you may strip the threads resulting in a leak. It's better still if you use a torque wrench but if you don't have one, it doesn't matter, just tight it nicely with reasonable hand force. Next you need to remove the old engine oil filter. If it is a metal spin on filter, use a filter strap, chain or other filter tool to unscrew it. When you have removed it, keep it the right way up. If you turn it upside down, you will end up with oil all over your nice clean floor. Take a smear of new oil on your fingertip, rub it onto the rubber gasket on the new filter and screw the filter on. You don't need to use a tool to fit the filter, just tighten it tightly by hand. If the car has a paper cartridge type filter, remove the lid of the housing and withdraw the filter. Remove the filter from the housing and dispose of it. Clean the lid. You will notice some rubber o-rings along with your new filter, change the old ones for these and smear the new ones with some fresh oil. Fit the new filter into the lid and screw it back into the housing taking care not to over tighten it. If your car has a plastic cover underneath, refit it. Aren't you glad you kept those screws in a little box? Next, jack the car up again, remove the axle stands and place the car back on the ground. Remove the oil filler cap and pour in the new oil. If you're worried about spilling, it may help to use a funnel. Unless you know the specific quantity of oil the car requires, fill a little at a time and keep checking the oil level on the dipstick until it reaches MAX. Start the car, wait 20-30 seconds and switch off. Wait a couple of minutes and check the oil level on the dipstick again. If you need more, add it but be careful not to overfill. Too much engine oil can do as much damage as too little. Start and run the car and check for leaks, there shouldn't be any if you have done everything right. Remember to dispose of the old oil and filter responsibly. Don't dump old oil down drains, it harms the environment. If you have everything you need to hand before you start, this should all take you around twenty minutes. Don't worry even if it takes you an hour though, it's not a race and enjoy doing something by yourself for the first time. **DISCLAIMER** This is only a basic guide to changing oil and filter. I accept no responsibility for any damage or harm caused by anyone changing their own car engine oil. Before you start, I recommend you read about changing oil for your specific model of car as per the car owners manual. There should be plenty of information online about it. I only seek to demonstrate how easy it can be.
- 1 comment
-
- 1
-
-
- diy
- oil change
- (and 4 more)
-
-
@amid You're 100% right. There's too much politics in clubs sometimes, with any make of car. It's all about power and control. People join clubs, have 'small penis syndrome' and start their own groups just so they can be in control. Before you know it you end up with 10's of dissident splinter groups with everyone fighting for control. Whatever happened to community spirit?
-
It's a fine looking automobile. Just a shame it doesn't have a manual gearbox option.
- 15 replies
-
- 1
-
-
- frod bronco uae
- ford uae
- (and 3 more)
-
My Pajero AC stops working after 120 km/h??
Barry replied to Luqman's topic in Mitsubishi Pajero Forum in UAE
Running without a thermostat will help the engine to run cooler initially but it's not something I would recommend as a long term solution. It's a last resort technique used when the thermostat fails and you need to keep the car running while you're waiting for one to be ordered in or you're having another overheating problem which you're waiting to get sorted. Without a thermostat, it will take the engine longer to warm up which means you're using more fuel, a bit like driving round all the time with the choke on (if you're old enough to remember chokes). Because you're using more fuel, it can cause the spark plugs to foul up which will affect running. The oil will take longer to reach operating temperature which means it's not doing it's job properly and may cause premature engine wear, bearing failure, piston ring failure etc. If you have an overheating problem, the only real solution is to find the root cause and fix it. Removing the thermostat is just burying your head in the sand. -
Just to lighten things up a bit 391595


-
Here's a guy using it on a car to strip paint. I'd love to see the actual finish up close though. When I worked in restoration, we used media blasting to clean the shells prior to starting work and sometimes it would leave the metal distorted which could be a real pain to sort. Personally, what I find funny in this video is the guy wearing sunglasses. If a 1000 Watt laser was to touch the glass and bounce back, it would melt his eyeballs, sunglasses or no sunglasses. I find laser technology fascinating, stuff like the space elevator blows my mind and how long before someone designs a laser engine which can be used in cars?
-
This looks like one bad ass machine. It uses a 1000 Watt laser to strip oxides, paint, oil and grease to prepare metal surfaces for work. Apparently it can be used for nuclear decontamination too Much cleaner alternative to media blasting. Best get saving though, I've heard they're around $500k.
-
@amitaj I think the reason second hand Toyotas are more expensive than other brands is because people know they are reliable and will spend a bit extra for that reliability. When you look at the old old cars around here (before 2000), 3 out of 4 will be Toyotas. Most other cars at that age end up on a scrap heap in Sharjah.
-
How to scan trouble codes?
Barry replied to jatin's topic in Peugeot General Discussion Forum in UAE
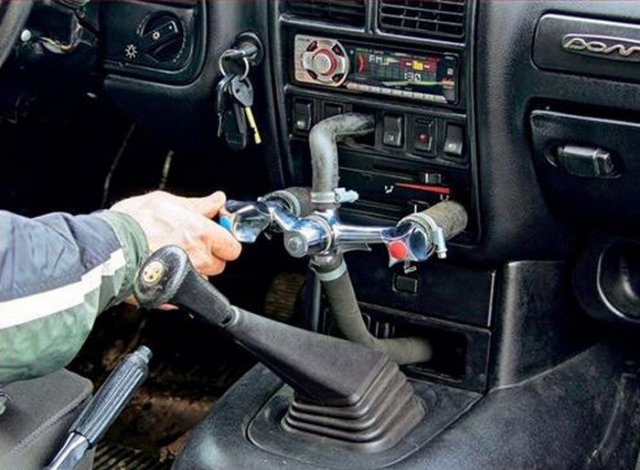
It IS possible to read DTCs on some Japanese cars without a scanner too. For example, Subaru, there is a sequence you can follow by using the headlight switch and trip reset button which will cause a red light on the dash to flash in long and short pulses, a bit like a Morse code. These can then be interpreted to the DTC if you have the workshop manual or there should be lists on the internet somewhere. Toyota has a similar system where you can count the flashes of the check engine light but to enable it, you need to jump the terminals in the diagnostics box under the bonnet. Same with Honda, you can jump 2 pins on the OBD port and count the flashes on the dashboard. I’m pretty sure similar methods work with other Japanese cars but you just need to look up what is specific to your car. -
Some pics from the last car show I attended in UK
Barry replied to Barry's topic in General Discussions
@robert Limavady, NI -
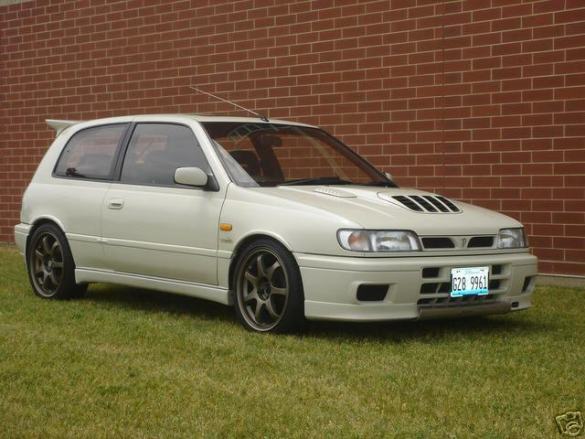
What's wrong with Sunnys? I present to you the Nissan Sunny/Pulsar GTi-R. 2.0 turbo intercooled, 230 BHP, 280 Nm torque, 5 speed gearbox coupled with a 4WD system and 0-100 KPH in just over 5 seconds. Japanese pocket rocket.
-
Rotarys are one of those engines that you either love or hate. I think they're great in theory, you can get crazy amounts of horsepower from something the size of a large shoebox. I looked at RX-8s as a cheap track car a while back, you can pick them up for as little as 1000 DHS in the UK but it didn't take me long to figure out why the cheap ones were all cheap! In the UK, we had a couple of rotary engined bikes in the late 80s early 90s. The Norton Classic which was air cooled then later the Norton Commander which was liquid cooled. The police ran the Commanders for a while. Cool old bikes but you don't see them on the road anymore, maybe only very rarely at a show.
-
@husain1 Why does anyone bother doing anything? It's because they are passionate about it and what they enjoy doing. Personally, I prefer shows like this rather new car shows where it's all bigwigs scratching each others bums and talking about how much money they made last year. Shows like this give you the chance to show off the work you done to your car, how you made it much more special than a car somebody just took from a showroom, it gives you the chance to meet like minded people and discuss new ideas and generally see what's going on in the modified car scene. It's always fun to watch the diff/drift at shows and even take part if you have the right car. When was the last time you went to a new car show and saw someone smoking off a pair of tyres just for the fun of it?
-
Koeningsegg/ValveFree are European companies but I think the reason you don't see it on mainstream road cars like VW, Audi etc. is that because the technology is still relatively new and therefore expensive, it would make it cost prohibitive to start fitting it to ordinary road cars although, I can see it becoming more commonplace in the next 10-15 years. A lot of people diss the Chinese but they forget that they're one of the fastest developing nations in the world and I don't doubt their ability to take this technology to the next level. I don't know why there aren't more Chinese cars on the road here. I see a few Great Wall pickups and Geely cars and they all seem perfectly fine to me. I think people don't trust stuff sometimes because it is 'Chinese', good old fashioned racism, but these days everything is made in China. Even my iPhone says Assembled in China on the back.
-
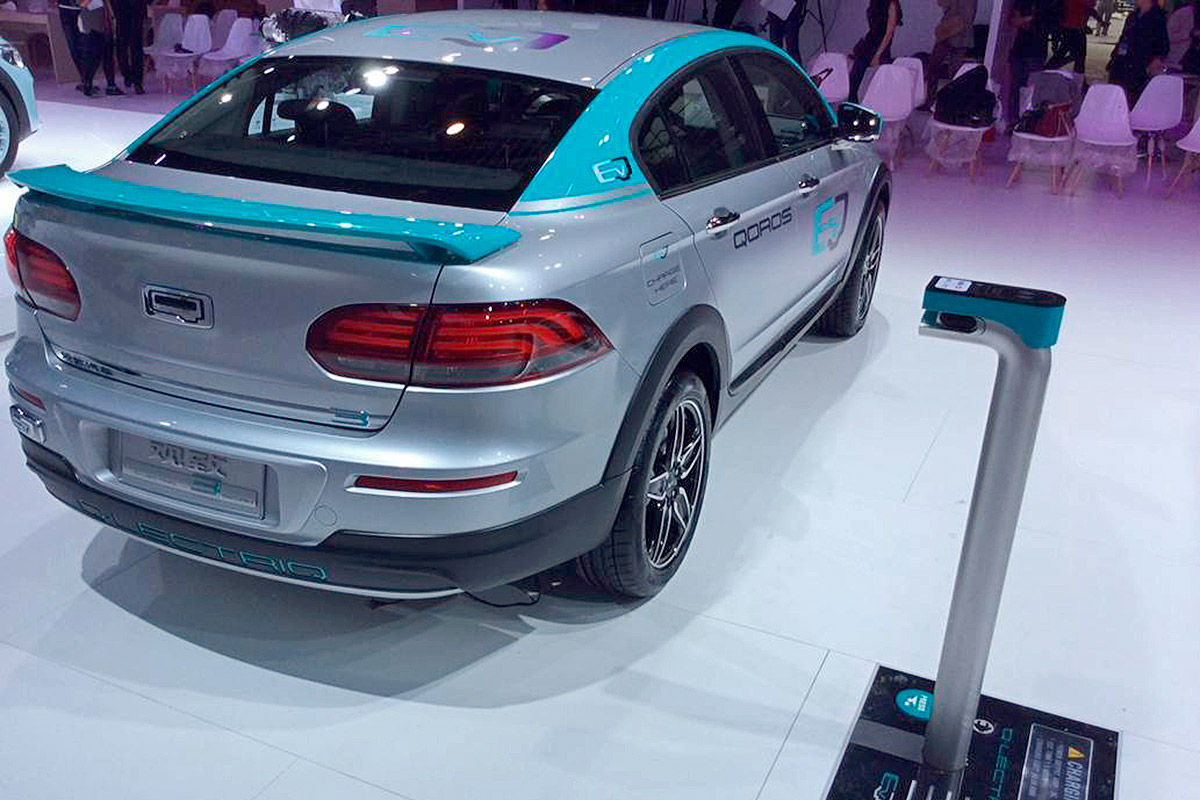
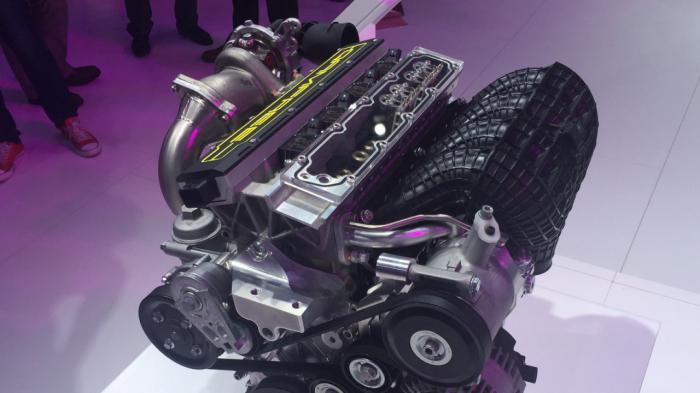
Chinese car maker Qoros have unveiled their Qamfree concept car at the Beijing motor show. This camless system has been developed by the Swedish company FreeValve AB who are part of the Koeningsegg group. Rather than using a camshaft and follower system to open and close the engine valves, it uses pneumatic hydraulic electric actuator technology (PHEA). This is a fantastic design, especially for tuners because rather than having to change mechanical parts to change valve lift, timing and duration, you will simply have to adjust a few parameters in the vehicles ECU. In theory, it's possible to have a button on the dashboard to push that can turn a vehicle from an economical town car to a full on race car in under a second rather than spends days or weeks rebuilding the engine. FreeValve are also claiming a 12-17% reduction in fuel consumption under laboratory conditions compared to the latest 2.0 litre direct injection engine with variable camshaft timing. They aren't the first company to have such an idea though, BMW, Fiat and Lotus have experimented with camless technology in the past but rather than PHEA, they used electromagnetic solenoids which can be heavy and slow. FreeValve are the first company to take such technology and make it viable.


-
In my opinion, injector cleaner is snake oil, something for people to sell and make commission. The only way to really clean injectors is to remove them and use ultrasonic cleaning and even then, it's something that rarely needs done. The colour of old oil can be an indicator of needing to change it. Sometimes you might buy a car without service history or maybe you just plain forgot the last time you had it changed. The simplest way to tell is rub some between your finger and thumb. The oil, even if black, should have a reddish/brownness to it and it should be 'slippy', after all, oil is a lubricant. If it's black/black and sticky it's definitely time to change it. Changing oil early won't do any harm but leaving it too late certainly might. I've seen people on an American truck forum saying that the engine oil has to be changed every 3000 miles. That's a bit severe in my eyes, especially in these days of synthetic oils where the service intervals are becoming further and further apart, there are some VW oils where they say the oil will last for 20k miles before it needs changed but personally, I would never leave it that long on my own cars.
- 10 replies
-
- 3
-
-
- adnoc oil change
- adnoc oil
- (and 4 more)