-
4.9 Stars ⭐⭐⭐⭐⭐ 450 Google Reviews

Stumpy
-
Posts
205 -
Joined
-
Last visited
-
Days Won
5 -
Country
Australia -
Carnity Points
0 [ Donate ]
Content Type
Profiles
Forums
Advice
Business Listing
Car Deals
Recall
OBD II Car Diagnostics
Guest lead capture
STORE
Events
Gallery
Blogs
Posts posted by Stumpy
-
-
9 minutes ago, Gaurav said:
You seem to be a pretty genius to reach this far to test.
If still not sure, if it's a starter or not, you can pick one from scrap for 200 dhs to test it. If that works, order a new one.
If you need the Pajero scrap guy's number, lemme know.
Hi @Gaurav thank you that would be great if you had a number.
I am pretty sure it’s the starter but would like to be sure before I get a new one.
-
What can go wrong has this week🥴
First a A/C high pressure line split, had a quote of close to 1300 to replace and recharge. Managed to buy the parts myself and do the whole job for about 400 including a trip to the service station for a charge.
then the steering rack has packed it in, rattling like crazy,
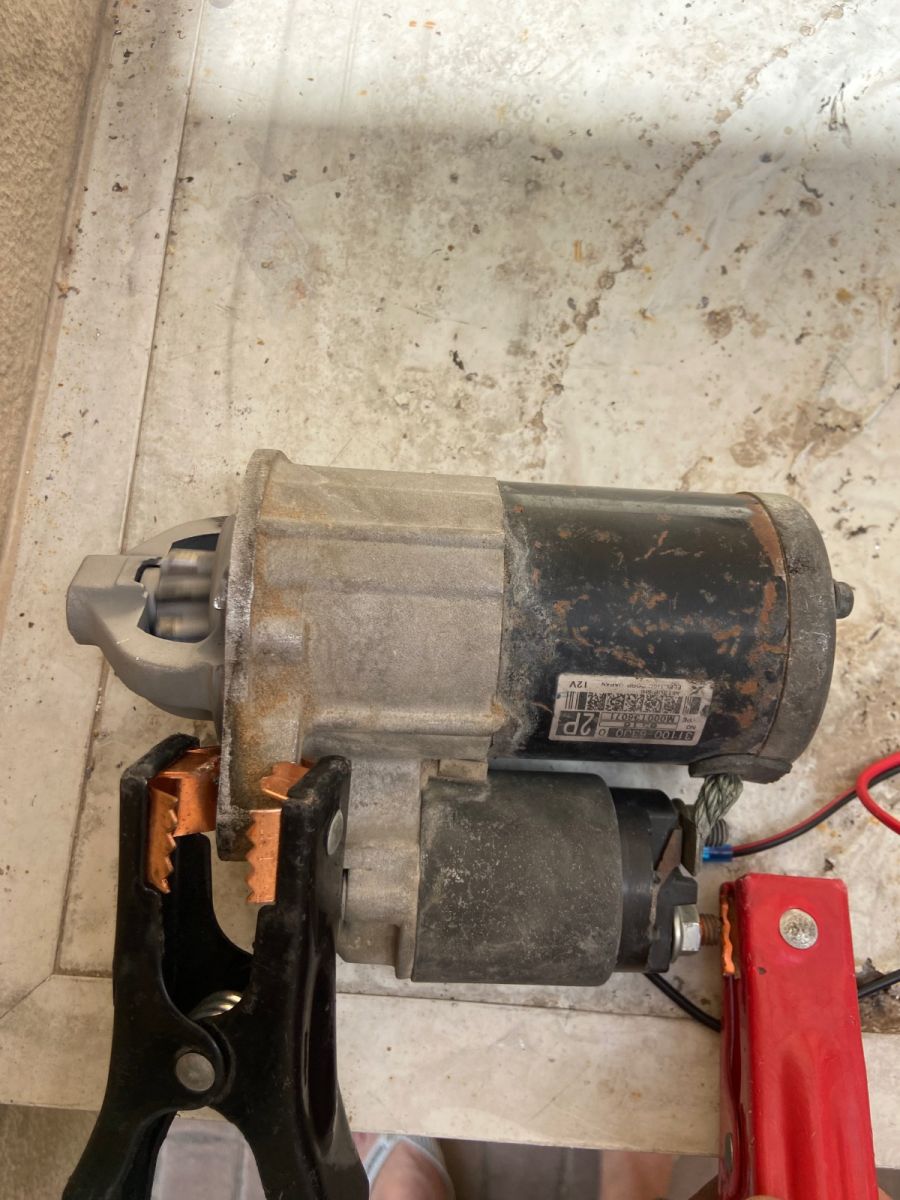
and today the starter motor gave up the ghost 🤬I think.
has anyone had to replace a starter in a Pajero? What were the symptoms? This is very slow to turn over especially when hot. Some times it won’t turn at all. It’s trying to turn but just doesn’t seam to have the power.
I have run a jumper lead from the battery to the block and tested the battery. Have also used a jump pack but still the same.
removed the starter and tested it, does seam a little slow and rattly but I don’t know what these are like normally. (Shocked at how small it is)
Disassembled and had a look, gave it a clean, the the brushes and the commutator seams ok. Bit of gunk but bearings and reduction gears are all free.
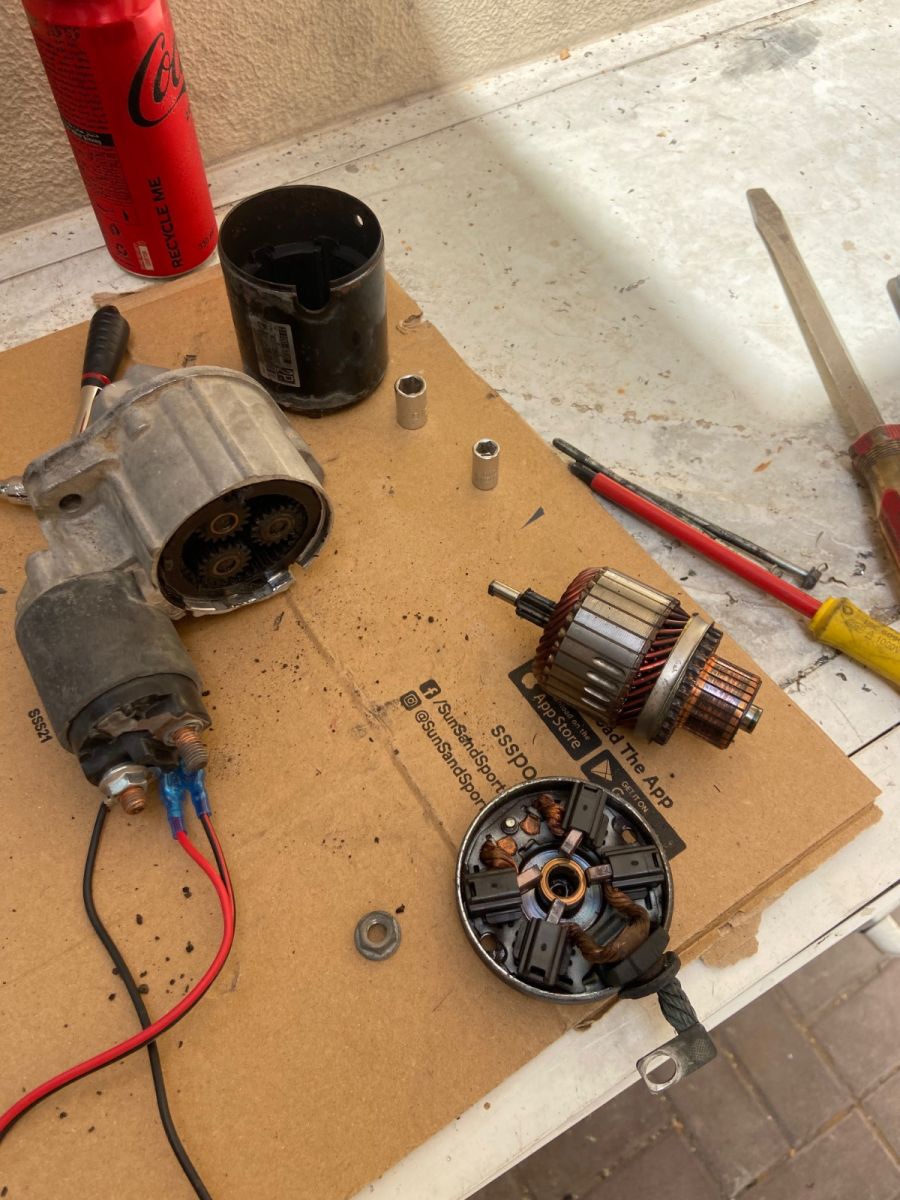
not sure, a new one is about 1300dhs so want to be sure before shelling that out.
any advice
-
 1
1
-
 1
1
-
-
On 6/11/2023 at 8:48 AM, Gary F said:
Really nice drive , I enjoyed the technical terrain a lot @GauravSoni and only ran into one turn that I had to do the old, stop and reverse to make the tight turn, of course my rear bumper took a few more hits, a metal one is in my future.
great to catch up everyone . See you at ARB @Stumpy Paj @Benjamin
@Joseph Raju any update on the patient , electrical or mechanical issues ?
@Ahmad Nerat great photos and ideas on positioning the cars for a photo shoot , while the rest of the convoy was in recovery mode. that was a fun area.
@Gary F well the trip to ARB wasn’t that successful, they admitted the hoses are defective and there is a new style but apparently the hose isn’t covered by warranty 🤬 said they can send it to arb in AD for repair 😂. A slight disagreement occurred with the manager and they eventually replaced it but only with another of the same. If I wanted to upgrade to the new style for a discounted price of 420dhs I was welcome. Needless to say I can get proper rated air hose for a lot less than that and swap the fittings over.
Might save you a trip, just cut the hose and reattach the fitting. 👍
-
6 minutes ago, GauravSoni said:
Nice!!! I have the remaining convoy at the start of the entry gate!
Watch the 🐪
-
1
-
-
Good morning, just checking we are in the right place?, at the pin drop point but only 4 cars here
-
1
-
-
2 minutes ago, M.Seidam said:
@Stumpy Paj you are welcome buddy . Added to the RSVP
Thank you, see you this afternoon
-
3
-
-
Morning, probably a bit late to join but I have added my self to the waitlist just in case.
nathan
ps, looks like a Jeep drive so I thought you might need something to practice recovery’s with 😂
-
2
-
3
-
-
6 minutes ago, Frederic said:
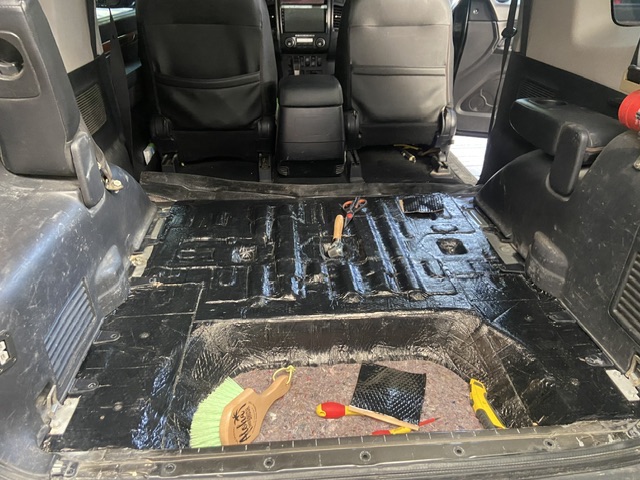
Fantastic job !
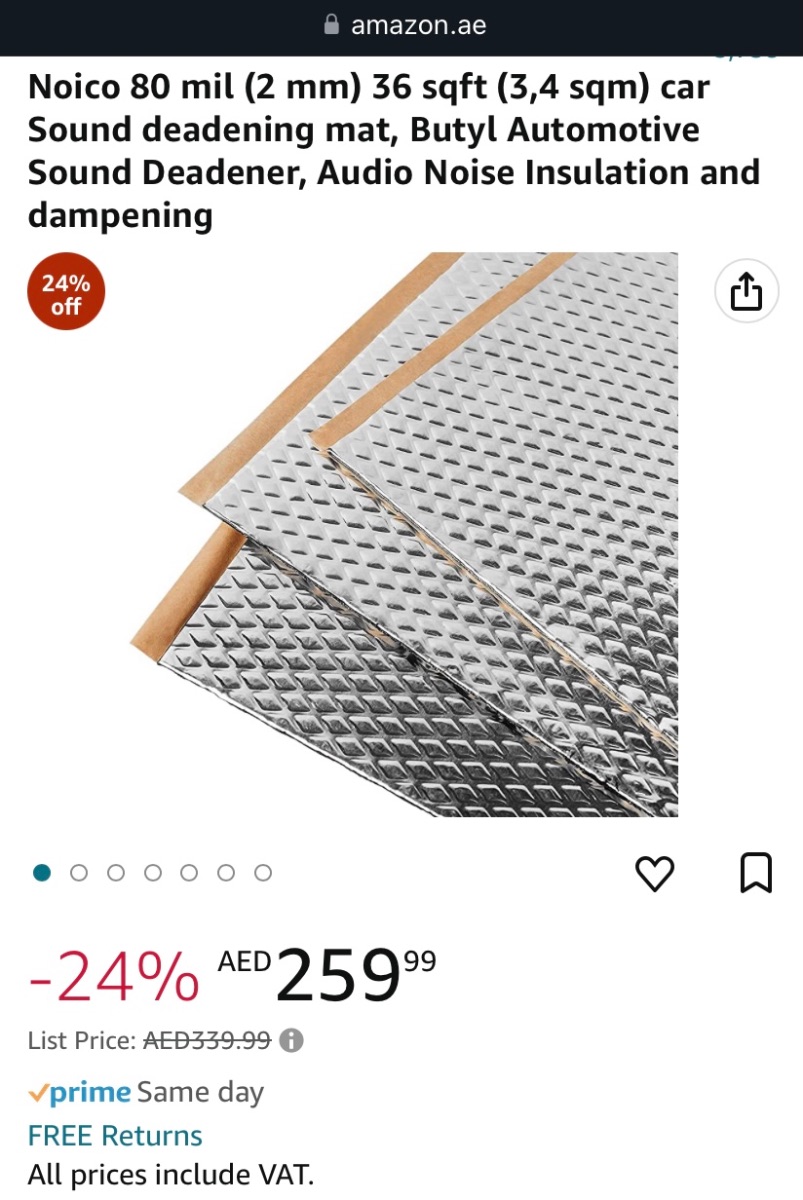
which material did you use ? This is adhesive butyl ?
Used this stuff, probably better out there but it seams to do a good job, have used two boxes for the SWB. Probably need another half box to finish the rear 1/4 panels.
-
2
-
-
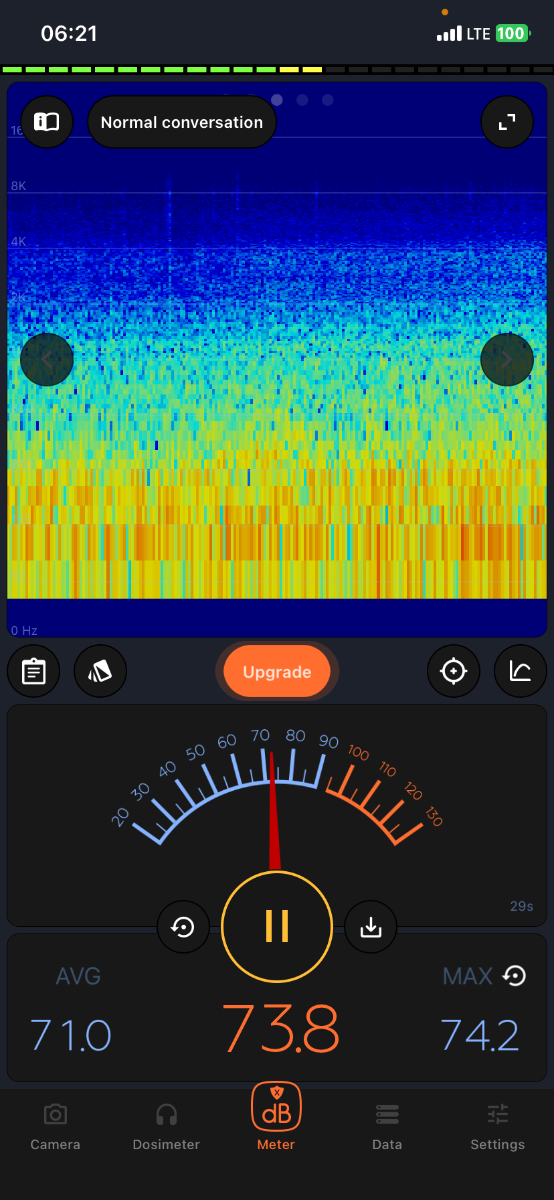
At 120, on the same road at the same time of day I was getting 82-85db
today after the insulation I got a average of 71 -74db.
definite improvement, can still hear noise from rear wheel wells so that’s on the list next.
-
3
-
 1
1
-
-
Just done the last of the drivers side foot well and did both doors, wow what a difference, huge change in the cabin sound.
There was zero sound proofing in the doors, I think this is the biggest area for sound In the cabin. Definitely will do this on all cars from now on.
its so quite at 120, haven’t done the rear 1/4 panels or the rear door yet but the loudest noise now is the air con vents now.

-
2
-
-
1 minute ago, Looper said:
This is my dream project too. I am not sure when I will come to around to do it for my jeep. Are you going to add foam over this sound deadening layer?
Possibly I will over the tunnel and the fire wall, will see what sort of difference I get with this first. Just doing the rear cabin has made a big difference
-
4
-
-
As most of you Dakar drivers would know the road noise in the cabin of the Pajero gets up there at times, has anyone put in sound deadening. What areas had the most effect.
I have done the floor and will start the rear 1/4 panels next. Plan is to do the doors last.
The rear section had no sound proofing at all, that seams to have made the biggest difference so far, with the passenger foot well close behind

-
3
-
 2
2
-
-
Boo @Bravoechothere goes the neighbourhood 😉
-
4
-
-
Congratulations @Davie Chase looking forward to driving with you again
-
 1
1
-
-
Well done @Looper congratulations
-
1
-
1
-
-
24 minutes ago, Bravoecho said:
Love where you heads at mate 👌
You may need a turbo and a new set of diff gears 😂
-
1
-
-
20 minutes ago, Bravoecho said:
Thanks @Looper and yes disappointed that my drive finished very early. Lots of research on tyres over the weekend but with 16" rims the choices become quite slim.
Time for 315/75/16s, no point stuffing around with half measures 👌
-
1
-
1
-
-
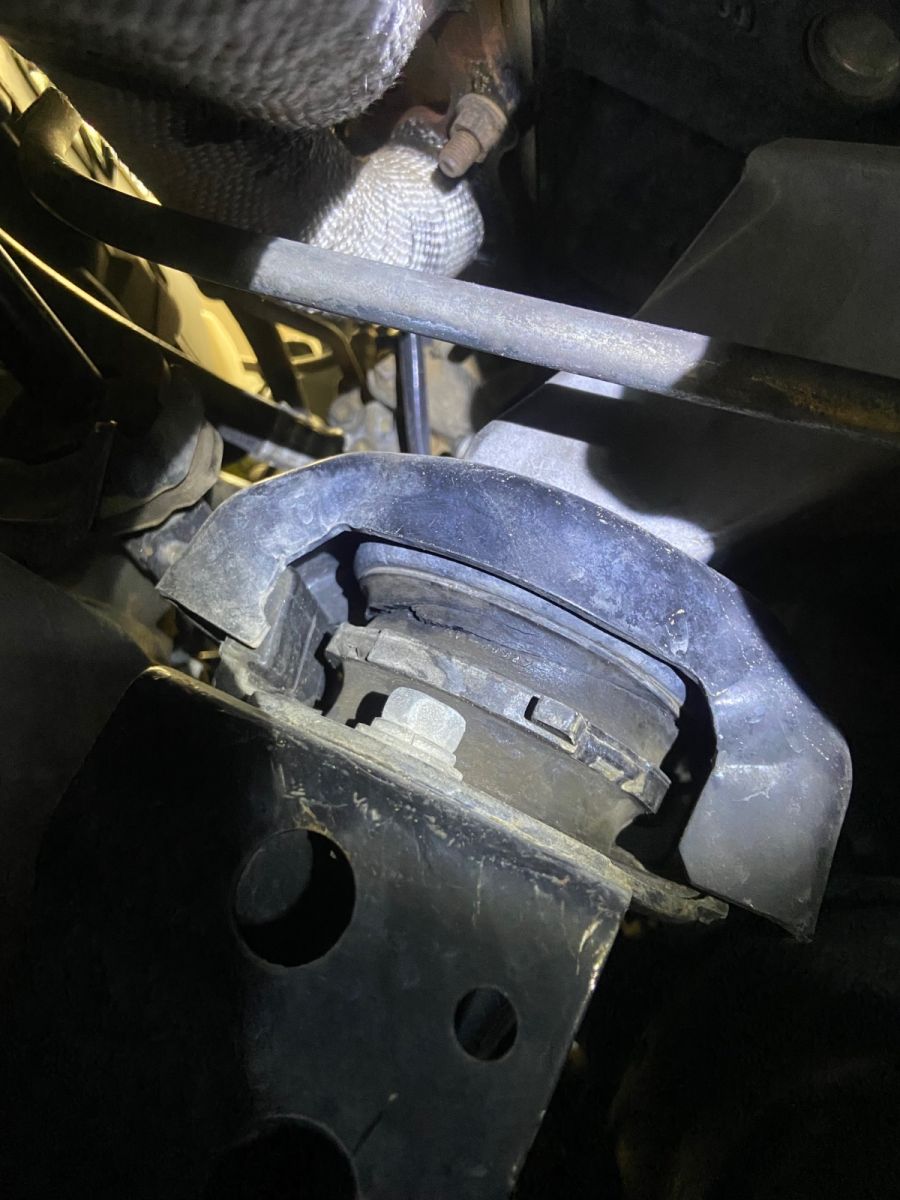
Well that was a lot easier than I thought, about a hr a side, total three hours but I also rewraped my exhaust headers as well.
if any one is thinking of doing this it’s actually very easy, and saves 500-600aed that the workshop wanted to charge in labour. Total was 367 in parts so not to bad.
will see how the car drives after this but the old mounts where completely separated/stuffed.
will update after I take it back for its inspection

thank you
-
3
-
1
-
1
-
-
-
1 hour ago, PETELCZYC PAJERO - luke said:
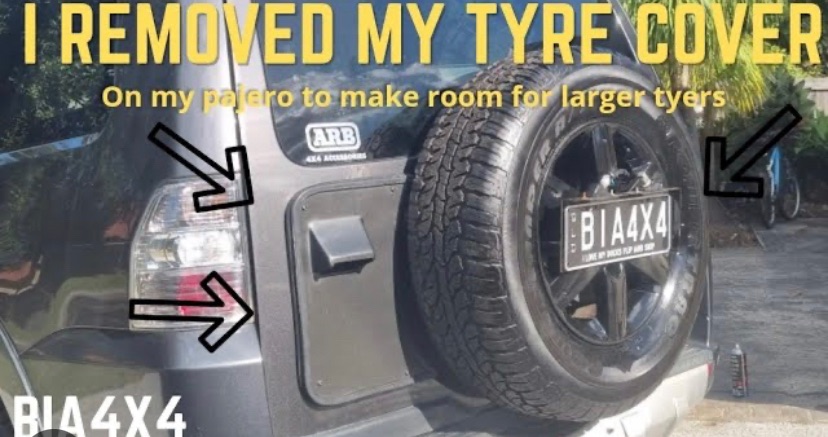
i actually have the opposite problem to this,... my wheel is sticking waaay out because of the bracket. and the door wont close due to it sticking out.
But yes i think deleteing the entire back panel might be a nicer look.
Yeh I agree, I want to delete the rubbish looking plastic as well, makes it easier to get to the wheel and you can mount fuel containers as well.
There are people who make the delete panels and the mount for the licence plate, just haven’t found where in Dubai yet. If you do can you let me know?
-
1
-
-
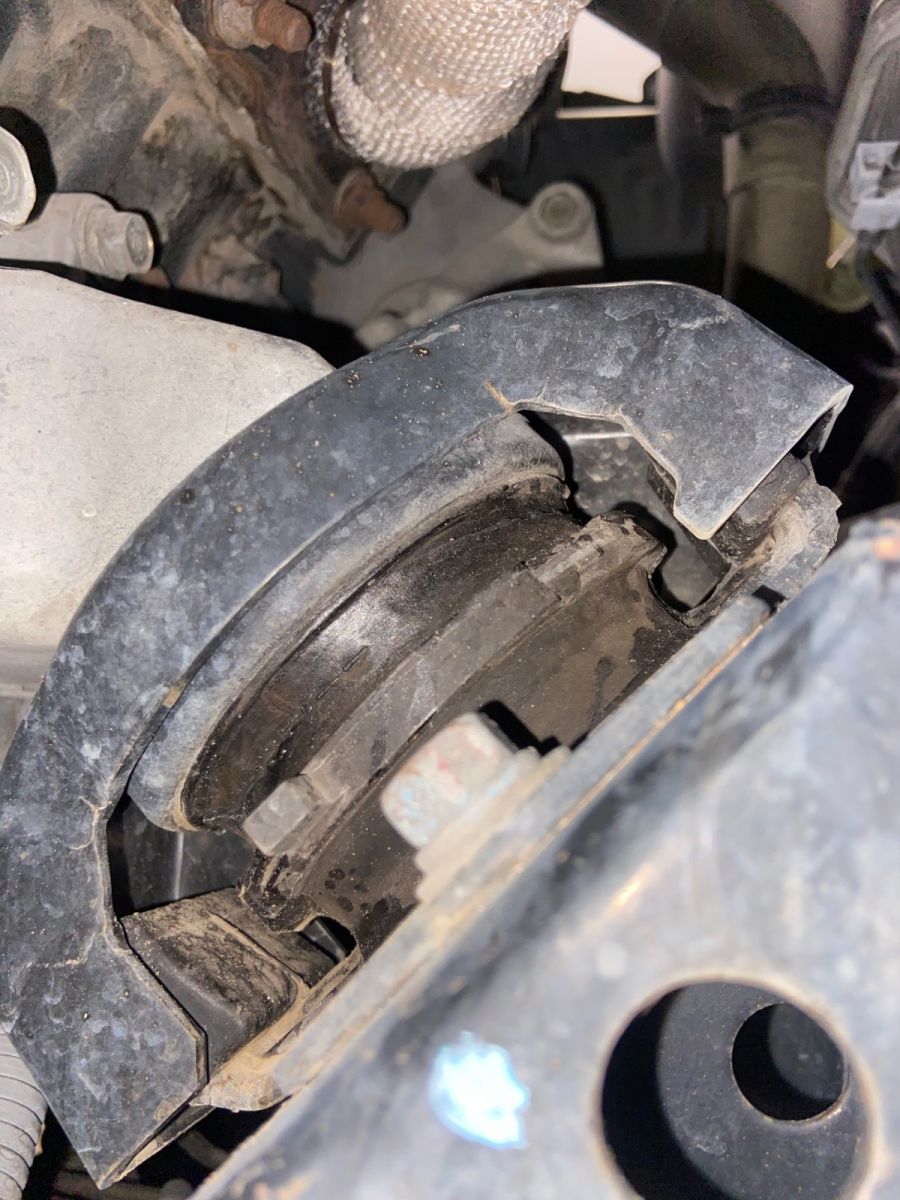
6 minutes ago, Simon D said:
I dont think it will be an easy job to do it yourself as you need to support the engine wheight while replacing them.
As an advice change both engine mounts plus the transmission mount all thogether . When the engine mount is broken the transmission mount will have to work extra by holding the weight of the engine as well. This will slash the life span of it.
.
Always up for a challenge, 🥴 just wondering if anyone had any tips or tricks when doing them.
changed the transmission mount not long ago and it still looks ok.
-
1
-
-
Quite a few people just make a spacer to pack it out, this one’s a bit extreme but you get the idea.
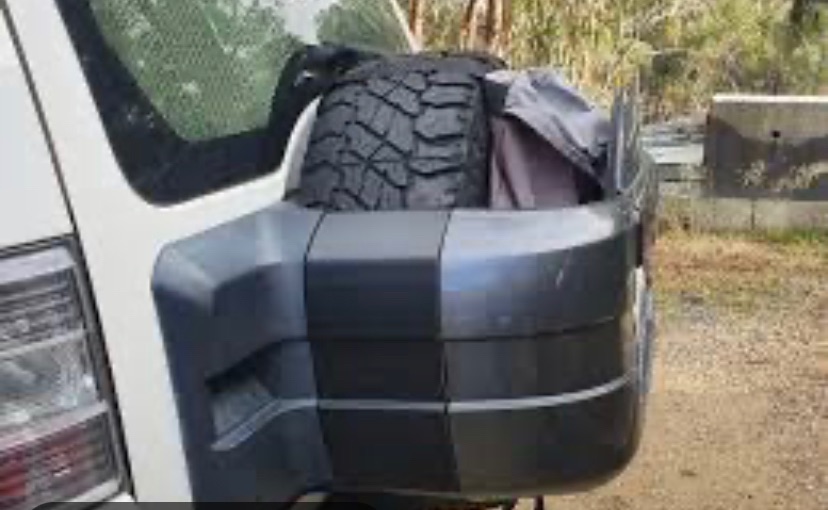
I think the best option is to delete the trim altogether, I think this looks the best and is the most functional
there are also spacers available to lift the tyre up when fitting larger tires.
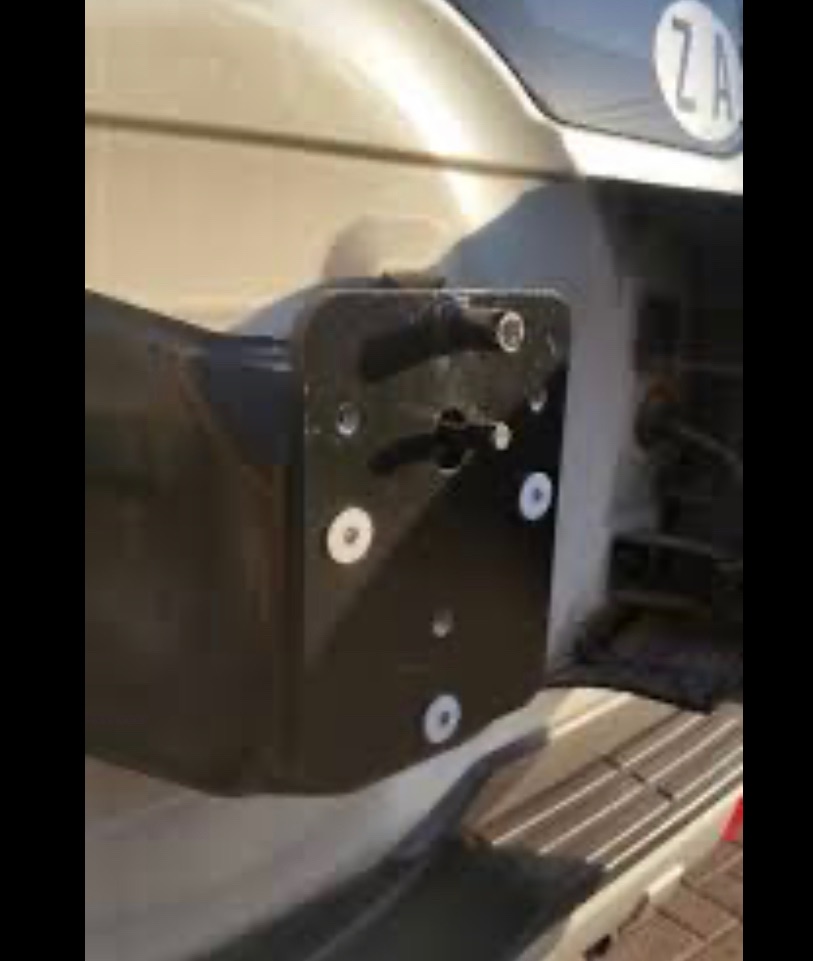
you can just turn the mount upside down to achieve the same thing but a bit more work cutting the studs off and swapping them
-
1
-
 1
1
-
-
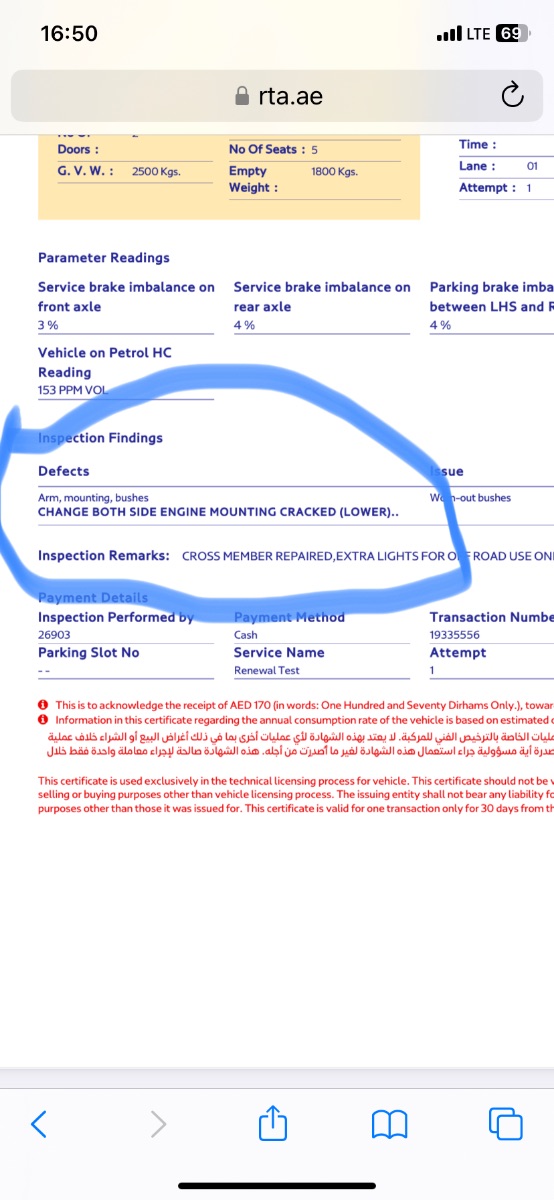
3 minutes ago, Frederic said:
Very common item to go on any off-road car. Never tried that myself though 😅
PS your HC readings are a bit on the high side ? Are you running without catalytic converter ?
Going to try change them tomorrow 🥴
Good eye, I can neither confirm nor deny that the catalytic converter is installed or not installed 😜
-
4
-
-
Ok……so car failed it’s rego inspection yesterday 🤯, apparently engine mounts are stuffed.
has anyone replaced these?
Any tips, I am going to have a go tomorrow at changing these myself.
Thank you
-
1
-
Pajero impersonating a Jeep for a week.
in Mitsubishi Pajero Forum in UAE
Posted
@Frans Mthank you, I didn’t measure the solenoid, it appears to be engaging the solenoid correctly but just not turning the engine with the same power as normal. I did measure the battery voltage when cranking and it didn’t drop below 10.8 volts.
i am pretty sure it’s the starter itself, as it’s my daily driver I have just ordered a starter 🤞
Will update this afternoon