Leaderboard


Popular Content
Showing content with the highest reputation since 09/23/2020 in Advices
-
 Two Way Radio Guidelines Every Off-roader brings his own radio, programmed to the frequencies described in below advice topic. We will not share spare radios or program your radio on the drive. If you need assistance in programming the radio, post a topic on the Carnity website with your questions and we will help you out. Make sure your radio is fully charged. It will be your only way of communication while driving. Before buying, please carefully read below advice so you are informed properly on which model / cost / shops... No radio = No drive. It is an essential tool and you should make sure you bring it on every drive and learn/practice how to use it. Within Carnity Offroad Club we are using a number of frequencies on the two-way radio. This is necessary as we have sometimes multiple convoys driving and broadcasting on the same frequency. With this functionality each convoy can select a channel that they want to use without interfering with others. The 10 radio frequencies are listed below: Below you will find the programming instructions for the most commonly used radios in Carnity Offroad Club. Please get yourself familiarized with your radio, as it's an essential tool for any Offroader, and this device is responsible for establishing clear and life-saving communication while venturing Offroad. If you are planning on buying a radio, make sure it is the UHF version and not the VHF version. We recommend the Motorola/Crony MT777, Crony CN888, or Baofeng UV-5R because of excellent price / quality ratio, Dragon Mart has many models, just make sure it has the ability to set the frequencies manually. Please do not buy a screenless model like the Baofeng 888S as it cannot be programmed without cable and software. Before getting into the real technicalities, some basic info on radios settings that you will come across: *STEP FREQUENCY: on the FM band, frequencies are spaced from each-other at a certain bandwidth. The Step frequency is basically the incremental change in your radio when you turn the rotary knob on top of your radio. When you program the radio to a certain frequency, you will need to make sure the appropriate step frequency has been set correctly. (see on the above frequency list). * PTT: Short for PUSH-TO-TALK: This is the button on the side of your radio that you push when you want to broadcast a message. * MON: Most radios have a Monitor button. When pushed you are basically monitoring the channel. If no-one is broadcasting you will just hear noise. But this is useful to set your desired volume. * SQL or Squelch: To make sure that your radio does not pickup every little signal, the squelch acts as a gatekeeper to only allow a broadcast on your radio when it is strong enough or nearby enough. If you encounter a lot of noise that's being picked up by the radio, try changing the SQL setting a little bit. A higher setting makes the radio less sensitive to noise. * RX and TX frequencies: RX stands for Receiving frequency, which TX stands for transmitting frequency. in Carnity we transmit and receive on the same channels. * DCS / CT codes: These are basically encryption settings that allow a user to make sure only radios with exact same CT codes can listen in on the chatter. As these settings are confusing and complex, they should not be used (CT should not be showing on your display). Programming the Motorola/Crony MT777: Note: This radio has 2 operating modes called "Frequency" and "Channel". To switch between these modes, keep the ENTER button pressed while switching on the radio. Pressing the VFO/MR button while you're in Frequency mode will bring you to the combined mode, which is basically a screen that shows both the channel and the frequency. You can use either one of these modes during operation. To Program the Channels: 1. Make sure your radio is switched off. 2. Press the Moni (black button on top of the orange one on your left side), and MENU key together while switching on the radio. 3. Wait for the set to display SELF (which means manual setup). 4. Press Enter and it will show the Channel number. 5. You can choose which channel to program by selecting it from the rotary selector knob on the top of your device. 6. Once you have the desired channel, press ENTER. 7. Type your first frequency you want to program. 8. Press ENTER on every setting below to go through the advanced settings and verify if they are programmed as following: (If above settings are not correct they can be changed with the rotary knob on the top keep pressing enter until your set displays the next channel to be set). 03=OFF (if a number is showing here, push the *Lock button until OFF appears). 04= Enter the same frequency as the one you want to program. 05= OFF (if a number is showing here, push the *Lock button until OFF appears). 06= OFF 07= ADD 08= HIGH(H) 09= NARROW 10=-------- 9. Repeat from Step 5 to program the rest of your channels. Very useful Youtube video below: method for adding a single frequency later on, without going through the whole SELF programming mode again: 1. Make sure the radio is in Frequency Mode. Type in the frequency you want to program. E.g 446.00625 2. Press MENU and then press the VFO/MR button. The channel number will start to blink. 3. Use the rotary selector knob to select on which channel you want to save this frequency. 4. Press VFO/MR button again to confirm and exit. Keypad can be locked by pushing the * LOCK button for a few seconds. --------------------------------------------------------------------------------------------------------------------------------------------------- Programming the Crony CN888: Note: This radio has 3 operating modes called "Frequency", "VFO", and "Channel". You can toggle between these modes by pressing the orange Function button on the top left corner, followed by pressing 1 (Mode). Programming the radio as described below can only be done in VFO mode. 1. Switch on the radio. 2. Press the Function Key (orange button on top left corner). 3. Press 4 (STEP) until it shows 6.25. Press EXIT to confirm. 4. Now type the first frequency you want to program. Eg. 446.00625 5. Now press the # button. The Channel number in the corner of the display will start to blink. 6. Select with the A (up) or B(down) buttons to choose wich channel you want to save the frequency. 7. Press the C button. the radio will confirm by saying "SAVED AS RX FREQUENCY" 8. Press the # button again. The Channel number in the corner of the display will start to blink. 9. Press the D button. the radio will confirm by saying "SAVED AS TX FREQUENCY" Keypad can be locked by pushing the Function button, followed by the *F.L button. Programming the Baofeng UV5-R: When buying a radio like the Baofeng UV5R, many certain frequencies and channels are already programmed into the radio, but these are different from the ones we use in Carnity. As you will be programming 5 new channels onto Channel number 1 till 5, it is important to first delete these existing frequencies stored in those channels. You can do that as following: Step 1: Delete the existing channels from channel 1 till 5: 1- Switch on the radio 2- Press the MENU button followed by the buttons 2 and 8. (Menu 28). 3- Press MENU, and then use the UP/DOWN arrows to select which channel you want to clear. 4- Select CH1 and press MENU again, you will hear "delete channel, followed by confirmed". 5- Now go back to step 3 and do the same for the following channels (CH2-CH3-CH4-CH5). 6- Now all 5 channels are clear and ready to be programmed. Step 2: Set the step-frequency: - Switch on the radio - Press the MENU button and with the up and down buttons select STEP frequency. - Change this to 6.25 and press MENU to confirm. - Press EXIT to go back to the main menu. Step 3 Program the new frequencies in the radio: 1- Press the VFO button. You will hear the confirmation “frequency mode”. 2- Make sure the arrow is on the top line. If not, press the blue A/B button. 3- Type in the frequency you want to save. I.e 446.00625 4- Press MENU, followed by button 2 and 7 (menu 27). You will see MEM-CH. 5- Press MENU and now use the up and down buttons to select the channel you want to save it on. 6- Press MENU again to confirm. Your first frequency is now stored under channel 01. (receiving memory). 7- Press MENU TWICE again to confirm. Your first frequency is now stored under channel 01. (transmitting memory). 8- Press EXIT and repeat from step 3 onwards to program your remaining channels. Note: To program the Carnity backup frequency channel 5, you will need to set the step frequency to 12.5. When done, follow the same steps to program and save it under channel 05. You can either program these channels one by one into your radio, which is the easiest for you later on, or you can just enter the frequency without saving it. Some extra notes: Option 5 in your menu should be on Narrowband. Option 10 and 12 in your menu should be set to OFF (we are not using CT codes). BaoFeng_UV-5R_Manual_(1).pdf31 points
 -
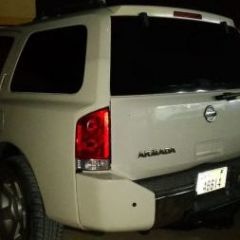
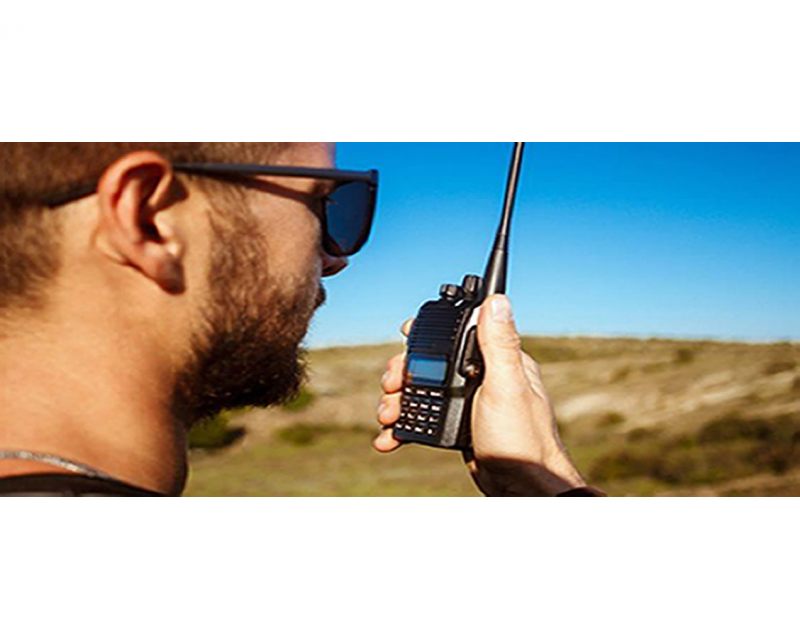
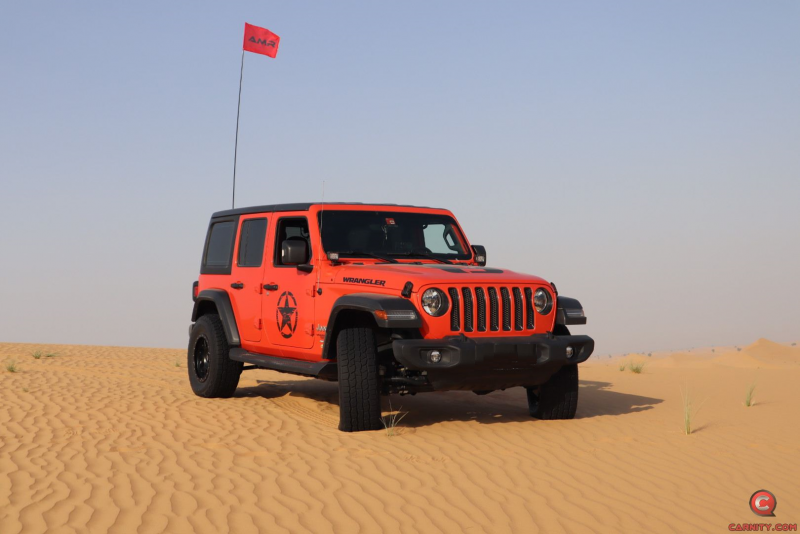 So you have decided to become an Offroad Enthusiast by either joining an Offroad-Club, or becoming a Solo Adventurer to explore the UAE deserts ? Then surely the time has come to start investing in the proper offroad gear. Good quality offroad gear will be your biggest help to be self-reliant and to enjoy this sport thoroughly. After all you don't want to be stranded in the middle of the desert with unsafe or unreliable equipment. We have compiled a list of essential tools you should have as per our club levels, and included some recommended gear which we have used in the club with good results. OFF-ROAD FLAG (NEWBIE AND ABOVE) A proper off-road flag is safely mounted with a bracket, or suction cup, and does not fall off on the first windy day. You can either buy a very decent flag like the AOR ones, or go to the nearest dune-buggy shop, or Dragon Mart. A fishing rod with flag also does the job. TYRE DEFLATOR AND PRESSURE GAUGE (NEWBIE AND ABOVE) Deflating your tyres will be a weekly practice, and the accuracy of your tyre-pressure gauge will make the difference between struggling in the sand or floating on it. You can buy them in ACE, Speedex, or Dragon Mart and it is advisable to buy two different models to double-check the accuracy. Most cheaper models work well on normal tyre pressures (35 psi) but start to give inaccurate readings below 15psi. Deflating your tyres can be done with a stem removal tool or a quick deflator. Whatever works for you. How to deflate your tyres is well documented here: FULL-SIZE SHOVEL (NEWBIE AND ABOVE) Next to your Carnity buddies, a proper shovel will be your best friend in the desert.You should get a full-size laborer shovel, and not a small foldable camping spoon/shovel. Buy a shovel with a handle, and a v-shaped tip, you will find them in general hardware shops. Example below is perfect, and will allow you to displace a lot of sand. TWO WAY RADIO (NEWBIE AND ABOVE) While driving with an offroad-club, a two-way radio is essential to communicate with the rest of the convoy and to receive instructions or guidance. In Carnity Off-Road Club, we use two-way UHF radios that are programmable to our frequency list that we have created. Make sure your radio is always fully charged for every drive, and if possible invest in having a second (spare) one. We can recommend the Crony/Motorola MT777 or the Baofeng UV5-R model as both are good radios with excellent price/quality ratio. You will find them in Dragon Mart. Do not buy a walkie talkie without a display, as these will be mostly pre-programmed and the frequencies cannot be changed unless you purchase programming software and cables. NOTE: THE BAOFENG 888 RADIOS THAT WE HAND OUT AS SPARE RADIOS WILL NOT WORK OUT OF THE BOX WHEN YOU BUY THEM AS THEY HAVE DIFFERENT FREQUENCIES. YOU CAN PROGRAM THEM BUT YOU WILL NEED PROGRAMMING CABLE, A LAPTOP, AND SOFTWARE CALLED CHIRP. IF YOU ARE NOT INTO THESE TECHNICAL THINGS, PLEASE STICK WITH BUYING THE CRONY/MOTOROLA MT777 or BAOFENG UV5R AS THESE CAN BE EASILY PROGRAMMED YOURSELF WITHOUT CABLES OR SOFTWARE. Instructions on how to program the Motorola/Crony and Baofeng you will find in below post: FIRE EXTINGUISHER AND MEDICAL KIT (NEWBIE AND ABOVE) Both items every vehicle should have, offroad or onroad. You will find DRY POWDER extinguishers at the petrol station or hardware shops, and a medical first aid kit at general hardware stores or pharmacies. Make sure they are immediately accessible in case urgently needed. 12V AIR COMPRESSOR (NEWBIE AND ABOVE) After every offroad drive you will need to re-inflate your tyres. If you are lucky to be nearby a petrol station you can slowly drive your way up there, but in many cases you will be miles away from one. You will find air compressors from 150 up to 2500AED as per your budget and liking, but if you are using it on a weekly basis you will find that sticking with a well-known brand like TJM, Bushranger, ARB really makes the difference. You can be lucky with the Camel branded compressors in Dragon Mart too, but do not expected any warranty on them. ACE, Speedex has the branded ones, and also a few cheaper options. GPS DEVICE (INTERMEDIATE AND ABOVE) From a dedicated GPS device such as the Garmin 276cx, or a smartphone with your favorite navigation app, it will be important from Intermediate level onwards that you start practicing navigation, putting waypoints, entry and exit points, and seeing the difference on your map between for example long range dunes and small technical dunes. Apps like MotionX for IOS, MyTrails, and GaiaGPS are very popular and allow you to properly prepare for your route / track beforehand. RECOVERY ROPE WITH 2 SOFT SHACKLES (INTERMEDIATE AND ABOVE) Recovering stuck vehicles in the desert is a skill, and from Intermediate level onwards you will be able to practice this. There are different types of ropes in the market, and finding the right one might be very confusing. - A Polyester Tow Rope is meant to tow a vehicle on the road, NEVER for off-road recovery. These are the basic tow ropes you will find at the petrol station. - A Webbing Sling is a Polyester rope that you can buy in hardware stores and is meant for industrial lifting, but can also be used as tow rope in specific cases (to re-direct a stuck vehicle with gentle tugs). This material does not stretch. - A Snatch rope (flat) or Kinetic Recovery Rope (round) is a rope made of Nylon that allows to stretch for about 20%, and is extremely useful for offroad recovery as the stretching creates a kinetic energy and the recoil effect helps in recovering vehicles stuck in the sand. When choosing a kinetic recovery rope, you should select a rope that has a breaking strength of 2-3 times the weight of the vehicle you will recover. For example; if you recover a Nissan Xterra which weighs 2 ton, the breaking strength of the rope should be at least 6 tons. Most recovery ropes have 10-15 Tons breaking strength. The reason for this is that the forces involved when a vehicle is completely stuck in the sand are far higher. Our club uses both the Viking Kinetic rope as well as the AOR Kinetic recovery rope with excellent results. The Viking rope costs about 350AED with a bag and 2 soft shackles included, while the AOR kinetic rope costs about 390AED without soft shackles. (AOR soft shackle cost 155 AED per piece). A shackle is a device that allows you to connect your rope to your tow point. These used to be mostly rated metal D-shackles, but nowadays the soft shackles, that were well known in the sailing world have become in offroading too. A soft shackle will be safer to use as the less metal involved the better during recoveries. More information on using these Kinetic recovery ropes and shackles can be found in below post: FLOOR JACK WITH WOODEN BOARD (ADVANCE AND ABOVE) A hydraulic floor jack in combination with a strong wooden board will allow you to safely lift a vehicle in the desert to replace a tyre or fix a pop-out. We do not advise using scissor jacks or bottle jacks, as these are only acceptable for on-road and will topple over in the sand or possibly even on a wooden board. A good hydraulic floor jack should be at least 2T capacity and a swivel neck (rotating handle) will allow you to put it further underneath the vehicle and still be able to lift it. JZX or YATO has good hydraulic jacks. Do not buy the cheapest one available as the consequences or risks when the floor jack collapses could be very serious. A strong wooden board should be at least 1 1/2 inches thick and made of natural wood and not MDF or plywood. A good example is scaffolding planks. It should be large enough to fit your hydraulic jack on it. TOOLKIT AND FLUIDS (ADVANCE AND ABOVE) A toolkit will come in handy for a multitude of reasons, in case a vehicle breaks down, to fix a loose exhaust, flag, or bumper, but can make you a hero if you are able to fix your vehicle instead of leaving it behind in the desert. Following items are recommended: A small basic multimeter, set of spanners up to size 24, some adjustable spanners, a hacksaw, hammer, set of screwdrivers, some electrical tape, duct tape, cable-ties, some spare car fuses, spare valves and stems, tie down straps, socket wrench set and some pliers. Also a tyre repair kit will be coming in handy, together with some thick gloves, and battery boost cables. Following fluids are recommended: - Engine oil: 1-2 liter - Coolant: 1-2 liter - ATF Transmission oil: 1 liter - A can of WD40 or penetrating oil - Spray-can with water to cool down an overheating engine.18 points
 -
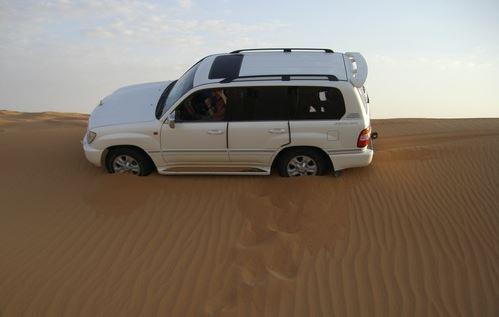
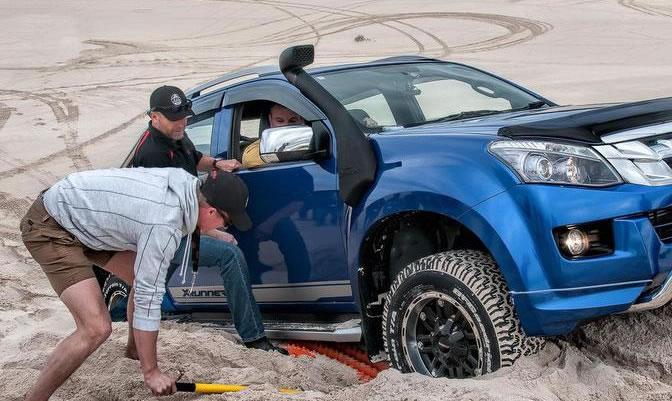 Top 3 off-road mistakes that driver makes in the UAE People assume driving off-road is a lot easier due to no rules and restrictions as compared to driving on the road. That may be true to a certain extent, but after a while it might get messy if certain rules aren’t followed. Off-road freedom is awesome, but you should always remember these three MAJOR off-road mistakes that every experienced and in-experienced off-road drivers come across in the UAE. By the way, all these 3 rules apply for desert, mountain, small drive - overnight drive, beach sand & sand dunes. So by remembering these 3 golden rules you will save yourself from 75% of the off-road threat that may spoil your enjoyment or cost you some expensive repairs. It's always good to read little bit more on how to drive off-road before you embark with your most capable 4x4 vehicle. If you are new to off-road then you should listen to people advice, see what others are doing and learn how to negotiate with various off-road obstacles. Deflate, deflate and deflate: No car in the world is capable of driving off-road without deflating. You might get away with few 100 meters without deflating, but eventually you will get stuck. Yes you need to deflate in sand and on rocks as well. For sand, ideal is to deflate to 15-18 PSI as per terrain difficulty and also as per the temperature (deflate more in summer, when sand is loose). Maximum you can deflate to 12 PSI (not lower) if you are in very challenging terrain like Liwa, Sweihan or Al Wagan sand dunes. For wadi's and rock crawling you need to deflate lesser up to 22-25 PSI as compare to sand. In wadi and rocks little deflation help in better traction by increasing the footprints while crawling and absorb LOT of shocks on loose gravel or rocky terrain, while driving. Plan your stop: About 90% of off-road stuck happen due to stopping in wrong places. Always choose the safe spot to stop, and stop slowly. People driving in sand dunes while climbing up and down the dune, get tempted to stop in amazing scenic spot, but when they start again they get stuck. Don't stop on uphill, sideways and on loose sand which will make it difficult for you to move the vehicle again. When in motion, use that momentum to choose the flat, hard spot (as much as possible) so that moving again is easy. Stopping hard with harsh brake will dig you in the sand and moving again will be even more difficult. In the inevitable situation if you brake hard, then go backwards few meter and gain momentum to drive further. Driving in sand is very simple physics that needs common sense more than an ego of being an owner of "most powerful car" and "most expensive car". Take it easy and be ready to go back little bit and start again if you are stuck in a difficult spot, try to find work-around than forcing your way in because mother nature is sometimes more stubborn than you are. For rock climbing, crawling and wadi passage plan your stop carefully so that you can start back safely and avoid any excessive wheel-spin or slippage of your vehicle. In rocks while negotiating with big boulder (stones) you need more of patience and external help than too much gas and distractions. External help means to have your friend or family person outside the car who can guide your exact tire movement (very slowly) and help you step on safe spot and pass through. Don't panic when you are stuck: The beauty of off-road driving is EVERYONE will get stuck, whether you are a super sales achiever, manager, leader, CEO or the VP. The idea is to stay calm and "DO NOT PANIC". Majority of off-road stuck are very minor and you can recover yourself in less than a minute if you are calm. If you panic and give too much acceleration it will dig you deep in sand and might dislocate your vehicle more in rocks. When vehicle is not moving, first attempt is to try reversing immediately and seeing what is blocking so that you can avoid it. If reverse is not possible, then step out and identify the situation, have few sips of water and you will get creative in thinking different ideas to get out. If you are stuck in wadi's and mountains, you can probably move few smaller rocks aside by hand and make your way or sometime you can place smaller rocks under your tire and use them as a stepping stone. In sand stuck, if vehicle is not moving engage your Lo-Gear (4WD lo-gear) and start with little aggressive acceleration up to 2500 RPM (ONLY) and that too in quick short intervals (no full gas for long stretch). See if it helps moving your vehicle few meters or even centimeters, then repeat the same in front and reverse several times and make little movable path and when you have a good stretch, then take off with more acceleration up to 5000 RPM (sometimes even full gas). Idea here is to avoid full gas in beginning as that will dig you down and once you have little movable path and vehicle is in motion for 5-10 meters and you give more or full acceleration, it will help you cross that climb, loose-sand or uneven spot more easily. If everything fails as per self-recovery, call for help and don't dig yourself deeper by too much excessive self-recovery, as that will make the situation worse for other car to pull you out.12 points
 -
 When joining Carnity Off-road Club, there will come a time that you’ll need to start looking for deflators, pressure gauges, compressors, flag, etc... Dragon Mart is a wonderful shopping paradise but finding the item you need is indeed sometimes a daunting task. So I listed below some shops and their locations that might be of help: Off-road Flag Section: EA Address: EA01 Shop: S&D Autoparts Deflator tool and pressure gauge Section: EB Address: EBD05 Shop: Taizhou Yian Trade Two Way Radio Lots of options, but the BA section has the most shops. Look out for the big CRONY labeled shop. They have the Motorola MT777 = 120 - 150 AED. Crony MT777 = 80 - 120 AED Also the Baofeng UV-5R is still popular and easy to find. Costs about 75 AED. Floor Jack & Tools JZX shop in section EA, no. EAA25 2 Ton floor jack with swivel neck = 120 - 150 AED (Recommended) Tool kit = 50-100 AED Compressor Mainly available in BA section. Have a walk and haggle a bit. The Camel logo brand is pretty good. Available in single or twin cylinder model. Single cylinder = 100 -150 AED Twin Cylinder = 150 -200 AED (Recommended) Please take note that we are not affiliated with these shops nor do we give any guarantees about their items. We solely provide the location where you can find these most common items to save your time.11 points
 -
This tutorial will describe the safest techniques to recover a vehicle from the desert. We will try to cover all scenarios and focus on the safety aspect. Although many offroaders have already learned the art of off-roading in the UAE desert, performing recoveries is a skill in itself and needs practice and clear understanding and respect of the dangers involved for the person recovering, the person being recovered, and bystanders. This is a skill that will require practice, and the more recoveries you do from different situations, the more experienced you will become. Whenever you have ANY doubt in during a recovery, you should assess the situation with other senior members and make the decision together. 2-3 people will most likely have a better total overview and will result in a safer recovery attempt. Team work is essential in this sport and all the more during recoveries. 4x4 Recovery Tools D-Shackle or Bow Shackle The D-shackle, also called a bow shackle, is the tool that you will use to connect your recovery rope to the tow-hook of the vehicle (both sides). Since the uprising of soft shackles, and the incidents that happened with poor quality D-shackles, most Off-roaders have now shifted to using soft shackles. A good quality, rated D-shackle can still be useful in some scenarios, and they are safe if the recovery is being done properly, but the risk of this projectile flying through the windshield and potentially killing people has made this shackle a tool only to be used by people who have 100% skill level and know what they are doing. Soft Shackles Soft shackles were first used in the marine/sailing world and have recently become very popular as the perfect shackle to use for off-road recoveries. They are easy to use, and in case they break they will not become a deadly projectile. They are more expensive than metal D-shackles but will last quite long and there is no compromise when it comes to safety. The shackle is made of UHMWPE, also known as Ultra High Molecular Weight Polyethylene, or Dyneema. This synthetic yarn is 10 times stronger than steel. Kinetic Recovery rope or Snatch Strap. A kinetic recovery rope is made of Nylon. The most useful characteristics of this rope is that it stretches about +/- 20% during a pull. This means the “tug” or “jerk” effect of the recovery will be dampened, resulting in less strain on the vehicle’s tow-points. The downside is that because of this characteristic, people sometimes have the tendency to start pulling much harder, which can result in breaking the vehicle’s tow-points or chassis. The recoil effect of this rope creates a massive force and that is why during a recovery we clearly instruct to not exceed 15km/h during recoveries, and to gradually build up the strength of the pull in 2-3 attempts. Do not use this rope for towing a vehicle. Due to the stretch effect it will be difficult to control the towing process, and furthermore you will damage the rope as it needs to recoil and settle after a recovery. When choosing a kinetic recovery rope, you should select a rope that has a breaking strength of 2-3 times the weight of the vehicle you will recover. For example; if you recover a Nissan Xterra which weighs 2 ton, the breaking strength of the rope should be at least 6 tons. Most recovery ropes have 10-15 Tons breaking strength. The reason for this is that the forces involved when a vehicle is completely stuck in the sand are far higher. Our club uses both the Viking Kinetic rope as well as the AOR Kinetic recovery rope with excellent results. The Viking rope costs about 350AED with a bag and 2 soft shackles included, while the AOR kinetic rope costs about 370AED without soft shackles. (AOR soft shackle cost 155 AED per piece). This rope is not the same as a Polyester Webbing sling that you will find in most hardware shops ! Kinetic recovery ropes will cost you about 350-400 AED. A Polyester webbing sling is far cheaper but does not stretch. Performing a Recovery When doing a recovery there will be tasks involved for both the person doing the recovery, and the person being recovered. It is essential that there is a clear communication established over the radio or verbally to make sure the recovery is being done professionally and safely. Bystanders should remain at a distance radius of at least 10m during the recovery process ! Scenario 1: A vehicle is crested Getting crested is an event that happens regularly during off-roading, and by following below steps you can recover a vehicle safely. The individual tasks for each person are mentioned below: # PERSON PERFORMING THE RECOVERY PERSON BEING RECOVERED 1 Will first inspect if the vehicle is front-heavy, back-heavy, and if the car can be maybe recovered without ropes. In many cases it is sufficient to clear the sand from the wheels, from underneath the body of the car, and try the self-recovery method and engage diff-locks. can help with clearing the sand from the wheels 2 When recovery with a rope is deemed necessary, he will attach the rope to a secure “recovery point” of the car. The recovery point needs to be strong enough and in perfect condition. He will not perform recoveries on worn out or heavily rusted towpoints. You need to keep approximately 2m free-play in the rope, so you have space to ramp up the vehicle before the pull starts. 3 Will step inside his car, put on his seatbelts, engage 4LO and put his car in First Gear forward or Reverse depending on the direction he will be recovered. He then announces on the radio that he is belted up, car is running in low gear, and he is ready for the recovery attempt. 4 Get inside his vehicle, engages 4LO, puts on the seatbelt, and asks the person being recovered if he is ready for the recovery attempt. Acknowledges the message and confirms he is ready for the pull. 5 Will drive a little bit forwards and backwards to create a firm track if needed, then starts off with a gentle pull. This is to test the waters and in some cases the vehicle will already come out. 6 If second attempt is needed, he will announce on the radio that he will try again. Acknowledges the message and confirms he is ready for the second pull. 7 Performs second attempt which is slightly more aggressive 8 The car comes out and is bring brought to flat ground where the rope can be safely removed. Follows the recovery vehicle to flat ground Scenario 2: a vehicle is bogged down When a vehicle is bogged down or in a ditch, and needs recovery with a rope, the same scenario as scenario #1 will be applied. You should always clear the wheels and shovel as much as you can to ease the recovery. It is also very important to properly position the vehicle to avoid sharp angles. Again, the rope should have at least 2m free play before starting the recovery. Make sure you position your rope in a zig-zag shape and verify it is not in a knot. Creating a knot in a kinetic rope will damage it beyond repair ! Scenario 3: a vehicle needs to be pulled upwards In the case that a vehicle needs to be pulled upwards, you need to be aware that the force that you will need to apply will be far higher. Some examples: - Towing a 2 Ton vehicle on the road results in a 100kg pull resistance. - Recovering a wheel-bogged down 2 Ton vehicle on flat sand results in 2000kg of pull resistance. - Pulling a chassid-bogged down 2 Ton vehicle on an upward slope of 15° results in 3500kg of pull resistance. (as photo below). This is the main reason why it is so important to clear the wheels from sand and shovel out the body of the vehicle as much as possible to reduce the resistance. Be aware that when pulling a vehicle upwards on a steep angle might damage the front bumper on the vehicle that is being recovered. Especially on slopes of 10° and more, the rope can hit the front bumper. Additional safety measures Safety Strap A safety strap is a very helpful tool to secure the rope or d-shackle during extreme recoveries. In that case it will avoid from becoming a projectile. Tow Point Essentials Most 4x4 vehicles are equipped with proper tow hooks which are welded to the chassis. In more modern SUV's which are less meant for heavy duty use, you will sometimes find a screw-in type of tow hook. These are generally ok for occasional use but for weekly recoveries they will not do as the threading will wear out and eventually they will fly out. Every Offroader should make sure he has proper recovery points on the front and back and that they are in perfect condition. During more extreme recoveries there are additional techniques we apply to distribute the load, such as a bridle rope. This rope basically distributes the load between both towpoints. In which direction should i put my vehicle when i recover someone ? This will depend on a case to case basis: When during the recovery you want to have FULL visual of the car that you are recovering, it will make more sense to attach your rope to your front recovery towpoints. In the case the recovery needs a bit more force, and you have a towbar or stronger recovery points at the back, then it makes more sense to attach your rope to the rear towpoints or tow bar. In the case that you really want to see where your own car is going (in difficult terrain with bushes for example), it will also make sense to perform the recovery by attaching the rope to the back of the car. Can i attach my shackle or rope to a tow ball receiver ? Tow balls are NEVER to be used for recovery purposes. There have been many incidents where the tow ball has come off and became a deadly projectile. DO NOT ever recover a vehicle by connecting to the tow ball !!!10 points
-
 Basic Guide to Self-Recovery For newbie here is the recommended to read beginners guide to off-roading before you jump to reading this topic. We have already looked at the very basics of driving in the desert, lets look at another aspect. Sooner or later you will experience another, but not so pleasant but inevitable facet of this sport or hobby. Getting stuck, now we will talk here about that or to be more precise, how to get yourself unstuck without any help or if you are on your own, which by the way is not a very good idea to start with, specially if you've been just introduced to this activity. Getting bogged down happens all the time, whether its your first day in the desert or your a seasoned professional with the scars to prove it. The very first thing to do is NOT to panic. You are not the first one this has happened to and your not going to be the last. Panicking will only make the situation worse, so its always better to keep a calm and collected mind to help you through this ordeal. The other thing is to realize that your actually stuck and leave it at that and learn to accept that, yes, you are stuck and not going anywhere anytime soon. I have noticed many a times that someone does not accept the fact he is stuck and making the situation worse, What usually happens is the individual goes into denial mode and thinks that power alone can help him out, forgetting that his old friend momentum has abandoned him because he was mean to it. Then you see huge trails of sand being thrown up as he or she digs deeper into the earths crust. You see every time a wheel spins in a stationary position is displaces more sand underneath it effectively acting as a drill, remember our goal is to stay on top of the sand not under it, so this ego push will make things worst. Most of the times by simply reversing out to where you came from will solve the problem, specially when you have a slightly rising gradient in front of you. But start of with the gas slowly making sure not to spin the wheels, a little slip here and there is acceptable. Best way to do this is to pop your head out of the window or simply open the door and peek at your wheels. The advantage of this is two fold, first you can see your tires and second very quickly you'll learn not to spin them as doing so sends a tons of sand in your direction and fill the interior of your car with sand. Also before you do this, its best to step out of your vehicle and analyze the predicament you've gotten yourself into. This gives a good idea of what exactly needs to be done next. One effective technique and one that I personally feel is dying out is the art of rocking. No its not some kind of ritual dance to appease the sand gods so they will let you free from their clutches. It is pretty much what it says. You literally rock your car out. This usually works best if you are knee deep in it and on relatively flat surface, has limited to no effect if the car is stuck sideways at a sharp angle. This works best if your driving a manual transmission but not totally ineffective on autos too. First thing to do is engage low ratio as this gives you more torque and you shall require oodles of it here. In low gear now bring the clutch to it's friction point, and I do hope you know what that is, if not look it up. Just when you feel the car is about to move, press it back in, just before it stalls. You don't need to use the gas pedal here. You might even stall a few times but its perfectly OK to do so, try again. Now once you do this you'll realize that the car gets a slight jolt like some one just gave it a wallop. Do this a few times and you'll feel with every movement of the clutch the car gets more movement than the last. What is happening is your disturbing the sand that has a death grip around your tires. With every jolt the car is trying to make forward, some of that sand is moving into place where your tire used to be, all the while making some space for the tire to move about. After a few attempts in one direction change gear, if you were in 1st put it in reverse and vice versa. Now this pushes the sand on the other side of the tire. All the while you will see your movements getting bigger and bigger gradually, now the trick is to keep the clutch engaged just long enough to move the vehicle as much as possible before it stalls out and you will see the car has now started to rock. What is happening now even if you have half a foot or less of travel in either direction is, sand is sliding in when you move and when you go over it the weight of your vehicle is compacting it, so you will slowly start to rise out of the sand. Sometimes the surface could be flat or the sand coarse and not sliding in at a fast enough rate or not at all. Now what you will do is what many will find extremely odd some might even disregard it. Pile up sand on your tire sidewalls. When I mean pile up, I don't mean bury your entire tire, just till sidewalls should be enough and you might have to repeat this. When you do this and rock that sand pile flows into that little tract your making like a small bulldozer and slowly the elevation starts to get higher. Now that you've got a good rocking motion going for you, you can feel your almost free. Now get the timing right on the edge of your swing, throttle it down and most of the times you will jump right out, sometimes you might misjudge it or the sand is playing tough, you might have to start over. Another thing to keep is mind is you have to make sure you are not grounded. This is when any other part of the undercarriage i.e chassis, differential etc is in contact with the sand, even if by a little. You'd be surprised how stubborn sand can be sometimes. Best to clear your car to such an extent that nothing other than your wheels are in contact with the ground. For an automatic rocking is less effective simply because of lacking a clutch, and not being able to give those life saving initial jolts. What one does is play between D and R. D a little movement forward, the same in R. Do this a few times and see if your getting any movement in any direction and if only in one direction, then play with that side first and then slowly going in the opposite direction. The concept is the same but just takes longer and your not rocking, rather paving your way out. You can try and achieve a rocking motion by alternating between a gear and N, but this is not recommended. Also keeping in mind not to over do it and automatic transmissions are prone to overheating, give it a little rest in between tries by simply putting it in park or neutral to cool itself down. Another way if your driving an automatic or you cannot rock for whatever reason. Is crawling. Now this is different and nothing like rock crawling. Crawling is basically struggling and fighting your way out. More like a battle with the sand to show it whose the boss, but don't get too cocky here, mother nature always has the upper hand. You might win the battle but will always loose the war. First of all is see if there is a downhill slope in any direction, even a very slight one, always remember to never underestimate the power of gravity. Similarly aim away from any uphill slopes, yes even very tiny ones and this goes for almost all types of situations where you get bogged down. How to crawl, very simple but can be physically strenuous at times. As always engage low ratio and apply differential locks if you have them. Now if the down hill slope is behind you engage reverse or forward if in front, first we have to get it going, then if it is on any one side we try to come out of it. You have to give it enough throttle that your wheels start to spin slowly, again stick your head out of the window for the two reasons mentioned above. Usually this is in between 1500 to 2000 rpms. Initially you might have to go a little over just to get the ball rolling, easing back down once you do. I don't think I need to mention again that you do not want to be spinning them as if your doing a burnout, just keep it steady. Now while that is happening, do full lock to lock turns with your steering wheel from left to right and than from right to left again. Do it with a little enthusiasm and not as if granny is trying to parallel park. You might notice that front wheels might stop turning between those lock to lock turns but that's OK. Keep at it. What is happening here is that your oscillating wheels are clearing out loose sand from its path and depending in which direction you are moving either pulling or pushing your car. Of course the rear wheels are also helping. Also if you got mates with you a little push also helps out a lot. By this time you should have some kind of movement. At first it could come is short bursts, but keep at it. If you notice you are getting lateral movement only within a specified arc of the steering i.e only half a turn in either direction and rest of the movement of the steering wheel is pretty much doing nothing. Then limit the the turns to that much. Trying out complete lock to lock turns again in the middle to see if the situation has changed or you lost movement in the your intended direction. If the downhill slope your aiming for is on one side then steer more on that side. Limiting turning to the opposite side. If your lucky and there is a downhill slope close by you will feel the car is starting to struggle less as it tries to free itself and gravity giving it a good helping hand, this is when you start to give it a little more gas. this is also when you realize how even a slight slope helps. Slowly but surely if you don't over spin you tires and keep at it, your vehicle will come to a harder patch of sand and now all you have to do is keep going until your well clear. And of-course when all else fails, use your trusty shovel and a little bit of elbow grease. But know how to use it wisely don't just go about it, a little shoveling in the right place goes a long way, rather than a lot of shoveling in the wrong place. First of all make sure as mentioned earlier nothing other than your tires should be in contact with the ground. If there is a build up of sand in front or at the back of any of the tires, clear that out as well. Once you've done that try to break free if it doesn't work the first time see where the problem is and shovel a little more and give it an another shot. One type I will not cover in detail here as it is a subject all on its own is when you get stuck sideways, only the very raw basics as it is always advisable to get help from others first, only if your by yourself and you have no other option. The simple aim here is you want either the nose or tail of the car to point downhill as much as possible. If it is very steep slope with very loose sand and your tires dug in quite deep on the down side, in that case call for help. If it is not that steep, or high and the sand is not all that soft and your not dug in too deep, then you can try to get out of that situation, but raise caution again if your not 100% confident of what your doing it is best to ask or call for help. Anything over 30 degree of tilt I would leave it alone, more experienced drivers might attempt steeper angles but they know what they are doing and do not try to emulate them. Thing to do here is see which side of the car is pointing more down and has a clear path that is no obstructions like bushes. You want to go in that direction. Sometimes you could land up in what will once again have your car stuck, i.e: a ditch or pocket but being stuck level in a ditch is any day better than being stuck sideways on a slip face. Try to crawl out first but of course not steering up in this case. If you feel your getting some kind of movement then keep on going if not, give it up. Assess the situation very carefully and correctly and then you might want to physically move some of the sand out of the way and try again but very very careful and cautious as sometimes that sand on the lower side wedged up against your car is the only thing keeping it from rolling over. So if you disturb that you could end up in a world of hurt. And last but not least as every stuck is unique and requires its own set of solutions to get away, sometimes you will have to use one of the techniques mentioned here sometimes all of them, or even more, never give up on ingenuity, but always step out and access your situation before you start trying.10 points
 -
When using your vehicle in the desert, certain electronic aids like Active Stability Control (ASC) or ABS need to be disabled, as the soft and slippery sand will make the traction aids kick in and you won't be able to spin the wheels, which is something that is unavoidable when driving in the sand. Below i will describe the easiest two methods to disable your ABS and Stability Control (ASC) at the same time. You can choose either method 1 or method 2 as per your own preference. Method 3 describes the installation of a kill switch, which will require some work as seen in the video. Method 1: Removing the ABS relay 1) Switch off the engine and open the hood. 2) Locate the relay box and open it. 3) Locate the ABS relay on the upper right hand. Remove it by pulling it out. 4) Close the cover and hood, and switch on your engine. You will have no specific alarms on the dashboard but they will start to flicker after a while (ABS light, ASC light, etc...) and eventually they will stay on which indicates they are completely disabled. Method 2: Unplugging the ABS connector This method obtains the same result, but faster. After unplugging you will have immediately disabled ABS and ASC, hence you will have no restrictions. After your drive, there could be some sand inside the connector, so carefully remove it with some compressed air or a small brush. After your offroad drive, you can open the hood, plug the relay or connector back in, and restart your car. The ABS and ATC dashboard lights will be off again. Method 3: Installing a Kill Switch If you are handy, you can do this yourselves by following below steps. If you are in doubt, get it done by a professional workshop. The most advanced method includes the installation of a special "double functionality" kill switch. These can be bought online but are rather expensive. See functionality below:9 points
-
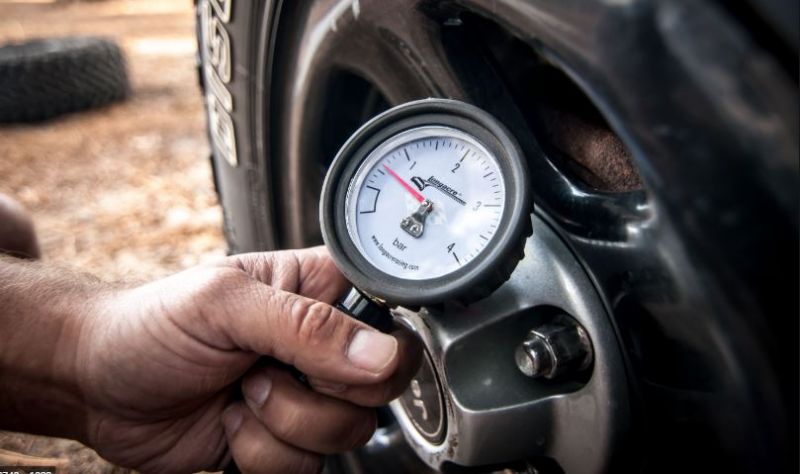 When starting as an off-roading enthusiast in UAE, you will come to hear about deflating your tyres, and setting your tyres to the right tyre pressure is one of the first things you will need to learn to master. The main reason for deflating your tyres is to obtain a longer footprint in the sand, and that enables you to drive on the sand, instead of digging into it. Tyre pressure is defined in PSI (pounds per square inch) or Bar. You will find both readings on your pressure gauge. In UAE most people use PSI, and the gas station compressors also use the PSI identification. Below you can see the corresponding PSI and Bar readings. As a beginner level offroader, you should reduce your tyre pressure to about 15 PSI. This is low enough to enable you to drive in the dunes without the risk of the tyre coming off the rim. This 15PSI is also perfect for on-road-tyres. After a few drives, and depending on the terrain, or if you have offroad tyres, you can slowly deflate further down to 10-12 PSI. Take note that the risk for having a pop-out will increase, so don't be afraid to post your questions on the Carnity website or consult one of the marshals if you are not sure about your tyre pressure. There are different ways of deflating your tyres, and each have their advantages and disadvantages. The more you will practice, the sooner you will find out what works best for you. How does a stem valve looks like ? The stem valve is consisting out of 3 pieces. The body, that is made of flexible rubber, the core, and the valve cap. Take note of the following: - The rubber valve body wears out over time. Once you start to see cracks, it is advisable to get it replaced at the nearest tyre center. - The valve core is a tiny component with a small rubber gasket. If you remove them on a weekly basis, the gasket slowly wears out or the core can even break. Carry 5-10 spares in your vehicle. The tyre center often give them for free. - The valve cap keeps dirt and sand from entering into the valve, so it's advisable to always screw the cap back on. The process of deflating / inflating goes by either pushing in the valve core, which allows air to be released, or by removing the valve core, which is a much faster option. How to check the tyre pressure ? Verifying your tyre pressure is really easy. Get yourself a pressure gauge, and push it against the tyre valve, or screw it on (depending on the model). You will see the reading in PSI or Bar. The digital ones are fine, but one day the battery will be empty, so a good old analogue is preferred to have as well. PS if you find that your gauge has difficulties reading the tyre pressure, and you really need to push it hard onto the valve, this is an indication that the valve core is worn out. Replace it with a new one and you will see that this will solve your problem. Which tools to deflate and how much time will it take ? 1) Set of keys, a rock, or anything you might find in your car (+/- 15 mins) PROS: CHEAP and plenty of stuff available CONS: Takes a very long time which you could use for a smoke or a chat and risk on damaging the valve stems. 2) Valve Chucks (4-5 minutes) Buy 4 of them and stick them on all tyres simultaneously and then wait about a few minutes (as per your type and size of tyre) to arrive at around 17-18 psi. Then take one tyre at a time and use your pressure gauge to further decrease and finetune the pressure of each individual tyre. PROS: Fast and Cheap CONS: none that i know off. 3) Stem removal tool (2-3 minutes) Available in most hardware shops. Enables you to remove the valve core stem so the tyre pressure comes down very fast. PROS: Very Fast and Cheap CONS: Be careful not to lose the stem as it can blow out. So taking some spare is advisable. Be careful not to deflate too much as it really goes fast. Use a stopwatch and learn to find the perfect timing when to screw it back in, and then double check with a pressure gauge. 4) Rapid Tyre deflator and pressure gauge ( 4-5 mins) This tool enables you to loosen the stem, quickly deflate and immediately take a pressure reading. PROS: Professional tool for reasonable price, pressure gauge and deflator in one tool. CONS: Might take a bit of practice to get the hang of it. The fake chinese ones are fairly unreliable. As with all tools and gear, we advise you to practice a bit at home to become familiar with them. It is also recommended to carry two pressure gauges, so you can compare them with each-other and double check your readings. Often we have seen pressure gauges giving accurate readings at high pressures (35) but very inaccurate results at 10-15 PSI.8 points
 -
 Welcome to a basic guide to off-road venturing. Most of us would like to venture into the vast dunes we see on either side of the road, but it can be tricky for the uninitiated to take the first step off the tarmac and into the unknown, Well the first thing to remember is sand is almost like a liquid surface and our main aim is to stay above it, buoyant if you will and not sink. How do we do that? Lowering the tire pressure. How does that help exactly? It increases the contact patch or footprint of your tires. Which basically means now there is more ground to support the weight of your vehicle and you wont sink in as easily. At first stick with 15 - 18 psi, going any lower exponentially increases the chances of the bead of your tire losing its seal with the wheel and letting go of all the air (pop out), usually at the worst time and place possible. Once you understand and gain more experience in the art of desert driving you can go lower according to the vehicle and terrain at hand. But in the beginning lets stick to 15 - 18 psi to keep our first steps in to the desert as trouble free as possible. Now that you have your tires ready for the terrain what do you do now. Full throttle starts are mostly never a good idea but rather gentle acceleration, some situations you need to give it more go than normal, but if starting from a flat and relatively smooth area it is always better to be gentle. Hard starts will usually end up in digging yourself in if not careful. But don't be a granny about it either, remember this is not your typical tarmac surface and gentle blips on the throttle will not get you anywhere. You have to learn to achieve that balance. Once you get going you have to remember what was mentioned earlier, that think of sand as a liquid surface. You have to keep your momentum, in fact momentum is your biggest friend out in the desert and once you have an intimate relationship with momentum, it will help you out in a lot of places. What you initially thought were impassible tracts of sand, momentum will take you through them. Think of this as water skiing, once the boat slows downs the skier tends to start going lower and lower into the water until he finally sinks. Although the desert will not consume you and your car like a body of water but getting back to that speed and motion is going to be real hard, and in some places its just not possible to build that momentum again and you will either get bogged down or have to change route. Don't be afraid to let your engines stretch its legs to keep the momentum going. Most people are afraid to rev their engines too much simply because they are not used to it. Don't change up gears too soon, as the lower rpms will rob the wheels of the required torque to keep the momentum going. But also just don't stick in one gear and let it scream in pain. If you're driving an automatic keep the pedal planted in just enough that it does not shift into the next gear or mashed totally into the carpet that it downshifts and starts to over rev. Automatics in this regards can be a slightly tricky, but they shift gears in milliseconds and keep the downtime in between gears to a minimum. While on a manual you have to be quick and crafty with you changes as too long between gears and you could have broken that fine balance keeping you afloat. Again taking similarities between water and sand, more like ice in this example. Steering. it will not be as sharp or as responsive as on a hardened surface. The vehicle will not turn on a dime. There is a small delay in where you want the nose to point and where the car itself wants to go. Basically you turn and then you wait for the rest of the car to catch up before it actually starts to and this delay gets worse as the speed of your vehicle increases as well as the softness of sand your driving on. So you have to be a little ahead of time, a sort of a mini time traveler if you wish and be able to predict where you want to be going in the next few seconds rather than waiting for the last moment. Sometimes no matter of future predicting ability can help you when gravity becomes in charge, this usually happens on slopes and we will talk about this later. Now that you got your self going, what about stopping? And as always braking, this is different here too, you just can't slam on the breaks. Because all this does is digs your tires into the sand and then trying to move again becomes a hassle if not totally getting stuck. Always gently ease off the throttle and apply the breaks slowly and when ever possible let the car come to a halt on its own. Also makes a big difference where you choose to stop. If your facing uphill and the angle is high enough. 9 out of 10 times you will not be able to carry on forward any further. Always try stopping facing downhill even if it a a very gentle slope. You'd be surprised how well gravity works ! OK, now that we know how to drive on flat surfaces, lets tackle some fun stuff ! Going up a dune ! Sand dunes have two sides to them. One is a gradual climb leading up to what I refer to as the slip face. The other side, a real sharp drop and most of the times there is a nasty bit in the middle of these too. Which I like to call the blade but usually know as the ridge. At first always try to go up the easy side first. Always look for a smooth and straight line up. Which is clear of all bushes, dips and bumps, basically as smooth a ride up as possible. Then comes the tricky bit. Now what you need is power but in very measured quantity. Too less and you won't make it and too much will send you flying off into the unknown on to the other side. So to make it simple, the thing to do is give it as much as you got at first but easing it off or totally letting it go before you go flying off. Three Fourth way up the climb you should be able to guess from the forward momentum of the car that whether you need to keep the pedal mashed into the carpet or you need to back off or totally let go and let your old friend momentum take care of the rest with just some gentle blips from you here or there. Keeping in mind the amount of run up you have had before the climb. If you had enough speed before you hit the dune and specially of it is not a very big one, say twice the height of your car. It would be unwise to mash it as you already had loads of speed and your own inertia will take you over just keep the throttle steady or give it a little more if you feel your losing forward motion on the way up. Sometimes you might even need to slow down if you don't want your bumpers from smashing into the wall of sand. What do you do once your on the top? Well hopefully your not on your own and you are following someone so keep an eye on that car what it does, goes over, turns to one side etc etc and try to replicate the same thing. If your following someone give it sometime before you attempt the climb yourself, in case there is a problem you cannot see. If there is you should see someone come over the top to tell you or if you have a radio you should get an all clear. If your by yourself. Always a good idea to go on foot and see whats on the other side. If you don't make it the first time round. Put your car in reverse and slowly come straight down. Sometimes this can be tricky as you may be a bit disorientated from the angle or which way the tires are pointing. Remember gravity and the delayed steering. Gravity will initially pull you down straight and then the delayed steering will come into play and you could end up sideways on a slope. Also never freewheel down, always keep in gear and let engine braking help you down plus this also helps you keep in control of the situation. Then back up a little further if possible and give it more throttle the next time. Also keep in mind that sand is also a little bit like pie. A hard-ish crust on top with being softer on the inside, and once you drive over a patch you have effectively cracked the crust exposing the softer inner side. So try not to follow your tracks of the previous attempt as you will be treading on the softer exposed sand. The more cars that pass the more churned up and softer it gets. Sometimes it is not possible to get a fresh patch of sand. Only one small exit out of a pocket or only a small crossing on top that is not sharp enough to cross over. In that case try to be on as much undisturbed sand before you are forced to get in line. As with all things, what goes up must come down. Going down is one of the easier parts of desert driving and sometimes the most scarier parts specially if your a beginner, but don't get too easy about it either. Things can still go wrong. First basic rule is too keep you wheels and the nose of your vehicle pointing straight down. This might be harder than it sounds, remember what was mentioned earlier about reversing down a dune, the same thing can happen while going down nose first. Again never freewheel in neutral down a drop and don't brake too aggressively this will cause your nose to dig in and in a worst case scenario cause you flip over, head over heels. Although this is very rare but this might happen. Another phenomena while slithering down a dune is fish tailing. That is when the end of your car wants to over take the front, So it starts to come up sideways from behind. What needs to be done is to make the appropriate steering correction and slightly accelerate for your front to get back up to speed with the back. But gently, over enthusiasm here can end up worse than the initial symptom of fish tailing. If coming down a sharp and steep downward slope engage low 4, 1st gear or D 1 if an auto and then let the car comedown with the help of gravity and engine braking. Better is to start off with less sharper gradients and practice this with being in D 1 or 1st. Once you get used to it you should be able to complete this task in D and just the brakes. But it is always handy to know this technique, In the end driving in the desert is a delicate balance between momentum, gravity and power and only practicing and driving as often as possible can get you better at it and develop a sixth sense about it. You will learn to interpret the feedback of your vehicle and steering wheel is giving you. You will learn to read the terrain better, even before your vehicle gives up on you, you will realize your not going to make the climb and its better to stop or if you have enough momentum left to come back down. But its better to start of with the correct basics instead of getting ingrained with the incorrect technique right from the start. This is just a very basic guide covering only some of the points. Remember nothing beats real world practice. Hope this has been of some help in making that transition from tarmac to sand. Feel free to add or edit or even post questions. I will try my level best with whatever knowledge I have to try to answer your queries.7 points
 -
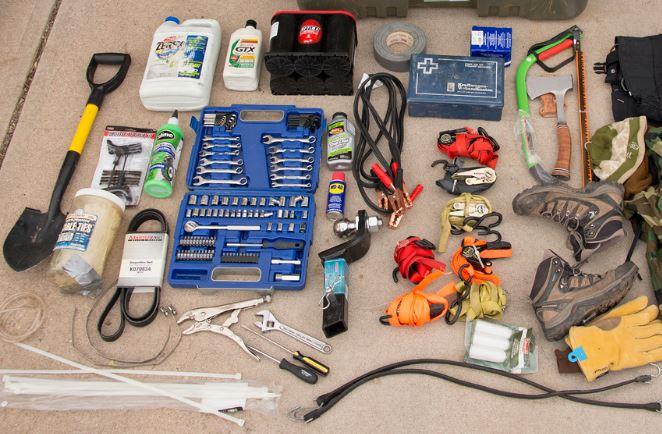 Recovery Gear Below is the most comprehensive list of all commonly used off-road gears and basic recovery tools - this is the stuff everyone needs and it has to be easily accessible at all the time, while driving in off-road terrain (Sand and Rocks). MANDATORY KIT AIR COMPRESSOR Bush Ranger Black Max, ACE @ Festival City. Also available Pro Air, Max AirII at different price points. ARB Air Compressors from ARB Abu Dhabi (call up and order, will deliver C.O.D) Chinese stuff at Dragon Mart - if you're feeling lucky. Other compressors at Carrefour/other Hypermarkets or car accessory shops are not really recommended. RADIO / WALKIE TALKIE Motorola, allegedly 20 mile radius, from the small Sabka shops Dhs.325 Dragon Mart, higher output (will fry your ears), cheaper, clearer. TOW ROPE / SNATCH STRAP Bush Ranger heavy duty tow (dhs.200 or so) or Pro snatch kit (Dhs500+) from Ace Viking rope from Robbie's Garage (to the left of Times Square, Shk Zayed Rd) Dhs265, I think. Kinetic Rope from International Trading Co. Opposite Everhot Water Heater - Al Qusais. SHACKLES Are available at ACE, 3.0 T to 4.75 T very reasonable rates, make sure you get the shackles with the screw and not the pin-type shackles. SAFETY FLAG - available from shops that sell Quads, alternately use Fishing Rods fastened with a bolt to the spare tyre rig, also available is the FireStik range at Robbies which is very expensive but very neat and professional). You may also want a gutter-mount for the same (if your vehicle has a rain gutter). SHOVEL Fancy chome-plated stuff rom ACE or other accesory shops - expensive & of debateable utility. Bushranger tri-fold shovel with its own cover - about as expensive, easier to carry. Regular construction shovel from a hardware or construction material store - Dhs.25 and much more effective but not so compact. Fiskars super-lightweight camping shovel. Most expensive but is also lightest (you want to carry sand, not metal!). I recommend this, but this is very budget-sensitive. BASIC FIRST AID KIT Available at all pharmacies, auto kits available at ACE and some specialized offroad joints, you can also put one together yourself or your vehicle may have one supplied with it. Should contain: Gauze (Large, Medium & Small sizes) Sticking Plaster & Adhesive Strips (Band Aid variety) Surgical Cotton Surgical Spirit/Antiseptic Basic medication/ointment for minor cuts and bruises Burnaid other burn treatment Scissors & Forceps Cotton Buds BASIC TOOLKIT + FIRE EXTINGUISHER + JUMP STARTER CABLES + USABLE STEPNEY HYDRAULIC SCISSOR FLOOR JACK & STRONG WOODEN PLATFORM/PLANK (or HiLift Jack base) An alternative is the very expensive and equally heavy but neatly packaged Exhaust Jack Series II (dont buy Series I) from ACE, its upwards of Dhs.800. A Hi-lift jack is something a lot of people like to carry prominently like some sort of badge, but this is of doubtful utility in our really sandy terrain. Very useful in Wadis etc. DEFLATION KIT Valve remover for tyres - most tyre shops Dhs.10/- Pen-type pressure gauge (marked in PSI, not LbFt) - Dhs.25/- most car accessory shops. Other gauges are also available, the pen-type stuff is considered good. Use trusted brands like Milton, PCL, ARB, Victor, Rolson or Monkey grip. 4 Spare Tyre Valves to replace any lost while deflating. CAN FOR ADDITIONAL FUEL FOR LONG TRIPS Available from Ace Hardware, good for long distance trips where you are not sure about the petrol stations on the way, very handy in places like Liwa. YOUR VEHICLE SHOULD HAVE RECOVERY POINTS - FRONT AND REAR. OPTIONAL ADDITIONS Collapsible water can from ACE (Dhs.35 or so). Cool box with ICE (also useful for medical emergencies) and fluids of your choice (for more guidance, ask Kash). Cargo Net & Elastic Tie-downs to keep things securely fastened. GPS - Make sure it can store way points, record a track and pay the track back in reverse. Miscellaneous stuff that you should never need, but would want to keep handy - tire sealant gel/foam/goo, radiator leak-stopper (powder that you pour into your leaky radiator), exhaust leak fix (for small leaks, not cracked exhausts), flashlight, etc from ACE. Just to be on the safe side, one small 5 litre fuel can (Dhs.25 from any petrol station) and a manual siphon hose to borrow fuel from others (15-20 bucks). Duct Tape, Insulation Tape, Bush Knife/Pen Knife & Plastic Zip Ties. For camping trips - collapsible chairs/tents/sleeping bags/lanterns/BBQ kits/use your imagination. Small bottle of concentrated liquid Camp Soap or Dettol Hand Sanitizer + lots of Kleenex/tissue rolls. Working gloves to handle hot stuff in the engine bay + cloth/cotton waste. AAA or IATC Assistance as a sort of insurance for major breakdowns. Hope this helps. Please let us know if you need assistance or further information.5 points
 -
 This comprehensive used car buying guide covers the complete spectrum from the day you first thought of buying a used car till the day you bring that car home. It is designed with clear headlines in a sequential manner so that you can jump to any stage with a quick scroll. We have spent a lot of time and effort in compiling this used car buying guide based on several senior members, experts, mechanics, and technicians advice with their years of experience in buying a used cars, fixing them, and spotting the dodgy repair work. I hope this wealth of knowledge helps you and your family in driving a safer car eventually. 1. Research and prepare your budget If you want to be successful in picking up that perfect deal, you will first need to build a target list of used cars that you are looking for. If you aren't sure about what you want, then check these 7 Car types you should know before buying. Once you have chosen the car(s) that you want to purchase, do some research online and try to find the model/year that suits your budget. Whichever car you shortlist, the very first step you need to check if that car's year model has any recalls safety alerts and bulletin. You can check most of the GCC vehicle recalls, safety alerts and TSB here, and also you can search all newspaper websites one by one for recalls verified by the United Arab Emirates Ministry of Economy. You should check the theoretical fuel consumption of the car with the distance you travel every month to factor in your fuel estimate. Be prepared that based on your driving style, this could be at least 15-20% higher. If fuel cost is a concern for you, then you can check 30 Fuel Saving Tips For Saving Over 30 Percent On Fuel Cost called Hypermile: Extreme Energy Efficient Driving. Apart from the car cost and fuel consumption, there are a few more costs involved that you need to know before making up your mind about which impact the Real cost of car ownership. Once you select your car based on your needs, research, and liking, it's always advisable to take a second opinion from a genuine car expert or a person who has owned a similar car in carnity car forums. Look how Avinash took the real good advantage of discussing his car buying need with unbiased car experts and owners and finally changed his mind from buying a Jeep Wrangler TJ to Nissan Xterra. The people who have owned a similar vehicle are the best persons to advise instead of your social friends, family, or salesperson at a car dealership. Buying a used car will probably mean that it needs some attention to bring it back to the condition that you really want. Consider replacing tires, having the full maintenance done, and bringing in the car for detailing and polishing will add to your total expenditure, so be prepared when setting your budget. When going for luxury cars like BMW, Mercedes, and Porsche, be prepared to put aside a bit more than if you’d buy a Japanese or US car. Maintenance and parts on luxury cars cost a lot more. Same way when considering a 4x4, there are more parts involved and higher fuel consumption you need to factor too. To have some guidelines on your budget, check these 3 Key factors for assigning next car budget. 2. Where to search and how to proceed Without any doubt, it is always recommended to buy a used car from a car owner than any car dealer or private seller as a middleman. The reason is that you will be able to have a clear understanding of the car’s history, and reason for selling, and as there are no other parties involved, both will get the most benefit from the deal. Always prefer Car Classifieds that have real car owners used cars and not from the car dealers. If you search car classified sites, always make sure to filter the ads from the car owner. Also, be careful because many so-called private sellers are in fact dealers on most of the car classifieds websites. If you don't see the seller's name on the car registration card or hear a story that I am helping my friend/brother then 90% chances are of a middleman acting as a private seller. You can find 5 Best places to buy clean used cars at good price here. The major problem with car dealers or the middlemen is that they are flipping cars for business and if the car has no service history records then it must have gone under a lot of compromised repair or quick fix recently. This sub-standard repair or cost-cutting will cost you dearly in the first 6 months of ownership. UAE has many used car dealerships, the Ras Al Khor auto market in Dubai is enormous, Mussafah in Abu Dhabi, Abu Shagara and Souq al haraj in Sharjah are a few of the big and famous used car markets here in UAE. Be very careful when buying a car from a dealer or auto market. The inspection steps mentioned below are to be followed even more rigorously to avoid ending up with an imported or salvaged lemon! Once you found a good prospective vehicle, don’t immediately jump to view the car, but call the seller or dealer first to make sure if it is still available. At the same time, you can go through the first basic questions like why the car is being sold, if it’s still available, how long it has been up for sale, and if it had any unmentioned issues or accidents in the past. Do not discuss the prices on the phone yet. Keep that for when you are face to face with the seller and once you have fully assessed the car’s condition. The reason for not discussing or negotiating the car price on the phone will set you aside as a real buyer as 90% of car dealer phone call starts with "what's the last price?" which is pretty sad and painful for any car seller that buyer wants to knock down 50% of asking value without even looking at the car or its condition. So with this strategy, you will have a better head start compared to other viewers and this approach might help you know a lot more about car history when the owner is at ease and not furious with bargain hunters. When you set up an appointment to view the car, make a preference to see the car in daylight hours. If it's not possible, then bring a good torchlight and ask the seller to head to any fuel station. This will help you in assessing the paint and bodywork. 3. Seeing the car and service history Once you go and see the car that you have prospected, it is very normal to be excited. But please do not ever show this to the seller, as you would give him the signal that you REALLY want the car, and that puts him at the competitive edge in the upcoming discussion about the price. Keep a poker face, stay friendly, and stick to the facts. Do not disclose too much information on why you are interested in this type of car. The less the seller knows about you, the less ammunition he has that he would use to ask for higher prices. It is ALWAYS recommended to bring a friend on the visit, he might see things that you don’t see. If that friend is a bit technically inclined, or even a mechanic, all the better! The car's mileage should represent what the seller tells you. While in theory, it is always better to have a car with low mileage, this depends on how the car was maintained and driven. Many high mileage cars are sometimes in better condition than that low mileage driven cars that have been standing still for years or are poorly maintained! Ideally, the car should have complete service history, preferably from the dealership or a reputable garage. If nothing is available, walk away from this vehicle or buy it at your own risk if you are technically inclined. This should ring alarm bells! Verify if the car is GCC specs or not. A GCC car will have the metal sticker on the driver sill containing vehicle info and has Arabic written on it then which means it is GCC specs. It is recommended to go for GCC specs vehicles in the UAE or GCC countries, but you’ll also find plenty of American and Japanese imports that will be a lot cheaper. Buying a non-GCC car is a big risk as most of these cars have been written off (accidental), stolen, or have unknown damages or issues. Ask for the previous RTA inspection documents and valid insurance and registration card to avoid problems when doing the official handover in the RTA offices. Check the mileages mentioned on the documents to see what the yearly increment was and whether it is in line with the current mileage of the car. If the car is on a loan or lease, the seller will need to settle that first otherwise transfer of ownership cannot take place. Ask him to check with his/her bank for the procedure and timeline required. Check for recent repairs and verify if the maintenance schedules were properly followed. Check when the next big maintenance is coming up, as that might include expensive parts like timing belts and suspension parts. Those are quite expensive maintenance jobs and if they are almost due, you should reduce the asking price accordingly. A VIN Number is an international Standard code on every vehicle. On most cars, you will find it on the dashboard driver's side. When cars are written off by the insurance due to a heavy accident or flooding, it will appear in the International VIN Database. For imported vehicles, you can use a website like carvertical.com that allows you to enter the VIN code and for a small payment receive a full report on the car. For checking the accident records inside the UAE, there are the following options: https://portal.moi.gov.ae/eservices/PublicServices/AccidentsInquiry.aspx?Culture=en https://www.evg.ae/_layouts/EVG/trafficaccidents.aspx?language=en 4. Exterior and bodywork inspection As mentioned, make sure you see the car in daylight, or if not possible, bring a torch with you and ask the seller to put the car underneath the streetlights or at a fuel station. Dodgy paint job A good way to tell if a certain car has been involved in an accident is to check for signs that it has been repainted and the way to do that, is to look at the reflection of the paint. The surface may look clear and smooth when viewed straight on, but sit by the side of the car and you may spot some unevenness or wavy lines with dips. If you do, there’s a good chance that the car has got a body repair job after the accident. Walk around the car and see if the color on all the panels matches — if it doesn’t then you know some patchwork has been done too to the car. Many cars that are 6 years and older, will have some scratches left and right. That is perfectly normal and does not mean the car is not worth buying. If the scratches are small, a decent polishing job can hide them again, and you can use it to push down the price a little bit. Misaligned panels When the doors, boot and bonnet are closed they ought to be perfectly flush with other panels. If the alignment isn’t right, it could be a sign that the car has been involved in an accident. Similarly, the front and rear bumper should fit straight but if you notice it’s at a slight angle or the gap between left and right doesn't match, chances are high that the car had an impact. Open and close all the doors once, there should be no rattles and they should align perfectly. Check the tyres Get your hands on your knees and give the tyres a good close look. If the tread seems uneven, it could be because of a misaligned wheel or even possibly caused by damage to the chassis. While you are down there it’d be a good idea to have a good look at the underbody and the wheel wells – if you see a fresh application of a rubberized undercoat it could be because of recent structural repairs and this was a quick way to cover that up. Windshield Inspect the windshield for cracks. Even the smallest crack can suddenly cause a complete crack a few weeks or months later. If the crack is smaller than a coin, there are companies that can repair it and make it structurally intact again, so it does not crack in the future. Inspect the windshield rubbers too, many cars that have been parked in the bright sun for a long time might have dried up windshield rubbers. Headlights Most modern cars now have plastic headlights, which become yellow after long exposure to UV radiation (in sun). When they become too hazy, RTA will make note of that and might not pass the car. If both headlights do not have a similar level of haze, then either the headlights were replaced after an accident, or the careful owner got them polished (and that means the owner is a bit perfectionist 😊), or kept the car in the shade at all times. Chassis Try to look under the car and see if there are any noticeable damages to the chassis. You can spot the recent damage by seeing the color differences on the repaired areas compared with the original paint. For older chassis damage you'll need to consult the proper technician who can check the chassis with computer alignment, including RTA Tasjeel selected branches. Have a look underneath the car's engine bay and sides to search for any wet markings of oil drops or pools of oil. Minor few drops or stains are acceptable to some extent if they are occasional, but regular drops or a pool of oil or any other fluid will require an immediate checkup! Clearwater dripping when the car is on = AC condensation - nothing to worry about. Clearwater droplets coming out from the exhaust = it's a sign of a healthy engine. Front side underneath - golden or brown oil = Engine Oil leaking - Immediate check needed. Front side underneath - green or red water-based fluid = Engine Coolant leaking - Immediate check needed. Under front driver or passenger side - red or brown oil = Gear Oil leaking - Immediate check needed. 5. Interior and minor detailing When entering the car, you might be either put off by the mess, or pleasantly surprised about the cleanliness. Both are possible impressions and be careful not to make an early judgment. Car dealers will get the interior professionally cleaned by third-party companies, so it looks super clean. When buying from a private owner you would hope that he shows you the car in a clean external and internal condition. If not, then better to walk away from a dirty interior car, which is expensive to restore. Damp smells If you notice that the dash light, or the power windows or indeed other electronical equipment doesn’t seem to be working right, it could be a sign of flood damage. Too many air fresheners in the cabin should sound the alarm bells – is the owner trying to cover up any damp smells caused by water damage? Visual signs of aging A car interior should match the km driven even if the car has a full service history. For cars with mileage below 50,000 km, you shouldn’t be seeing any broken knobs, faded buttons, worn-out brake or accelerator rubber, or loose and shaky gear levers. Car seats should not have too much play when you sit. Pull the seat belt out and see how smoothly it rolls back, if it doesn’t or gets stuck halfway then either car is accidental or driven over 100,000 km. Look on the driver's door sill, to spot any fuel station service oil change stickers to contradict the full-service history. Not all dashboard warning lights are serious, the one in yellow is an indication and orange is a warning and red is the problem. Still all lights are having different meanings for different brands, so worth checking further with the owner’s manual what any existing light points to and then decide to make a purchase. Try all functionalities such as an electric folding roof, electric seats, lights, indicators, radio, fans, and others before starting the car. Listen for squeaky noises or rattles. 6. Test drive, warning light and feedback Finally, the time has come to start the engine and focus on how the car drives and behaves on the road. The engine should start with a single crank and have a stable RPM after a first 15-30 seconds of warming up. Any dancing rpm is a sign of an engine that's not in good health. Although it might not be a big concern or issue, you should know that it will require some tune-up or minor repair work for changing spark plugs, coils, HT leads, etc. in the very near future. In idle, when you hit the gas, the engine response should be instant without any lag, unless it’s a turbo engine that has turbo kicking lag (not engine lag). NO check engine light on the dashboard is acceptable. Period. Use your nose. Do you smell gas, burning oil, or anything amiss? If you hear a loud ticking noise from the engine bay (engine head), there might be a problem with the valve lifters inside the engine head. Some cars are known to be prone to this, but have it checked by a skilled mechanic before you decide to buy as it could be a more serious and very expensive repair. Hitting the wide-open road: Start off with giving the car enough time to warm up. During that time you can keep the windows open and listen for abnormal noises as the revs slowly dropdown. Once on the highway, drive it at 120 km/h for at least 5-10 minutes. Listen for wind noises as this could mean the door panels or rubbers do not match up. How are the brakes? Are they doing the job of stopping the car? Do they squeak? If while braking there is a shudder, brake rotors might need to be replaced. Is the steering wheel centered, and does the car goes straight when releasing the steering wheel? Might need an alignment. Does the steering go smooth? If not, then the servo pump might be defective. Transmission and Drive train: In an automatic gearbox, ideally, a gearshift should not be noticeable. The best to pay attention is from the 1st to 2nd gear shift and see how smoothly it shifts. As in any aging gearbox that is the first starting point to show little to moderate jerk while shifting. Minor jerk could be because of stale oil and filter that is manageable but worth getting it checked further with the proper technician. In a manual gearbox, the firmer the gear lever shifts the better it is. Loose or soft shifting gear lever needs further inspection. Try to shift gears manually as fast as you can and see how the engine, clutch, and gear respond to your fast movement: If you see any hesitation or delay in engine response in fast-shifting need to be further diagnosed. If the clutch pedal feels loose or spongy, then you might be having a worn clutch that will soon need to be replaced. At an extremely slow speed (in a quiet area), pay attention to any rubbing, grinding, and metal shaking noise. It usually shows when a drivetrain has some issue from the driveshaft or loses couplings often resulting in humming or vibrations or low-speed rattling. Go slowly over the speed bumps and listen carefully. Try all gears, including the reverse gear. If the car is a 4X4, pay extra attention to the transfer box, and try all settings (2H, 4H, 4L). If any blinking lights appear when changing the settings, this could mean mechanical problems, but could also be an easy fix like a sensor or vacuum solenoid. Get it verified by a skilled mechanic in that case. 7. Close the deal and register Does the idea of "talking numbers" fill you with dread? It shouldn't. Negotiating doesn't have to be a traumatic experience. If you are reasonable and have a plan, chances are you can make a deal pretty quickly and easily: Decide ahead of time how much you're willing to spend to get the car. But don't start with this number in your discussion. Make an opening offer that is lower than your maximum price, but in the ballpark based on your average price research. If you and the seller arrive at a price that sounds good to you and is near the average price paid, you're probably in good shape. And remember, the people on the other side probably hate negotiating too (even if it's their job). Transferring ownership in UAE is easy, thanks to the RTA Tasjeel inspection centers. Some are even open 24/7 so you can meet up with the seller in the center to get all the paperwork done. Be careful with the insurance sellers in these offices. Prices will be significantly higher than if you enquire in advance at a regular insurance company. When you buy from the Ras Al Khor auto market, there is an RTA center on site so you can quickly settle the deal. When the car passes the RTA inspection, this does not necessarily mean that the car is in perfect condition. It merely means that the vehicle has no serious structural damage and is considered "roadworthy" by them.4 points
 -
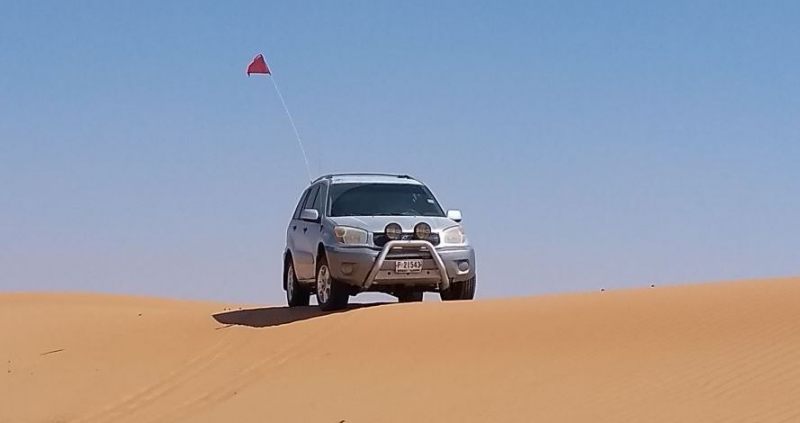 The nose-dive damage while off-roading is too familiar with the people frequenting with the off-road drives. I myself have experienced it once if you see the large voids in the front face especially in the lower area like in the first image below. It basically means you are a sitting duck if you hit something hard or a crest. It will break or push in the area that gets hit as in normal physics to absorb the force. Now to protect that area from nose dive hit, smart thing to do is installing a skid / bash plate. Which will not only try to level the area you are gonna cross but also dissipate the force intended to hit vital organs of your car. So now you will be thinking which metal to choose for bash plate? Well you can go with iron plates or steel plates if they are strong enough and of certain thickness plus they are cheap but it will add the extra weight, which is very important thing for off road as lighter car use less force to do the same work. You can use duralumin or titanium if your pocket allows they are sturdy and really strong with a fraction of weight associated with iron and steel plate. Lastly you can use aluminum if it has the right thickness and it will not be so heavy on weight and is not so expensive for the pocket. Here in the following picture if you observe I have used aluminum sheet with a thickness of 4mm. We couldn't bend it by hammering it so we took it to a press so that we can attain the desirable curves but the finished product is of utmost quality and appearance. It's durability will be tested in the continuing journeys of the carnity off-road drives and I'll keep you posted of it's off-road progress.4 points
 -
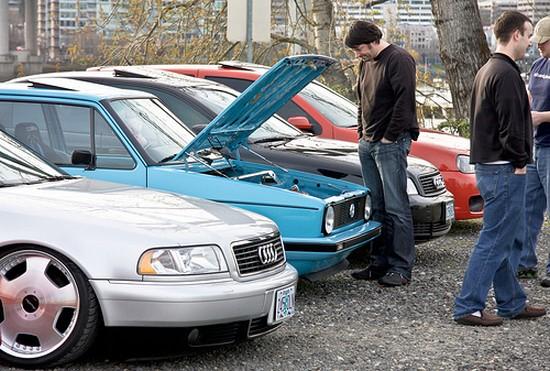 5 Things to check in used car before buyingOnce you find out your next almost perfect car, then follow the below checks by yourself and you will be almost 75% sure that it’s clean and not lemon. To make it easy I have divided this in below 5 important areas: Exterior: Check the car in daylight always or in extremely well lit area.No major dents, broken bumper, headlights, tail lights, indicator, brake light, chipped paint.No glass is broken from windows and front & back, including rear view mirrors.Open the door and check the pillars for any welding or repairing spots. That perfectly curly welding spot which is fully covered in car paint is the original manufacturer welding (that’s fine). Look for some type of accidental damage from side impact (if any). Open the engine bay and look all around the bay for any repair or repaint from accidental damage.Pull windows rubber beading to checking the inside metal gauge is perfectly straight and smooth and not involved in side impact accident.Interior: Car interior should match the kms driven even if car has the full service history. For cars under 50,000 km you shouldn’t be seeing any broken knobs, faded buttons, worn out brake or accelerator rubber, loose and shaky gear lever.Car seats should not have too much play when you sit and shake little bit.Pull the seat belt out and see how smoothly it goes back, if it doesn’t or get stuck half way then either car is accidental or driven over 100,000 kms.Look on the driver door sill, to spot any fuel station service oil change stickers to contradict the full service history.Not all dashboard warning lights are serious, the one in yellow is an indication and orange is warning and red is the problem. Still all lights are having different meaning for different brands, so worth checking further with owner’s manual of what any existing light points to.Engine: It should start in single crank and have stable RPM after first few minutes of warm up. Any dancing rpm is a sign of engine is not in good health. Though it’s a not a big concern, but a concern you should know that it will require some tune-up or minor repair work for changing spark plugs, coils, HT leads etc. in very near future.In idle when you hit the gas, engine response should be instant without any lag unless it’s a turbo engine that has turbo kicking lag (not engine lag). Japanese and Korean cars generally have fraction of second lag, which is acceptable but German and American cars engine should have immediate response when you tap on the accelerator.ALWAYS drive a car on highway at 120 km/h for at least 5-10 minutes, and any hesitation of engine will show up quite noticeably at higher RPM.NO check engine light on dashboard is acceptable. Period.Transmission and Drive train: In auto gearbox, ideally a gearshift should not be noticeable and best to pay attention is from 1st – 2nd gear shift and see how smoothly it shift, as in any ageing gearbox that is the first starting point to show little to moderate jerk while shifting. Minor jerk could be because of stale oil and filter that is manageable but worth getting it checked further with proper technician. It may be a major expense, so it’s worth a second look when in doubt.In manual gearbox, firmer the gear lever shifts better it is. Loose or soft shifting gear lever needs further inspection. Try to shift gears manually as fast as you can and see how engine, clutch and gear respond to your fast movement: If you see any hesitation or delay in engine response in fast shifting need to be further diagnosed.On extremely slow speed (in quiet area) and while going for highway drive, pay attention to any rubbing, grinding, and metal shaking noise. It usually show when drive train has some issue from drive shaft or loose couplings often result in highway vibrations or low speed rattling.While driving if car pulls to any side it’s a concern and often it needs a wheel alignment (100-300 dhs) but in some cases it may be an axle damaged with minute fracture by hitting the pavement at high speed or off road damage in case of 4x4 or SUV’s.Chassis: Try to look under the car and see any noticeable damage to the chassis, you can spot the recent damage by seeing the color difference on repair area than the rest of it. For older chassis damage you need to consult the proper technician who can check the chassis.Though this is not very big concern for check it yourself, as RTA approved testing center will check this in detail before passing the car for registration. Disclaimer: I have written this and all linked articles to help my friends and family and other car enthusiast’s like you. This is purely based on my own experience. If you know anything more than this I am happy to edit these articles any time. Please leave me a comment and I will accept your changes and improvise these as soon as I can. If you like reading these articles and it helped you in anyways, please pass on the knowledge to others and use below red like to show your appreciation.2 points
 -
 How to choose a capable off-road car? Off-road driving means different things to different people, and one of the most common, and potentially most expensive mistakes made by novice drivers is to think that SUV’s and Crossovers are off-road vehicles simply because they have some AWD capability or they look very similar in height and width. A current post on this forum is good case in point, since it asks if a Renault Duster is a capable off-road vehicle. The answer is simple; No, it is NOT a capable off road vehicle, and no serious off-road driver will ever see it, and other soft-roaders like it as a capable off-road vehicle. This article is not intended to bash Renault Dusters and other vehicles like it; it is intended to explain why they do not make a capable off-road vehicles. For the purpose of comparison, I will stick to why Renault Duster is not a capable as an off-roader, although the reasons listed here apply to all SUV’s and crossovers from almost all the brands and regions. It should have a low range Having a low range is of critical importance in any capable off-road vehicle. It may be true that a Duster has a specially geared first gear that provides a bit more torque to the driving wheels, but the gearing is not low enough to prevent wheel spin, which is an absolute requirement for driving in desert sand. A proper low range should reduce the gear ratio in first gear to the point where the maximum attainable road speed in first gear does not go over 8 - 10 km/h. The advantages of this should be obvious - the low gearing prevents the wheels from rotating fast enough to start wheel-spinning in sand or mud, so with suitable tyres, all of the rotation of the wheels is converted into traction. Soft-roaders like SUV’s do not have low enough gearing to prevent wheel spin, which is why they get stuck so easily. It should have way to disable ABS brakes ABS brakes can be dangerous in off road driving, since it increases stopping distances. This might sound strange, but the fact is that ABS was designed to work on paved roads, where traction is a lot higher than on even the best off road surfaces. On tarmac, the ABS allows the brakes to work at maximum efficiency because there is enough traction to slow the vehicle down effectively without skidding on any direction. However, in the off-road environment, and especially with tyres that are designed for on-road use, traction is reduced to only a very small fraction of what is available on a paved road. Thus, when a driver applies ABS brake when driving on loose surfaces, the wheels lock almost immediately, and before the vehicle has started to slow down. Moreover, as soon as the wheels lock, the ABS system releases the brakes until the wheels lock again, and so on and so forth. In practice, this means that the vehicle effectively has no brakes, and the vehicle could easily drive over a cliff because it cannot stop in time. Any capable off-road vehicle should not have ABS, or if it has, it must have a means to disable the ABS when it is not being driven on hard, paved roads. The most effective way to stop a vehicle on loose surfaces is to allow the wheels to lock, which causes them to dig into the ground, thereby creating increased rolling resistance, which is what stops a vehicle on any surface. It should have a proper diff locks The only differential locks that work reliably are those that lock mechanically. Almost all soft-roaders with some AWD capability have various kinds of viscous couplings that lock only the transfer case to supply torque to the diff that does not normally drive the vehicle. The problem with this is that viscous couplings can seldom handle high torque values over long periods on the one hand, and that the actual differentials on the driving axles are sometimes not locked. Although the Duster can be retrofitted with a rear differential that locks mechanically, there is no point in locking only the front differential in tricky or difficult driving conditions. With proper diff locks, all the wheels receive the same amount of torque but with soft-roaders, and especially those that do not have a low range, the torque that is supplied to the wheels is delivered at wheel rotation speeds that is too high for the tyres and suspension to maintain traction in deep sand or mud. Moreover, soft-roaders are often fitted with traction control systems that are based on the ABS brakes, which means that the system’s stored energy can run out before the vehicle is out of a sand or mud trap. If this happens, the automatic diff-lock control system cannot control wheel spin on an axle, which in turn means that the driver can lose traction on two or more wheels until the traction control system is recharged. On a proper off-road vehicle with mechanically locked diffs, torque is supplied to all wheels equally all of the time, and since momentum is the off-road driver’s best friend, there are no interruptions in power delivery that can cause the vehicle to sink into soft sand or mud. No diff- lock system that works with viscous couplings, and/or that depends on a brake-based traction control system can ever be effective in deep sand or mud, since it cannot supply torque to all four wheels for long period of time. Read more: 5 reasons to not use SUV's for off-road2 points
 -
 3 Key factors for assigning next car budget in Dubai and UAE As everything in life revolves around money, so deciding the fixed budget for your car buy is the number one thing that you should be doing. It’s not only to let you stay in control, but making the rest of the process streamline based on the available budget be it 10,000 or 5 Million. You need to decide the cash amount in hand as a buying kitty and then decide on how big you want to invest or rather spend. Off course I said as big because you don’t buy car everyday unless you are a dealer and hence increasing the budget has its own advantage to get you the most perfect car you need and will enjoy for the next few years. So allocate generously but definitely within your affordability parameters. People who want to take the buying kitty as a down payment only, need to also decide on how big car loan they can comfortably afford as an initial spend and for every month car loan EMI. If you are a cash buyer, then planning is lot easier in assigning the next car buying budget is equals to whatever you saved or whatever you can afford to spend for certain number of years after the residual value of car resale value. Example: You saved 100,000 for your next car buy and plan to drive the car for 5 years. Assuming your car resale value after five years will be 40,000 (4 Most important factors impacting used car price). So if you can afford comfortably spending the 100,000 – 40,000 = 60,000 over 5 years means 12,000 per year = 1,000 per month then go for it. Remember this amount is without Car maintenance, Car Insurance, Fuel cost, registration, Salik etc. This section is bit more complex for the car buyer who is planning to take up a car loan. As he still need to consider the above depreciation affordability and also find viability for the monthly payments. As most bank loan offer up to 80% of car value, so you should be ready with 20% cash as a down-payment. For the remaining payment EMI as a general rule of thumb, you should not exceed the below percentage of your gross monthly income depending on where you fit yourself: For an average joe, for who Car is just an absolute necessity: 10% - 15% Car enthusiast’s, who love Cars and want to enjoy to the max: 15% - 25% Car Maniac, who is crazy about Cars and can’t live without it: 25% - 40% Below are the 3 key factors that you must be aware of and able to factor them while allocating an appropriate car buying budget: Insurance: 4-5% of car value generally for all cars and all drivers 5-7% of car value for sports or high performance car or new driver 7-10% of car value for sports or high performance car and new driver Car Registration, Plate Number, Salik etc: 500-600 AED Annual Maintenance: Approx. 3-5% of car value for Japanese, Korean and American Cars within 5 years of age. Approx. 5-7% of car value for Japanese, Korean and American Cars after 5 years of age. Approx. 7-10% of car value for European and UK Cars within 5 years of age. Approx. 10-12% of car value for European and UK Cars after 5 years of age.1 point
 -
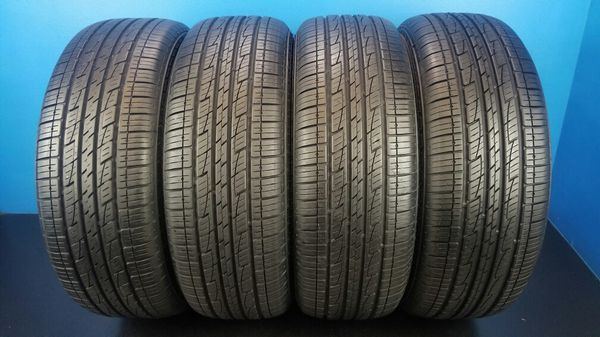 Set of 4 used: Once Vehicle used: Mitsubishi Pajero 3.8 Number of years used: 3+ Years Value for money: 5 / 5 On-road comfort: 5 / 5 Off-road performance: 4 / 5 Overall Performance: 4 / 5 So it was time to go for a new set of tires for my wife's Mitsubishi Pajero and after a lot of research was in a lot of turmoil whether I should go for the Nitto Duragrapplers as tried and tested or a set of Kumho Solus KL21. Put the options to my wife and with the price point, she immediately jumped at the Kumho Solus KL21 set. I obeyed my wife and asked them to slap the Kumhos on, but deep inside I was waiting for them to fail and never thought that 3 years down the road and I would be writing a positive review on these. Kumho tires are a Korean brand and made in Korea so it makes you think twice about your investment. I drove them now for 3 years mostly on road except for a couple of occasions when I took them off-road in the sand for a short stint and here is what I think about the Kumho Solus KL21. On road they are really quiet and offer a very comfortable ride, they have a good grip on the road in all weather conditions and so far I have not seen any inconsistent ware in these tires. They have been on for 3 years with almost 70K Kms on the clock and I recently got them inspected, they always remained very smooth and quiet on-road and I now feel confident having them on as the tire shop told me there is quite a bit of tread left on them and no cracks at all. My main concern, however, came how it does perform off-road being a highway terrain tire? The honest truth is, being my wife's car I hardly took it off-road, but for what it is worth it performed well for a couple of short stints I was talking about earlier. The straight threads of a highway terrain help them float better in the sands, and they seem light (which is a big positive mark from the off-road side for stock cars). They have served me very well for over 70,000 kms so far and I am very pleased with their overall performance. They are still smooth, quiet and comfortable on-road even at 140 kmph and gives you good control with different maneuvers. In conclusion, I would only like to say, these are my first set of Kumho Solus KL21 on my wife's Mitsubishi Pajero and although I was not sold on these at the time of purchase these have most definitely impressed me. I am very happy to own the current set and feeling relieved that my wife had made such a great investment for the past 3 years and the remainder of the time to come. At the price point, they are very good performer on-road and very good value for money.1 point
 -
 A very good morning to all my fellow Carnity Enthusiasts. I wanted to share this simple but useful device which I had bought recently from Dragon Mart, a bit expensive, but totally worth it. This is a power bank which can easily fit in the palm of your hand and includes all wires to connect and charge your mobile phones, laptops and more importantly start up your dead car battery. It is a bout 12000 MAH power bank that can easily start up your dead car, I have tried it twice with 2 dead cars and it works like a dream, no need to keep it charging for long. Just connect, switch it to 12Volts (it has a switch 3V, 6V and 12V for different applications), and start up your car. It sends a strong charge to the car battery and just starts it up. If fully charged it still has enough juice to charge your 3000 MAH battery completely. Forgot to mention it has a torch also, not so powerful, but useful to eliminate dark spots. Awesome device. This is what it looks like, I like the case also, very handy and useful.1 point
 -
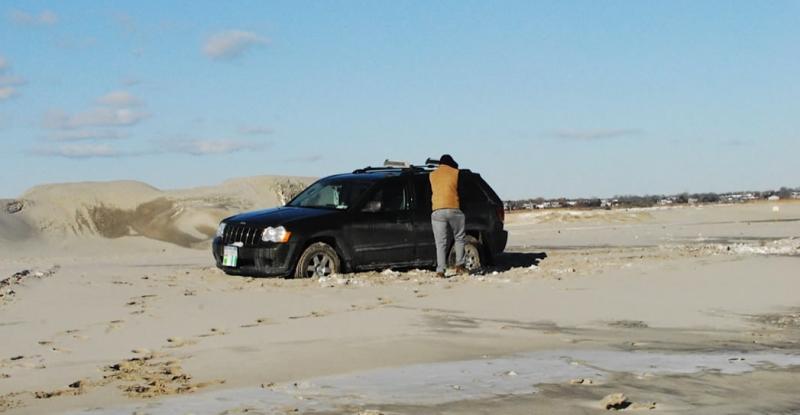 5 reasons to not use SUV's for off-road In my previous advice I have explained: How to choose a capable off-road car? based on low range, ABS and Diff-locks. In this advice I will explain why SUV’s and crossovers do not make good, capable off road vehicles. The SUV’s / crossovers have serious design flaws (or differences) that make them unsuitable as off road vehicles. Below are the 5 points that will make this class of vehicle unsuitable as off road vehicles. 1) SUV’s have poor suspension articulation Main part of the reason why proper off road vehicles can do what they do is the fact that they have a long suspension travel, otherwise known as “suspension articulation”. What this means in the real world is that these vehicles can cope with uneven terrain because the suspension systems allow the wheels to move for up to 40 inches (1 meter) and more with respect to each other. This means that even on extremely uneven terrain, all the wheels can remain on the ground, thus maximizing the traction. In the case of SUV’s and crossovers, the maximum suspension travel is about 9-10 inches (seldom more), which means that once a wheel has moved as far as the suspension allows it to travel, the part of the vehicle lifts off the ground. When this happens, one or more wheels lose traction and if the vehicle is not fitted with diff locks, the vehicle is stuck, and has to be towed out of the obstacle, or uneven terrain. 2) SUV’s are not flexible enough Proper off road vehicles that have separate, “stepladder” chassis are extremely flexible, which also helps to keep all the wheels on the ground. In combination with their long, built-in suspension travel, this means that a proper off road vehicle can negotiate types of uneven terrain that no SUV or crossover ever can, simply because SUV’s cannot “bend” enough to allow the wheels to remain on the ground. 3) SUV’s do not have enough ground clearance While some SUV’s have about the same ground clearance as many proper off road vehicles, the problem is that their suspension setups do not allow for heavy loads. This load is sometimes made up of up to seven passengers, but in most cases, the load comes from the suspension being too soft. When an SUV goes over, say, a bump, the vehicle drops down too low when the suspension compresses as the vehicle leaves the obstacle, and especially so when the vehicle is travelling too fast. Since the suspension compresses too much, the vehicle’s ground clearance can be reduced to the point where some components like differentials, cross members, and even the engine and transmission can hit obstacles like rocks. Proper off road vehicles do not have this problem, because their hard suspensions do not compress to the point where ground clearance is affected in meaningful ways. Moreover, because proper off-road vehicles have hard suspensions, its ground clearance actually increases when one or more wheels go over an obstacle, since the vehicle’s weight is always fully supported by the firm suspension(s). This is not always the case with SUV’s, since their suspensions were designed to move in such a way that uneven spots are absorbed without excessive body roll or movements. Thus, the vehicle is not lifted off the ground when one or more wheels pass over an obstacle, and if the vehicle is loaded with passengers, it could happen that even small obstacles could hit one or more critical components. 4) SUV’s are overly complicated The ideal off road vehicle has as few components as possible to make it work, with driver and passenger comfort coming a long way behind requirements like reliability, ease of use, and easy repair ability. This is not the case with luxury SUV’s and crossovers that are designed to give the driver and his passengers the most comfortable ride possible on hard, paved roads. While we agree that some SUV’s are able to complete short and easy level 1 off road trails that are designed with SUV’s in mind successfully, the problem is that SUV”s are too complex (complicated) to do anything else reliably. Part of the problem is that the electrical systems of modern SUV’s are not designed to cope with the heat, dust, and vibration that go with serious off road driving. In many cases, the air suspensions of these vehicles are protected by dozens of fuses, relays, and control units that were simply not designed to cope with the demands of off road driving conditions. No vehicle that can be completely disabled when a single fuse blows (such as when the compressor stops working when its fuse blows) can ever be trusted on a long, difficult off road trail, and especially a trail that requires extreme care by an expert driver. 5) SUV’s do not have recovery points It is one thing to clown around on some loose sand, or to drive an easy, level 1 trail when there are plenty of other vehicles around to supply a tow, but it is something else entirely when that vehicle has to be recovered in very difficult terrain. For instance, a vehicle that is stuck in sand up to the depth of the tyre sidewalls, can require a force of up to three times the force required to move it if it were on a hard surface. This force is calculated by using the weight of the vehicle as a base line; therefore if your vehicle weighs say, 1800 kgs, you will need a force that is equal to the vehicle’s weight, plus ten percent of that value to move it on a hard surface. In this instance, you will need a pulling force of at least 1980 kg. However, if as we said, the vehicle is stuck in sand up to its rims, you need at least three times that pulling force, thus, 5940 kg, and that is where the problem comes in. Even if there is a vehicle with a winch available, there is no attachment point on the stuck vehicle that is strong enough to withstand this pulling force, and it is almost certain that the normal towing point or recovery eyelets will tear out from the vehicle- leaving the vehicle stuck in the sand, and probably hurting someone as the winch cable snaps and recoils. Depending on circumstances and local conditions, the required pulling force can be as high as six or even seven times the value of the baseline figure, which should make it obvious that unless the vehicle has properly rated recovery points, it should not be used off road, and most certainly not in conditions where it might have to be towed out with forces that exceed its weight by several times. SUV’s are simply not designed to withstand pulling forces of this type, and any attempt to subject a vehicle to these forces is irresponsible, dangerous, and likely to hurt someone. So, no, SUV’s and crossovers do NOT make good off road vehicles, even if it is only because they cannot always be recovered safely.1 point
 -
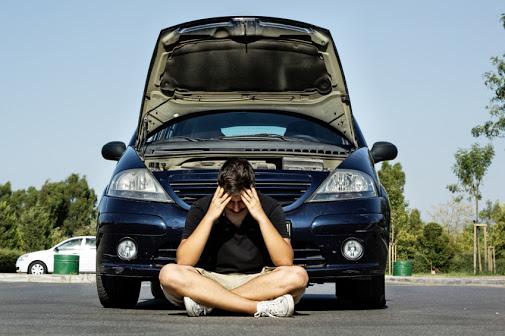 The top 5 most common Car problems Car not starting The single most common car problem is the car not starting and that has series of things to check and troubleshoot before calling a recovery and sending for detail diagnose. Low on fuel: If car is extremely low on fuel and fuel pump is weak and/or old it will not build enough pressure to start the car as fuel delivery is very less. To counter this, always keep fuel more than 1 quarter of a tank. Dead Battery: If battery health indicator turn white, it means its dead. Green is good, empty means that battery is fully discharge and can be recharge by jump starting the car and then driving the car for more than 20 minutes to start the charge cycle. If car interior lights and headlights are dimmed then it’s a sign of weak battery that stop retaining the charge for certain cranking amps and failing to start and changing the battery is required. Choked Air filter: Check the air filter and it should look clean and free from dust and practically in a white or lighter color (depends on brand). If it’s fully clogged, choked and turn to darker color then remove it out and tap it on the floor gently couple of times to remove the dust as much as possible or use compressed air to blow the dust away. If car starts, then change the air filter asap as it’s not good to suffocate the car air delivery passage, that will burn more fuel and have difficulty in start up again very shortly. Car wobbling or pulling on one side Car majorly wobble due to unbalance wheels. No matter how good they were balanced in the past this problem can still occur, by simply hitting or scrubbing the pavement that removed the wheel balancing small metal strip accidentally. While balancing the wheel it is important to see Zero | Zero on both left and right side of the wheel to make sure it is 100% balance. In off-road cars, little bit of sand can get in the tire that makes similar wobbling as that sand keep rotating inside the tire. So get the tire open and remove all the sand from inside and then balance the wheels. Last but not least this can also happen if all 4 tires are inflated at different PSI level. Always inflate the tires as per OEM specification sticker placed on the driver door side (when open). In some cases (not so common) car can also wobble while having a drive-train issue, axle issue or faulty suspension. These all require professional diagnose and repair accordingly. Reason for car pulling on one side is the wheel alignment and that is totally different than balancing. Alignment is much quicker than getting all wheel balance and done faster and cheaper. Alignment will keep your car steering straight on road and also save your tire from uneven wear. Check engine light This one is the big Pandora box that can get on for so many minor to major reason that to list all of them here will require a separate book for each brand. However, in general “Check engine Light” comes for below most common reasons: Car is due for service. Fuel cap is not closed properly. Crank sensor, Cam shaft sensor need replacement. Faulty spark plug, HT lead (plug wire) or faulty ignition coil. Engine oil level depletes due to leak or internal combustion. Air filter is not set properly, or air flow meter on air filter housing got loose. Issues with emission control and some of the emission component need change. Engine Overheating Most dangerous and often neglected that result in huge repair bills. Always keep an eye on Engine temperature gauge inside the car dashboard. STOP the car immediately if it rises even slightly and inspect the below items immediately: Check the level of coolant in reservoir bottle, if low top-up immediately. Check the level of coolant in the radiator (when car is cold), if low top-up immediately. Check radiator fan is working in two speed: low (normal) and high (when car is hot). Check if there is no leak in the radiator and neighboring big black water hoses. AC fan works, when you switch on AC and shuts off when you switch off AC. If you pay attention to above 5 points, you will save over 75% chances of your car getting overheat and save your engine. Hope you know if car engine overheat to the max ONCE, it has over 90% chances that you need either new engine or rebuild old engine that cost almost 60%-70% of the engine cost. So make sure your eyes are always glued to the engine water/coolant temperature gauge and you notice the rise in time and stop to diagnose. If in doubt, do not drive if car is overheating in idle. Period. Screeching noise while braking In simple words, if you hear screeching noise while braking then change the brake pad shortly as they are going to screech even more in next few days to remind you for the required maintenance. While changing brake pads, front set of pads get consumed 3 times faster than the rear ones as over 70% of the time car only uses front brake and not rear. It’s only when car is under full load or high speed hard braking engage all 4 brakes together to stop your car faster. While at it you also should pay attention to brake disc condition, and should always get the brake disc skimmed if your brake pad change was delayed and constant metal scratching caused the serious scratches on the brake disc surface. Secondly, brake disc has certain minimum thickness and if it’s lower than the threshold thickness (mm) then it is highly advisable to change it ASAP for safe braking. Check your car repair manual or speak to service adviser to find out the minimum thickness of brake disc for your car model. Headlight or Taillight not working First thing to doubt when the headlight or tail light fails is the electric fuse, which is simple do-it-yourself job and replace any blown out fuses. If fuse were fine then you can check the lamp placed inside the tail light or head light and see if that is blown out, just like our house bulb it also breaks the filament after certain age. These two above steps can be simply performed by reading your car owner manual instructions. Beyond this point to check the switches, wiring, distribution points you will need a professional assistance to carry out a thorough check with a certified car electrician.1 point
 -
 5 Best places to buy clean used car at good price in Dubai & UAECar buying is an absolute mix of art and science together if you want to buy a perfect car. Having said that, means it requires a lot of patience and tolerance toward the car sellers. About 90% of the car seller offer might not fit your requirement, but just raise your tolerance and simply move on than getting into any heated argument. It’s not that you cannot prove a point, but what is the use of picking an argument when you aren’t interested in their car, so save your energy for next car visit and keep yourself calm and positive to do the proper inspection for your next perfect car. No to car dealers I am not saying or claiming that all car dealers are bad, but my experience has been 75% bad with all of them, and I have dealt with 8-10 different type of car dealers from small to medium timers (big boys are usually very expensive) here in Dubai. Sometime they fail to show the complete truth about the vehicle history and when you ask 5-10 questions then you figure out the crap and ugly truth they were hiding. I have even witnessed that 5 year old Nissan Patrol shows 60,000 kms on the odometer and also carrying 180,000 kms Oil change sticker of ENOC fuel pump on the driver door sill (odometer reversed case). It’s very difficult and for novice buyer it’s impossible to figure out the crap they can get from car dealer, so your best bet is to stay clear and do not deal with them. If you are really stuck because of no option in private deal then ask the first golden question with any car dealer: “Do you have full service history”? If the answer is yes, then inspect the service record with your eyes first before wasting any single minute, as many times I have experienced that when you ask service record they start playing hide and seek, that it’s there but in another office or car and will come here tomorrow if you are really a serious buyer. I am like you get serious first to sell and display what you have than playing otherwise and waste my time. No to big car classified sites As majority of them are car dealers or private dealers who is posting their junk cars at dirt cheap price there and keeping the best cars in their showroom to get you their and use these big and overly successful classifieds sites as a bait for the car buyers. Always focus on private deals with the real car owners Search for online car forums with real people Off-road clubs member forumsFacebook groups & pagesLocal supermarket advertisement boards etc.Office intranet or bulletin boardIn all the above 5 options you are sure to deal with the real people and not the car dealers. Once you find a good car deal make a visit and see if the car registration is at least 6 months old and if it’s not, then it may be a of private dealer. In worst case scenario private dealer are much better than the car dealer as they are less hungry and markup only 5-10% but will get you a super clean car with full service records. It’s worth the time and effort they spend to scout a clean deals on wheels. Second point to pay attention is the service history records, check all the receipts and see the service booklet is timely stamped and not any service has been missed out. In some cases people get the minor service to get the stamp and skip the major service to save money or get it done from outside workshop. In case of any gaps, if owner has a record of carrying out the major service from any other reputable workshop, it’s still acceptable than completely skipping it out. Third thing is the quick exterior looks for seeing any noticeable damage from accident, broken bumpers, headlights etc. Fourth is to start the car and see if it starts fine and no warning lights have been displayed on the dashboard. Fifth and the last point is to drive around a car and see how engine and gearbox react to your throttle response, skip a few bumps at good speed to check the suspension, check the AC cooling is OK while car is parked and good when car starts moving, play the music system and check the clarity etc. If all above 5 points are positive then you can consider yourself almost on the way to find your perfect car and consider yourself to go further with testing in detail by yourself in less than 30 minutes: 5 Things to check in used car before buying. Disclaimer: I have written this and all linked articles to help my friends and family and other car enthusiast’s like you. This is purely based on my own experience. If you know anything more than this I am happy to edit these articles any time. Please leave me a comment and I will accept your changes and improvise these as soon as I can. If you like reading these articles and it helped you in anyways, please pass on the knowledge to others and use below red like to show your appreciation.1 point
 -
 Top 5 best car brand types to buy in Dubai and UAEAlthough this area majorly depends on so many personal choices, but I will try to high grade the most important points to pick and choose the most appropriate and most successful 5 best car brand types for you next car. The basic attribute of the brand behavior is very closely related to the geographical location they come from. In UAE there are 5 major and best car brand types extremely famous and successful in delivering all sorts of Cars. Below is a quick run-down in very generic and not specific to any one brand from that region. Japanese Cars: Honda, Infiniti, Lexus, Mazda, Mitsubishi, Nissan, Toyota. They are generally famous for extremely reliable and durable cars. Offer reasonable comfort with very high usable life of cars.Resale value: 10 out of 10.Korean Cars: Hyundai and Kia. Recently they are famous for great designs and new technology at competitive pricing. Offer reasonable reliability and acceptable performance.Resale value: 9 out of 10.American Cars: Cadillac, Chevrolet, Ford, Dodge, Chrysler, Jeep. They are generally famous for larger than life, spacious and very competitively priced cars. Offer reasonable vehicle life with standard reliability and acceptable performance.Resale value: 8 out of 10.German Cars: Audi, BMW, Mercedes, Porsche, Volkswagen. They are generally famous for high end luxury and extreme performance cars. Offer amazing creature comforts, new technology but with limited usable life of car.Resale value: 7 out of 10.UK Cars: Land Rover, Jaguar, Mini. They are generally famous for impeccable detailing and comfort in style. Offer reasonable vehicle usable life with excellent performance but with low reliability.Resale value: 6 out of 10.Having said the above quick pointers, they do not apply exactly same to all brands from same region. For example Toyota and Nissan is few notches above Mazda and Mitsubishi, although all 4 are from Japan, means each brand is slightly different in their core values, commitment and quality. Secondly the resale value is just a quick indicator of an average comparison as per each brand if compared to the same car classification (Explained earlier here: 7 Car types that you should know before buying a car). Each vehicle depreciation is majorly depended as per their origin and then as per their classification. Disclaimer: I have written this and all linked articles to help my friends and family and other car enthusiast’s like you. This is purely based on my own experience. If you know anything more than this I am happy to edit these articles any time. Please leave me a comment and I will accept your changes and improvise these as soon as I can. If you like reading these articles and it helped you in anyways, please pass on the knowledge to others and use below red like to show your appreciation.1 point


This leaderboard is set to Dubai/GMT+04:00