-
5.0 Stars ⭐⭐⭐⭐⭐ 628 Google Reviews

Frederic
-
Posts
9,048 -
Joined
-
Last visited
-
Days Won
455 -
Country
Belgium -
Carnity Points
4,017 [ Donate ]
Content Type
Profiles
Forums
Advice
Business Listing
Car Deals
Recall
OBD II Car Diagnostics
Guest lead capture
STORE
Events
Gallery
Blogs
Everything posted by Frederic
-
 thanks for informing @fayez hope nothing serious...
 -
Welcome to the club @sohinik ! See you tomorrow !
-
I agree the extra skirts they have installed on the Signature model are very prone to damage while off-roading
-
Dzien Dobry @Dorian Zissi ! And that's about the only Polish i remember 😁 See you tomorrow !
-
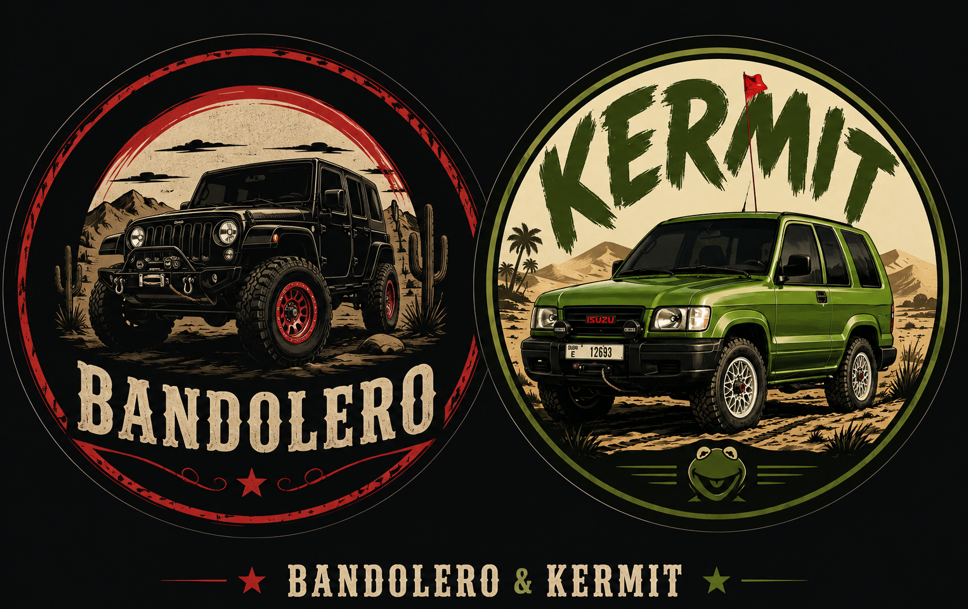
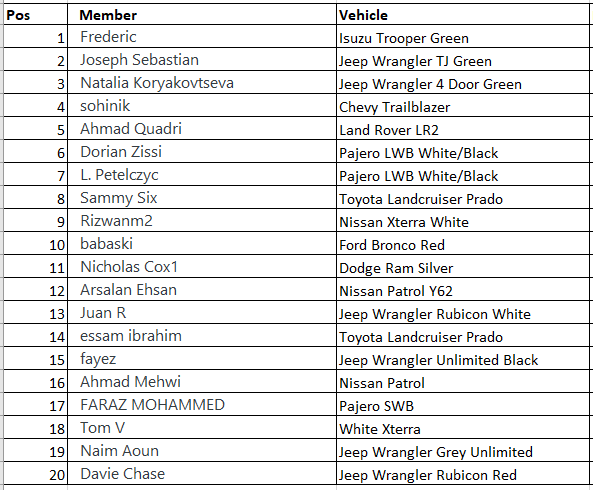
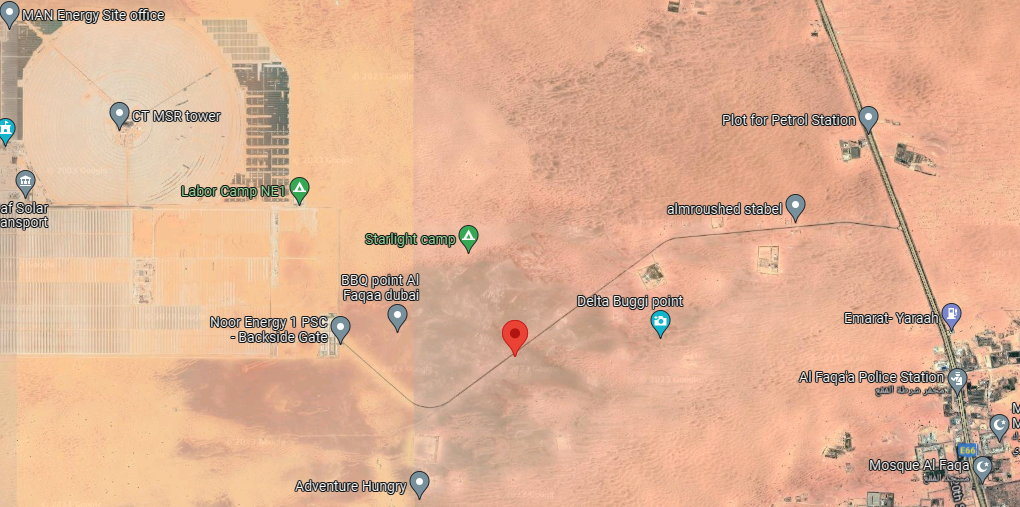
DRIVE RSVP IS NOW CLOSED @Joseph Sebastian@Natalia Koryakovtseva@sohinik@Ahmad Quadri@Dorian Zissi@L. Petelczyc@Sammy Six @Rizwanm2@babaski@Nicholas Cox1@Arsalan Ehsan@Juan R@essam ibrahim@fayez@Ahmad Mehwi@FARAZ MOHAMMED@Tom V@Naim Aoun@Davie Chase Dear friends, please find your convoy positions for tomorrow attached. You can park on the hard sand when you arrive where you will find my car (i will be there from around 7.10AM). For the Newbies who have driven with us before: * Please tune in to Channel 2: 446.031 Mhz as we will use this channel during the drive. * make sure to bring your offroad gears (radio, deflator/gauge compressor, shovel) and definitely a flag. Otherwise you will not be allowed on the drive. For the ones joining us for the very first time (Absolute Newbies) and do not have a radio yet, i will bring a spare that you can use for your first drive with us. If you have one you can of course bring it. If you do not have a flag yet that is also fine if it's your first drive. We will start with a briefing which will contain similar information to what you have seen in the Absolute Newbie briefing video. If you have not seen it yet, please go through it as its very helpful. In case of any issue, you can reach me on 056 504 26 32 Please double check the location before leaving the house. Google Maps has been acting up lately and i don't want you to end up somewhere on the other side of Dubai The proper location is nearby Al Faqa next to a long road that leads into the desert, south of the Solar Park. See the red pin below: Hope to see you all tomorrow ! Fred
-
Thanks to the good support, i will be extending our convoy and make a nice big train for Saturday morning ! Attendees Arsalan Ehsan @Arsalan Ehsan Juan R @Juan R Tom V @Tom V Naim Aoun @Naim Aoun FARAZ MOHAMMED @FARAZ MOHAMMED fayez @fayez Natalia Koryakovtseva @Natalia Koryakovtseva babaski @babaski Ahmad Mehwi @Ahmad Mehwi L. Petelczyc @L. Petelczyc essam ibrahim @essam ibrahim Sammy Six @Sammy Six Joseph Sebastian @Joseph Sebastian sohinik @sohinik Nicholas Cox1 @Nicholas Cox1 Dorian Zissi @Dorian Zissi Ahmad Quadri @Ahmad Quadri You are all confirmed for a drive Saturday morning. I will be posting the convoy list tomorrow by noon and hope to meet you all in the sands of Faqa soon As usual, this is a Newbie level drive with a few Absolute Newbies in there, so we will be taking it easy, enjoying the scenery, and get to know each other better. The weather will be pleasant and it will be a great morning out !
-
@Dorian Zissi @Ahmad Quadri@sohinik😉 this is your first club drive according to our data, so kindly introduce yourself and provide us the following info: 1. Which 4x4 are you bringing ? 2. Any prior offroading experience ? 3. Is the 4x4 equipped with front and rear towpoints ? We have a very nice Absolute Newbie briefing video that brings you up to speed immediately on what you can expect and prepare for: Please bring a pressure gauge, deflator, and air compressor as minimum. We can lend you a radio for your first drive. Let me know if you have any questions or concerns.
-
For your first drive with us we want you to bring the following items: 1. Pressure gauge 2. Tyre deflator 3. Compressor Once you have completed your first drive, you will be an official "Newbie" and will need to bring the following items as well from your second drive onwards: 1. Offroad Flag 2. Shovel 3. Two Way Radio, programmed to our frequencies. Some more info: Offroad Flag Guideline Two Way Radio Guideline Off road Driving Etiquette's Emergency details for all off-roaders Off Road Driving - Roles & Responsibilities And our comprehensive Newbie briefing video below which is very useful to get you started:
-
Newbie - Joining In - Things to buy - recommendations
Frederic replied to Ahmad Quadri's topic in Off-Road Club's Discussions
* Frontal airbag can be left on. After all it will protect you in case of a nose-dive. * Curtain airbags (if your car has them) should be disabled, as these are usually connected to a yaw sensor and might react when the car is tilted too much * ABS should be disabled. Check in the vehicle manual which fuse you can pull. For your first drive this is not a big issue but later it will definitely be needed. * Traction control should be OFF. This is usually a button with the logo of a sliding car on your dashboard. Pushing it will disable it and it will light up as an orange icon on your dash to notify you that it has been disabled. -
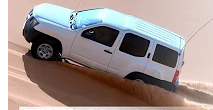
With the money you saved, book yourself a nice little trip to a resort with the family Stock Xterra-Stock Wheels-HT Tyres Leading Extreme drives in any terrain of the UAE.... As you can see, it's always about the driver and his skills.
-
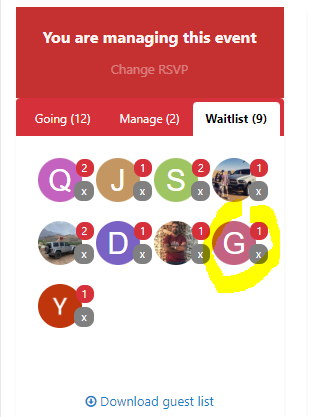
The numbers of drives you are waitlisted for. For example if you do not have a confirmed drive yet, it will show "1". If you are already RSVP'd on another drive, there will be a "2" showing. That numbering also provides priority to members who are on their first drive, so whenever spots become available, the system will automatically start adding members from the waitlist with "1" behind their name, and only when that list is exhausted, members with "2" will be added. Hope this is clear
-
Hi @Georges Kazan You are indeed in the waitlist (see below).
-
Hey @Benjaminthis is a bit of a controversial topic, but a good one to bring up of course. There are two different things at play: 1. Upgrading your stock suspension, with or without lift. The OEM suspension is designed to have a good balance of offroad capabilities and on-road manners. Upgraded suspension might perform better offroad but there will be a price to pay in on-road driving. 2. More ground clearance. My personal opinion, looking at the existing clearance of a Jeep Wrangler would be that there is no need for more ground clearance. With your 4x4 you can easily reach intermediate level without any sort of mods. Take note if you lift your 4x4 but want to keep the same COG (center of gravity) you will need to have a wider stance as well (can be obtained by wheel spacers or aftermarket rims with more negative offset). In some way it's opening a can of worms, and might lead to many other modifications later to make better use of the lift kit (different control arms, etc...) All in all, long story short, here is my mantra: Your 4x4 should be as low as possible to have great handling, but high enough to have the clearance to manage all drive levels. You will notice that many IM members and trip leads are still on stock suspension and no lift. Again it depends on the vehicle and your own expectations.
-
Ishak has been promoted to Fewbie level
Frederic replied to Gaurav's topic in Off-Road Club's Announcements
Well yes exactly, that’s how we all progressed 😜 -
Great to see that !
-
Ishak has been promoted to Fewbie level
Frederic replied to Gaurav's topic in Off-Road Club's Announcements
The shoveling has paid off @Ishak ! -
Hi @L. Petelczycthese are old links which i forgot to remove, thanks for noticing !
-
Newbie - Joining In - Things to buy - recommendations
Frederic replied to Ahmad Quadri's topic in Off-Road Club's Discussions
traction control will be disabled anyways in the desert. I remember @Gaurav telling me we used to have an LR2 driving in the club that was a very capable and powerful 4x4. -
Newbie - Joining In - Things to buy - recommendations
Frederic replied to Ahmad Quadri's topic in Off-Road Club's Discussions
Land Rover LR2 is not bad at all in the desert. It's quite powerful and at least you will be unique ! -
So the 50% used one has been one of the main 4 tyres right ? In that case i believe the 100% 6 year old tyre would still be better.
-
I would vote for the tyre that has had the least amount of UV or heat exposure. If the 2017 one has seen little to no sun, i would expect the rubber compound integrity to be better. Some telltale signs of ageing could be colour fade and small micro-cracks in the rubber. What is rubber deterioration? Most elastomers undergo rubber degradation over time and the most common rubber deterioration causes are exposure to light, oxygen (ozone) and heat. The molecular changes brought about by these environmental conditions can significantly impact the mechanical properties and therefore service life of rubber products like seals and O-rings. Oxidative and thermal ageing of rubber are accelerated by stress and reactive gases, like ozone, resulting in cracking, charring and colour fading. However, the addition of antioxidants, UV stabilisers and antiozonates can slow or prevent these types of issues. Oxidative rubber degradation can cause hardening or softening, depending on the structure of the elastomer. Hardening is more common because free radicals produced due to heat, oxygen and light combine to form new crosslinks, which reduces the flexibility of the rubber.
-
Good morning Carnity Friends ! It promises to be a busy weekend. We have less drives available unfortunately due to our yearly pilgrimage event (Liwa Crossing), but we will make the best of it. Attendees Arsalan Ehsan @Arsalan Ehsan Juan R @Juan R Tom V @Tom V Naim Aoun @Naim Aoun FARAZ MOHAMMED @FARAZ MOHAMMED fayez @fayez Natalia Koryakovtseva @Natalia Koryakovtseva babaski @babaski Ahmad Mehwi @Ahmad Mehwi L. Petelczyc @L. Petelczyc essam ibrahim @essam ibrahim Sammy Six @Sammy Six You all have confirmed spots for this drive. Waitlisted Attendees lucas amat @lucas amat Patrick van der Loo @Patrick van der Loo Sajan.S @Sajan.S Quresh. @Quresh. Joseph Sebastian @Joseph Sebastian sohinik @sohinik Nicholas Cox1 @Nicholas Cox1 Misha Puskar @Misha Puskar Dorian Zissi @Dorian Zissi Ahmad Quadri @Ahmad Quadri You are all in the waitlist currently. Usually we will have couple of dropouts, so keep an eye out, and perhaps we can add 2-3 waitlisted members. @Natalia Koryakovtseva this is probably your first club drive according to our data, so kindly introduce yourself and provide us the following info: 1. Which 4x4 are you bringing ? 2. Any prior offroading experience ? 3. Is the 4x4 equipped with front and rear towpoints ? In the meantime, please take your time to go through our Absolute Newbie briefing video: See you soon !
-
Did you clone yourself ? Ale his drive is on the same morning and you are in support there as well 😁
-
Newbie - Joining In - Things to buy - recommendations
Frederic replied to Ahmad Quadri's topic in Off-Road Club's Discussions
Welcome to the club @Ahmad Quadri ! Below article might be of help: -
Thanks @Looper from what I’ve noticed the MOI website works the best to retrieve cars registered in Abu Dhabi. Perhaps the federal database and Dubai database are not (yet) aligned.