
Leaderboard
Popular Content
Showing content with the highest reputation on 12/15/2022 in all areas
-
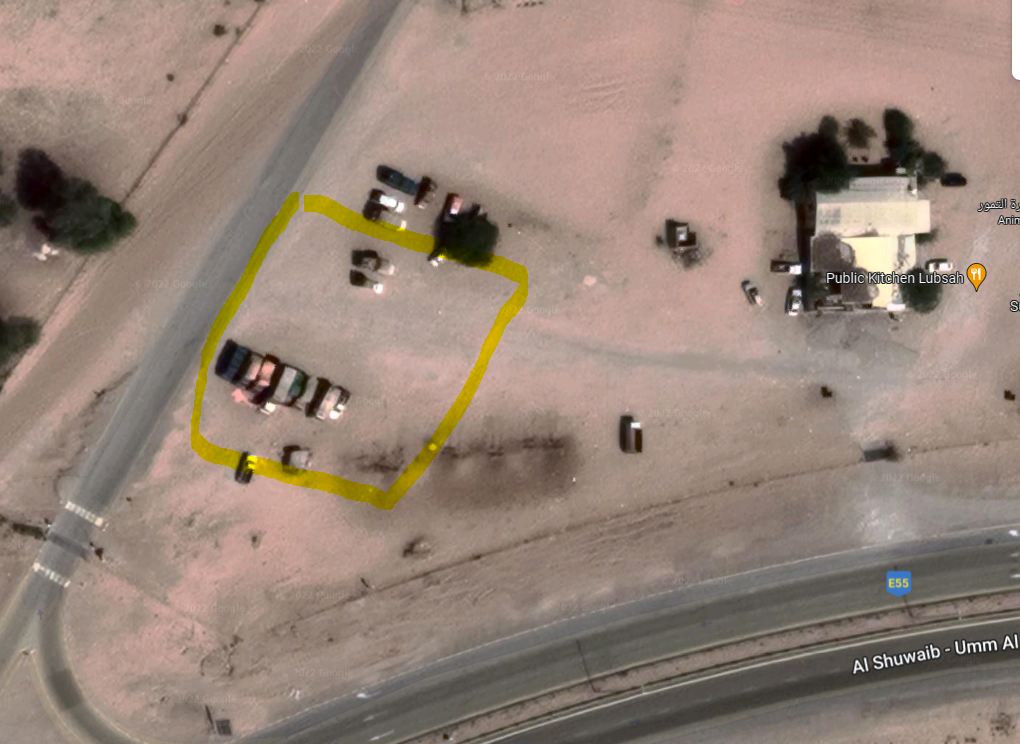
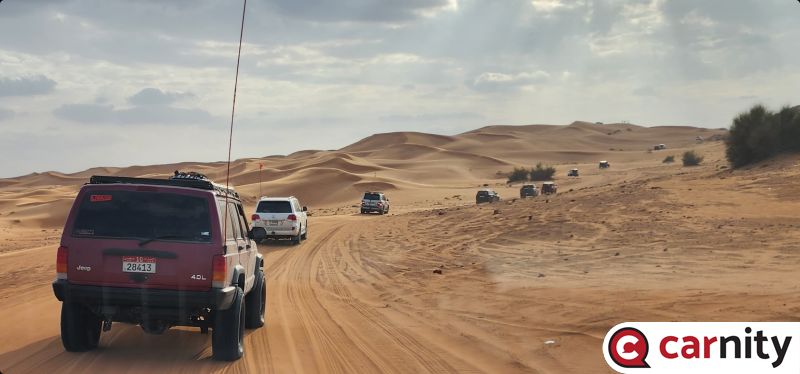
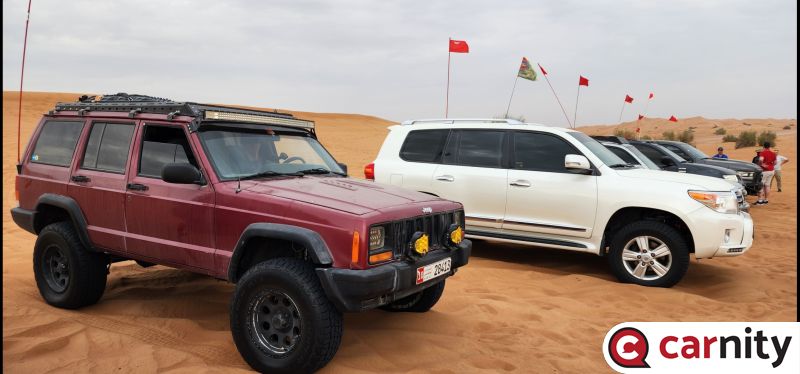
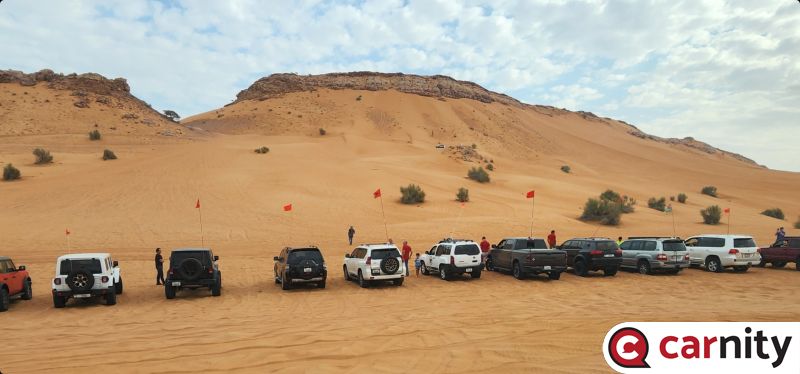
Good morning All ! Attendees @imranaasghar81 @Ahmed Wagdy @Theo09@Ahmad Nerat@Frans M@Sammy Six@Jeetu Sharma@lucas amat@Andrei S@Ishak@Mike M.@Danish Mohammad@Udit S@rohit kumar@premindra rajaram@MohamedSherif Managed and supported by : @Frederic @Davie Chase @Varun Mehndiratta @Dodi Syahdar Waitlisted Attendees @fayez Taking into account the great support on this drive and considering this is a scenic drive which is not that extremely difficult, i have decided to stretch the RSVP to give you all an opportunity to enjoy this wonderful terrain. A few notes to make things go a bit smoother: 1. When you arrive at the meeting point, park the cars a bit orderly next to each other. There is ample space but this area can be quite busy with farmer pickup trucks and camels on their way to the race track. Start deflating to 14psi if you have Highway HT tyres, or 12psi if you have All Terrain AT tyres. 2. Please be on time. In our club this usually means arriving 10-15 mins earlier than the mentioned meetup-time so you can deflate your tyres and get the flag installed. That way, by 7AM we would be ready to do the briefing. It might be a bit chilly so bring a sweater or jacket. 3. This drive is perfect to bring family or friends as passengers. We will be driving through the dunes, but we will also make use of existing farm tracks so we have time to relax and they can take some photos of the scenic terrain. We will take at least 2 breaks as well. 4. This drive is not a dune-bashing style drive. I have mentioned this clearly on the drive topic. 5. We will be exiting in Falaj Al Mualla, which is a quiet little town. Have a look around and perhaps try one of the little restaurants in the area. 6. The last petrol station is located here: https://goo.gl/maps/jL1UvZakWRjMDpZB9 We will be using Radio Channel 2: 446.03125 Mhz Please make sure to bring your programmed radio. For the ones joining us for the first time i can provide you with a spare radio that you can use. I will be posting the convoy list tomorrow. See you all soon !
 8 points
 -
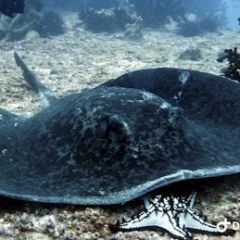
I've done Musandam somewhere in 2018 with Arabic speaking friends. We drove to Khasab port and took our camping gear with us and approached one of the fishermen. He took us to one of the beaches, around here somewhere: https://goo.gl/maps/JfKFSFp9bBhxjEtNA dropped us off, and came to pick us up a 9AM the next morning. We camped at the beach and for the first time ever i saw the phytoplankton in the ocean. It was unforgettable ! I was not able to take a photo but it looked like this:7 points
-
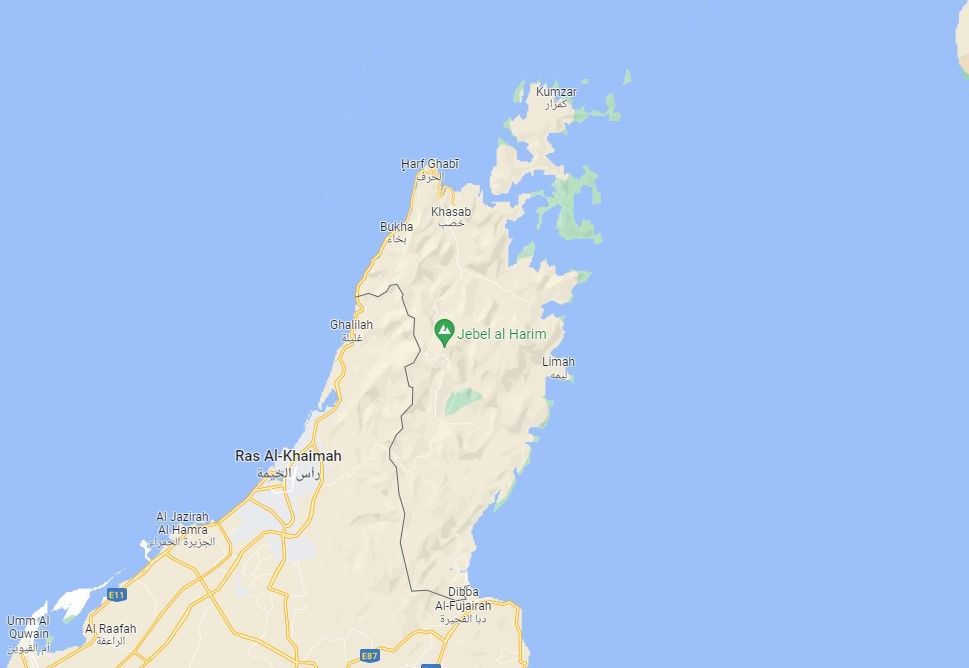
@Brett Eicher There is a stunning gravel trail that is easily doable with our machines from Khasab through to Jebel al Harim and south all the way to the Wadi Biyah junction. Along the way you'll see little farms and the mountain range being split by the road you're on. The challenge is that this is a one-way path. So once you get to the Wadi Biyah junction, there is a military checkpoint and only the nationals of UAE & Oman (may perhaps be GCC too) can pass through this gate back into Ras Al Khaimah for you to continue to Jebel Jais. As an expat, I need to turn back around and retrace the same track to Khasab from where I need to again use the official land border to cross back into the UAE. One of the ways in which I was thinking about doing it was to enter from the Khasab coastline and return back from the Dibba border. I just need to scope out how to take the Rawdah exit from Biyah west towards Zighy and south down to Dibba. Would love to try and scope this out with you if you're keen.7 points
-
Hi Carnity, Has anyone traveled the area in Oman that is in northern UAE? It looked like an interesting area to spend a few days exploring the mountains and coastlines, and would love any feedback/recommendations. My aim is offroading/overlanding style, and camping out of my truck. And, if anyone thinks this sounds like fun and want to join, let me know. I'm aiming to go over the next couple weeks. Cheers, Brett
 5 points
 -
Well done @Brett Eicher for taking the initiative to kick-start the Overlanding trips. Hope you guys explore and find something nice and doable for us to follow.5 points
-
I have done this several years back with friends including overnight camp and BBQ on top of Jabal Alharim.. with multiple stops at interesting view points along the way.. crossing to UAE back from the other side of the trail is not allowed for expats as @munkybiznesssaid so you have to turn back and follow same route through Khasab. P..S. If u are camping on top of Jabal Alharim make sure you have more than enough stuff to keep u warm at night and early morning hours .. it’s freezing cold5 points
-
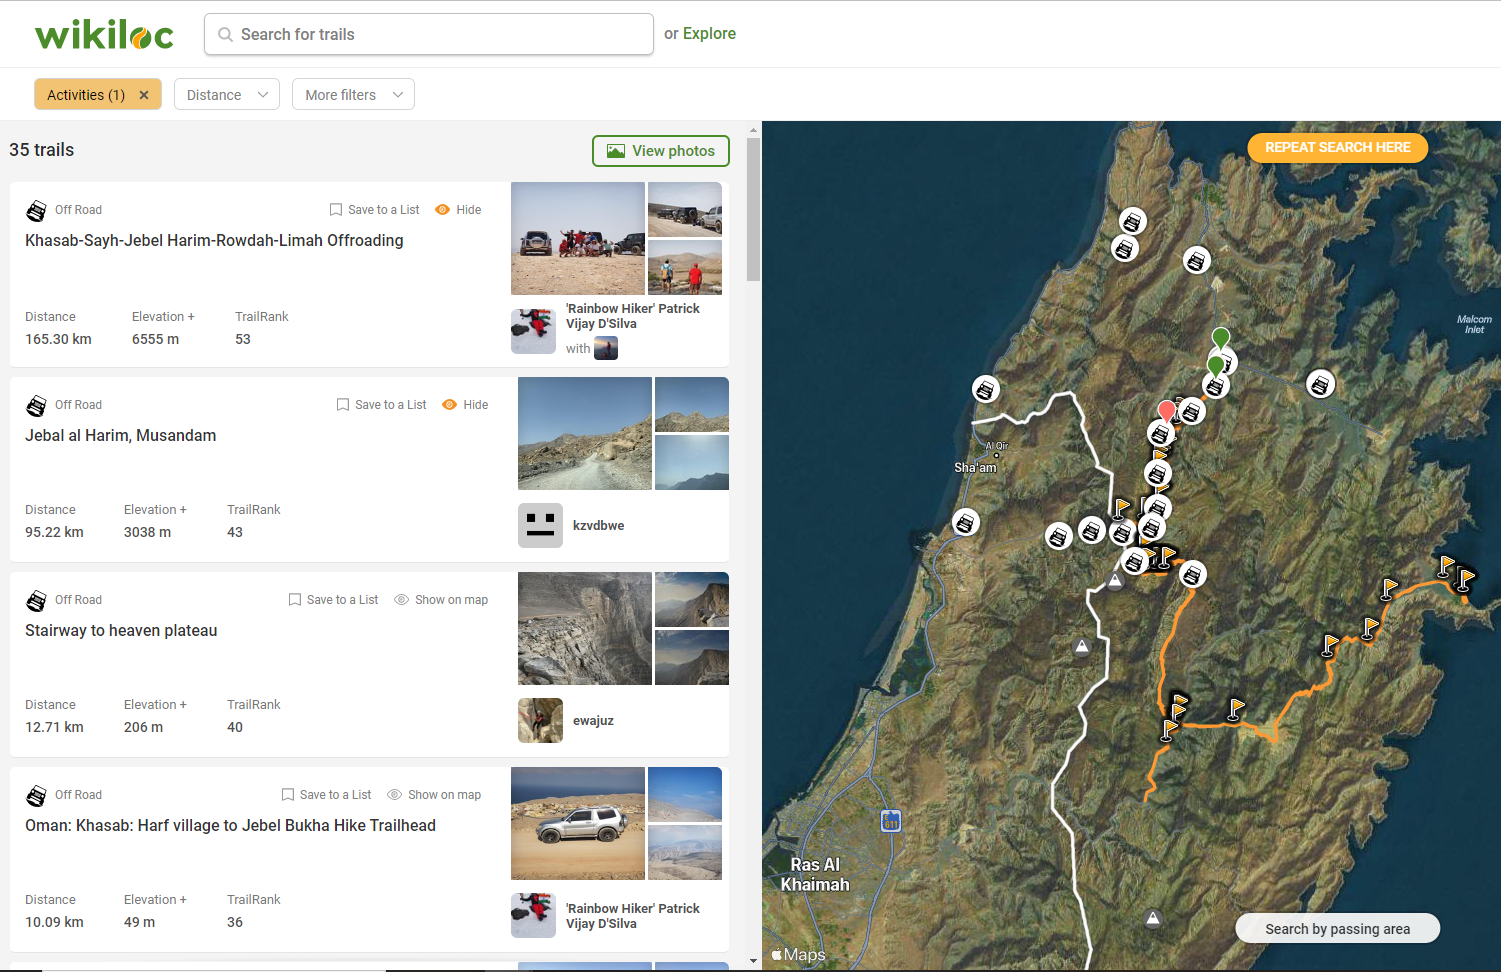
Wikiloc is our trusty source for finding trails !
 4 points
 -
3 points
-
@munkybizness Thanks for the feedback, and your company would be most welcome! I was looking through google maps, and saw lots of wierd little trails, wadi's and cuts... as you said, I was hoping to find a way linking the north/west and east coasts. I was looking at the map for a khasab-rawdah-dibba route. I did see the check-point you mentioned. wasn't sure how far it extended, and what routes it cut off. A shame, that as expats we are prevented from taking some of these trails, as they look fun. I read that Jebel al Haram peak is off limits, which makes sense, as this is where military facilities are set up... comms towers or radar stuff.3 points
-
This will be my first drive with the club, so I'm looking forward -- thanks Fred for organizing!3 points
-
Thanks Fred, that's perfect. I'll arrange next time.2 points
-
Hi @Andrei S yes, as we do not have separate Absolute Newbie drives anymore, they are now part of the Newbie drives. You can indeed lend your car to another person, as long as that person is the one who makes a user profile and RSVP's on the drive. We also ask not to swap during the drive itself, as it would become impossible for us to keep track of the drives you have done. Long story short... we track the member itself and their progress in Carnity, not the vehicle.2 points
-
@Frederic What a cool experience! And thank you for sharing the location point! I've used Wikiloc a lot as well, fantastic tool. Sometimes people know things that don't show up on it 😅2 points
-
Has anyone here used Michelin LTX for regular sand driving? Appreciate any review or feedback, please. LTX M/S 2 (moderate 4x4 tread) LTX A/T 2 (Proper AT tread, aggressive) I used LTX M/S long ago and love the rubber quality and sand flotation, it was amazing on sand (being very light) BUT not for wadi and rocks. Also, it lasted close to 60K kms without any aging issues. Now it seems Michelin added A/T too, which can potentially persuade me to ditch Geolander on the next tire change.1 point
-
Hi Hisham, Nice to e-meet you for now:) Please find the below details as requested Please share your vehicle details - Make, Model, Year and Color. Nissan Patrol Y62, 2016, White Confirm your vehicle has front and rear tow hooks / eyelets.. Yes Confirm your car has 4x4 Hi/Low gear..Yes Share details of your prior off-road experience, if any. Have done 1 drive with friends in a desert. Have you completed a Carnity Master Class before? No Confirm you have a safety flag, programmable radio, and air compressor. Yes, everything is available. Also before the drive, please ensure and CONFIRM you completed the readings below and watched the video: confirmed watched and read1 point
-
Hi @Santoso Marjuki I appreciate your enthusiasm buddy.. we will have more such drives in future.. there is always a next time!1 point
-
Out of interest, is there any reason why this isn't practiced any more within @Carnity? Although in my time with Carnity I have only seen two failures (one was the tow point shearing off on a car being tugged, resulting in a near miss, and the other more recent one was the soft shackle breaking on the car that was tugging, resulting in considerable damage to the car being tugged from the recoiling kinetic rope) this additional safety measure would have prevented both incidents.1 point
-
My BFG KO2 AT have lasted 70k KM and still good for more.1 point
-
Selling it. Wanted something new and shiny. 😅1 point
-
He saw the light and made the smarter decision to get a Y61 instead, where he will spend more on fuel but will spend less on braking as everybody will just move out of his way 👏🤣1 point
-
Has anyone been able find these Michelin AT2 anywhere? Thinking of putting them on my new Y61.1 point
-
Nice one @JeromeFJ. Rear diff lock is real gem in this kind of situations.1 point
-
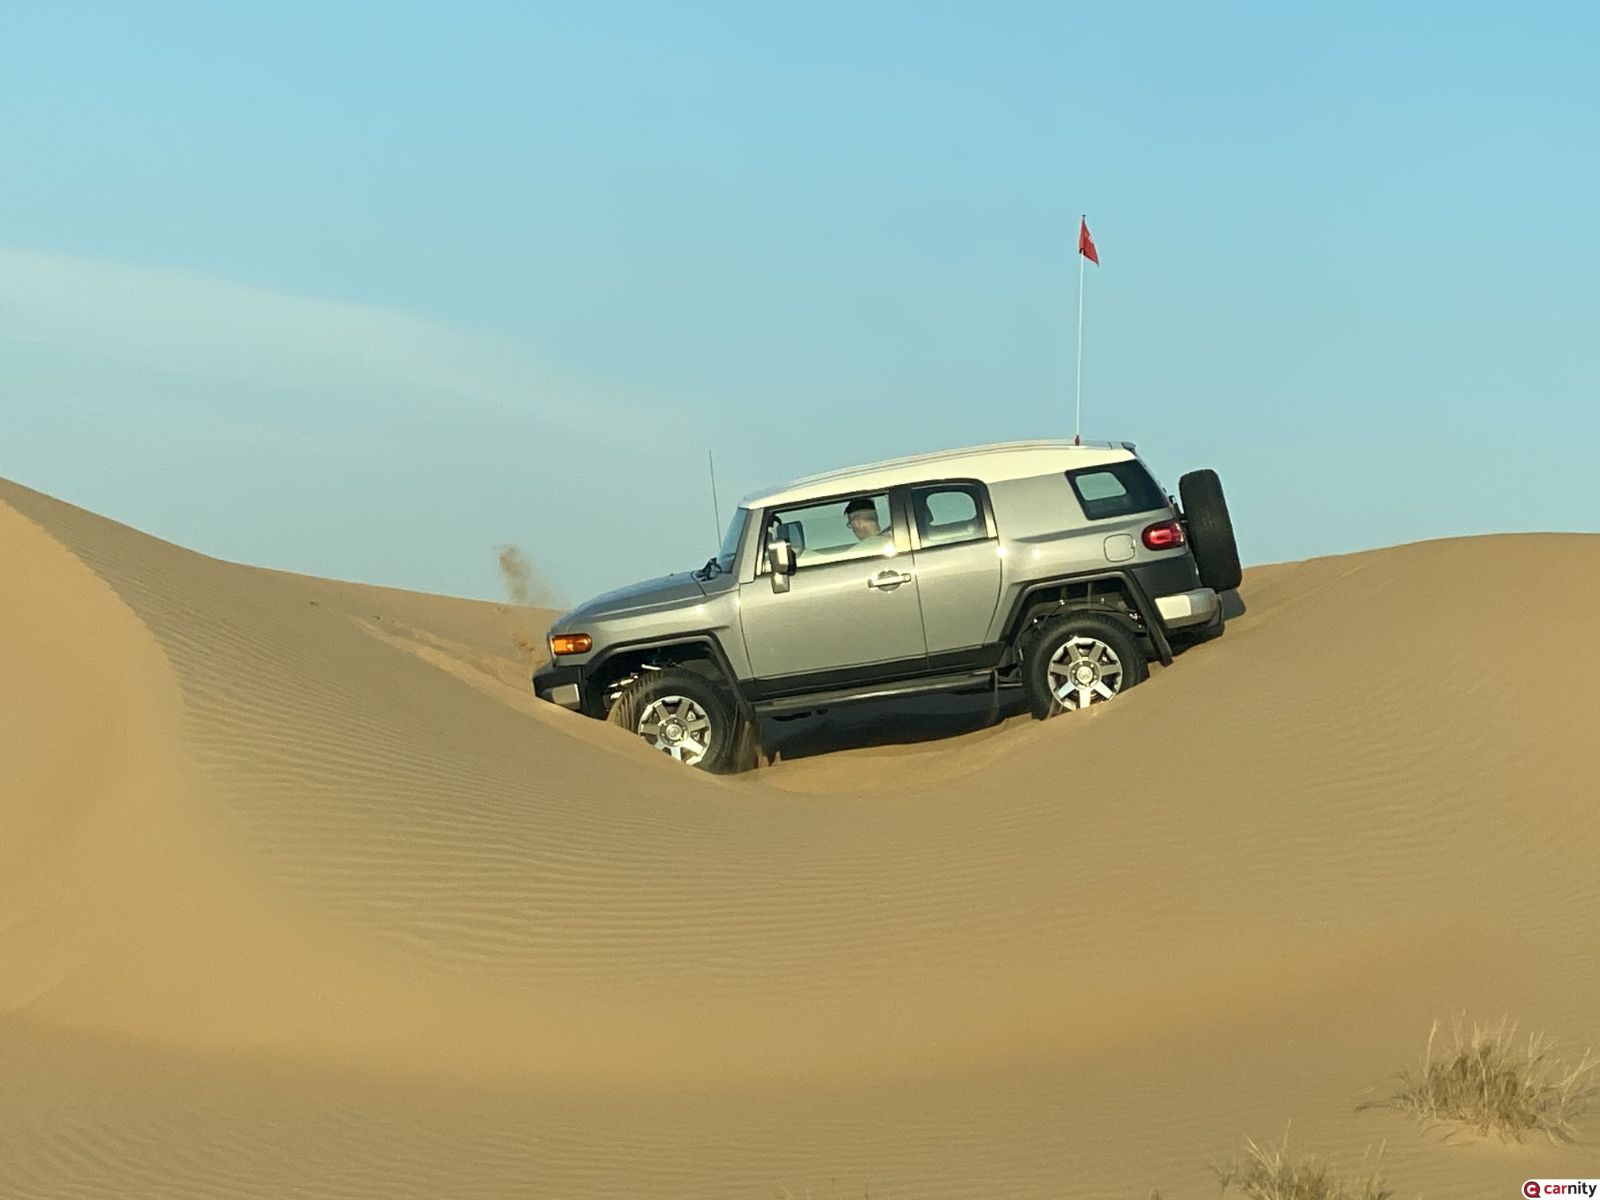
Well managed @M.Seidam, taking the time to analyze the situation, and putting in place what is required to limit the stress on the vehicles, and the risks for everyone ! I was stuck in similar situation in my last drive, and managed to get out thanks to the capabilities of the car But I realize afterwards that it would have been difficult to recover. I will keep in mind your step by step approach for the next one !

 1 point
 -
We’ll see who changes first and then provide the review to the other. But I guess i Will immediately notice the difference if I go with either, since Im moving from HT. I also never tried the Geolanders before, as you know I had the BFG Ko2 on that mighty car, so not sure how reliable my review be in terms which is better!1 point
-
I would say try Michelin AT, as they are the only tire in the market that comes with 5-year warranty and will easily outlast 50K kms. Even if I don't get any reviews, I am seriously 90% inclined on giving them a try soon. My previous experience with LTX M/S (not AT) was exceptionally well in sand. They were so light and smooth that my boat LC started climbing bigger heights, with just a change to lighter tires.1 point
-
Not sure if anyone tried the new Trail Terrain tires from BFG, they are lighter and less aggressive than KO2, checking the specs the tires weights 40lbs for the 265/70/R16. I have to change my H/T tires very soon;will be one of these Michelin AT, geolanders ot the new trail terrain BFG.1 point
-
Was about to ask the same - as other than Cooper they have the best of sizes, so lots of offer for my R18. Following the thread and hoping to get some good first hand usage feedback.1 point
-
The first I had them on my JGC they are awesome. However as for off-roading very rarely but in those rare desert drives they float amazingly. for the second I wanted to go for them for my Xterra last year but they were not available so I kept bouncing on the Geolander1 point
-
When using your vehicle in the desert, certain electronic aids like Active Stability Control (ASC) or ABS need to be disabled, as the soft and slippery sand will make the traction aids kick in and you won't be able to spin the wheels, which is something that is unavoidable when driving in the sand. Below i will describe the easiest two methods to disable your ABS and Stability Control (ASC) at the same time. You can choose either method 1 or method 2 as per your own preference. Method 3 describes the installation of a kill switch, which will require some work as seen in the video. Method 1: Removing the ABS relay 1) Switch off the engine and open the hood. 2) Locate the relay box and open it. 3) Locate the ABS relay on the upper right hand. Remove it by pulling it out. 4) Close the cover and hood, and switch on your engine. You will have no specific alarms on the dashboard but they will start to flicker after a while (ABS light, ASC light, etc...) and eventually they will stay on which indicates they are completely disabled. Method 2: Unplugging the ABS connector This method obtains the same result, but faster. After unplugging you will have immediately disabled ABS and ASC, hence you will have no restrictions. After your drive, there could be some sand inside the connector, so carefully remove it with some compressed air or a small brush. After your offroad drive, you can open the hood, plug the relay or connector back in, and restart your car. The ABS and ATC dashboard lights will be off again. Method 3: Installing a Kill Switch If you are handy, you can do this yourselves by following below steps. If you are in doubt, get it done by a professional workshop. The most advanced method includes the installation of a special "double functionality" kill switch. These can be bought online but are rather expensive. See functionality below:1 point
-
@M.Seidam.... Great feat and well done.1 point
-
Sure 24°46'32.2"N 55°20'22.1"E https://goo.gl/maps/W1jmsFeYZJebiTBx91 point
-
Hi @M.Seidam thanks for sharing, amazing recovery and most of all what a great display of camaraderie throughout Carnity. Just out of curiosity, could you share the location where this happened? that sand looks very soft, the area very technical too.1 point
-
You know guys recovery is an essential art in sand off-roading and from time to time I try to keep this thread reviving by posting some clips relevant to our trips , and encourage all to do please as well for the sake of our all collective benefit 🙏1 point
-
Winch recovery executed by @Hisham Masaad in a night drive in Qudra. 👍1 point
-
Gentle recovery executed by @Hisham Masaad 👍1 point
-
Amazing self recovery by @Shantanu Joshiwith clear instructions from @Chaitanya D in An Absolute Newbie drive…Brilliant work buddy!1 point
-
For safer off-roading, we request every off-roader to follow these mandatory safety requirements. Failing to abide by these mandatory safety requirements = NOT ALLOWED TO DRIVE. Your safety is our top priority but ultimately it is YOUR responsibility. Seat Belt: is the most important safety feature in every car. It is illegal not to wear and is of paramount importance when off-roading. Seat belts constantly protect you from bumps and jumps during the drive. Everyone in your car should be wearing a seat belt at all times - without any exception, excuse or reasoning. Driver, passengers, guests, family, friends, kids everyone should wear a seat belt at all times. It's the driver's ultimate responsibility to make sure everyone is wearing a seat belt at all times. Failing to abide - even once - you will be banned forever from Carnity off-road club. All children should be sitting on age-specific child/kids/booster seats with the seat belt fastened. Nobody should lean outside the windows or sunroof from a moving vehicle for any reason. You can only accommodate maximum passengers, as much as the seat belts available in your vehicle. If you walk across to help to recover a car and then jump in another offroader car for reaching back to your car, please wear a seat belt even if your car is one dune away. If your car breaks down or is stuck and you join another offroader car, please wear a seatbelt at all times. Secure loose objects: Everything should be strapped and secured in your vehicle before you start the off-road drive. All off-road gear- Shovel, Jack, Board, Compressor, Fire extinguishers etc. should be either fully strapped with strong tie-down ratchet (no bungee cords and no spider net) or a boot partition should be installed with molle panels, dog guard, boot divider mesh or flexible straps. This is to prevent any off-road gear from freely moving in the cabin space and potentially causing a fatal injury during off-road bumps or any unforeseen accident. No camping gear, chairs, boxes or wood should be kept loose in your car boot. Clear Visibility and Focus: While off-roading, driver should have clear visibility and focus. Anything that blocks the clear visibility should be removed immediately from your car e.g. excessive front wind-shield tinting, loose sun-visor, etc. You should immediately stop driving off-road during sandstorms, foggy conditions, or any other natural conditions that hamper visibility to continue. Check and/or replace your wiper blades every month, as rubber degrades with time and if your wiper is not cleaning the windshield properly it may block your visibility. All distractions from passengers, music, phone calls, etc. should be avoided while off-roading.
 1 point
 -
1 point
-
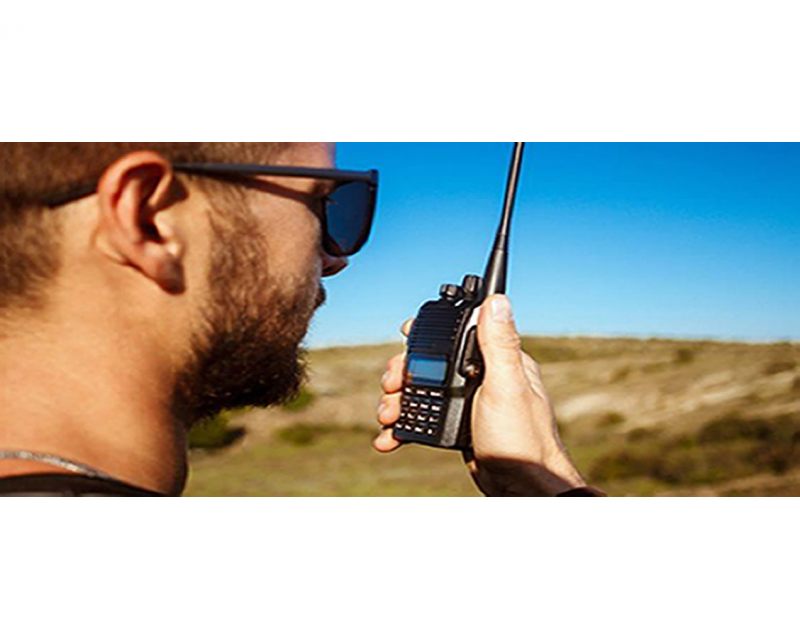 Two-Way Radio Guidelines A two-way radio is an essential safety device during every Carnity Offroad Club drive. It is the primary means of communication between the convoy members. Before the Drive Every participant must bring their own two-way radio. We highly recommend programming your radio with the Carnity frequencies listed below beforehand. We do not provide spare radios or program radios at the meeting point. For your very first club drive we can lend you a radio for that day only. Ensure your battery is fully charged before every drive. No radio = No drive. If you need help choosing, programming or operating your radio, simply create a topic on the Carnity website. Our community will gladly assist you. Radio Channels Carnity Offroad Club uses multiple radio channels so that several convoys can operate simultaneously without interfering with one another. Your Drive Lead will always announce the channel to use before the convoy starts. Recommended Radio Models and Brands UHF Two-Way Radio (400-470Mhz operating range). (VHF will not work). Handheld radio (built-in models can be purchased as extra but you need at least one handheld model. Recommended brands are: Baofeng (UV5R, UV5RH, UV5R Mini), Crony or Motorola MT777, TYT, Make sure it's equipped with a keypad so you can enter the frequency. Do not buy the models without keypad unless you are savvy enough to program with a separate USB cable and Chirp Software. Recommended Radio Settings For best compatibility with other convoy members, we recommend: Frequency Step: 6.25 kHz CTCSS / DCS: Disabled (unless instructed otherwise) VOX: Off Radio Etiquette Listen before transmitting. Keep messages short and clear. Do not interrupt emergency communications. Use the radio for convoy-related communication only. Follow the instructions of the Drive Lead and Marshals. The 10 radio frequencies are listed below: Technical Details STEP FREQUENCY: on the FM band, frequencies are spaced from each-other at a certain bandwidth. The Step frequency is basically the incremental change in your radio when you turn the rotary knob on top of your radio. When you program the radio to a certain frequency, you will need to make sure the appropriate step frequency has been set correctly. (see on the above frequency list). PTT: Short for PUSH-TO-TALK: This is the button on the side of your radio that you push when you want to broadcast a message. MON: Most radios have a Monitor button. When pushed you are basically monitoring the channel. If no-one is broadcasting you will just hear noise. But this is useful to set your desired volume. SQL or Squelch: To make sure that your radio does not pickup every little signal, the squelch acts as a gatekeeper to only allow a broadcast on your radio when it is strong enough or nearby enough. If you encounter a lot of noise that's being picked up by the radio, try changing the SQL setting a little bit. A higher setting makes the radio less sensitive to noise. RX and TX frequencies: RX stands for Receiving frequency, which TX stands for transmitting frequency. in Carnity we transmit and receive on the same channels. DCS / CT codes: These are basically encryption settings that allow a user to make sure only radios with exact same CT codes can listen in on the chatter. As these settings are confusing and complex, they should not be used (CT should not be showing on your display). Programming the Motorola/Crony MT777: Note: This radio has 2 operating modes called "Frequency" and "Channel". To switch between these modes, keep the ENTER button pressed while switching on the radio. Pressing the VFO/MR button while you're in Frequency mode will bring you to the combined mode, which is basically a screen that shows both the channel and the frequency. You can use either one of these modes during operation. To Program the Channels: 1. Make sure your radio is switched off. 2. Press the Moni (black button on top of the orange one on your left side), and MENU key together while switching on the radio. 3. Wait for the set to display SELF (which means manual setup). 4. Press Enter and it will show the Channel number. 5. You can choose which channel to program by selecting it from the rotary selector knob on the top of your device. 6. Once you have the desired channel, press ENTER. 7. Type your first frequency you want to program. 8. Press ENTER on every setting below to go through the advanced settings and verify if they are programmed as following: (If above settings are not correct they can be changed with the rotary knob on the top keep pressing enter until your set displays the next channel to be set). 03=OFF (if a number is showing here, push the *Lock button until OFF appears). 04= Enter the same frequency as the one you want to program. 05= OFF (if a number is showing here, push the *Lock button until OFF appears). 06= OFF 07= ADD 08= HIGH(H) 09= NARROW 10=-------- 9. Repeat from Step 5 to program the rest of your channels. Very useful Youtube video below: method for adding a single frequency later on, without going through the whole SELF programming mode again: 1. Make sure the radio is in Frequency Mode. Type in the frequency you want to program. E.g 446.00625 2. Press MENU and then press the VFO/MR button. The channel number will start to blink. 3. Use the rotary selector knob to select on which channel you want to save this frequency. 4. Press VFO/MR button again to confirm and exit. Keypad can be locked by pushing the * LOCK button for a few seconds. --------------------------------------------------------------------------------------------------------------------------------------------------- Programming the Crony CN888: Note: This radio has 3 operating modes called "Frequency", "VFO", and "Channel". You can toggle between these modes by pressing the orange Function button on the top left corner, followed by pressing 1 (Mode). Programming the radio as described below can only be done in VFO mode. 1. Switch on the radio. 2. Press the Function Key (orange button on top left corner). 3. Press 4 (STEP) until it shows 6.25. Press EXIT to confirm. 4. Now type the first frequency you want to program. Eg. 446.00625 5. Now press the # button. The Channel number in the corner of the display will start to blink. 6. Select with the A (up) or B(down) buttons to choose wich channel you want to save the frequency. 7. Press the C button. the radio will confirm by saying "SAVED AS RX FREQUENCY" 8. Press the # button again. The Channel number in the corner of the display will start to blink. 9. Press the D button. the radio will confirm by saying "SAVED AS TX FREQUENCY" Keypad can be locked by pushing the Function button, followed by the *F.L button. Programming the Baofeng UV5-R: When buying a radio like the Baofeng UV5R, many certain frequencies and channels are already programmed into the radio, but these are different from the ones we use in Carnity. As you will be programming 5 new channels onto Channel number 1 till 5, it is important to first delete these existing frequencies stored in those channels. You can do that as following: Step 1: Delete the existing channels from channel 1 till 5: 1- Switch on the radio 2- Press the MENU button followed by the buttons 2 and 8. (Menu 28). 3- Press MENU, and then use the UP/DOWN arrows to select which channel you want to clear. 4- Select CH1 and press MENU again, you will hear "delete channel, followed by confirmed". 5- Now go back to step 3 and do the same for the following channels (CH2-CH3-CH4-CH5). 6- Now all 5 channels are clear and ready to be programmed. Step 2: Set the step-frequency: - Switch on the radio - Press the MENU button and with the up and down buttons select STEP frequency. - Change this to 6.25 and press MENU to confirm. - Press EXIT to go back to the main menu. Step 3 Program the new frequencies in the radio: 1- Press the VFO button. You will hear the confirmation “frequency mode”. 2- Make sure the arrow is on the top line. If not, press the blue A/B button. 3- Type in the frequency you want to save. I.e 446.00625 4- Press MENU, followed by button 2 and 7 (menu 27). You will see MEM-CH. 5- Press MENU and now use the up and down buttons to select the channel you want to save it on. 6- Press MENU again to confirm. Your first frequency is now stored under channel 01. (receiving memory). 7- Press MENU TWICE again to confirm. Your first frequency is now stored under channel 01. (transmitting memory). 8- Press EXIT and repeat from step 3 onwards to program your remaining channels. Note: To program the Carnity backup frequency channel 5, you will need to set the step frequency to 12.5. When done, follow the same steps to program and save it under channel 05. You can either program these channels one by one into your radio, which is the easiest for you later on, or you can just enter the frequency without saving it. Some extra notes: Option 5 in your menu should be on Narrowband. Option 10 and 12 in your menu should be set to OFF (we are not using CT codes). BaoFeng_UV-5R_Manual_(1).pdf1 point
 -
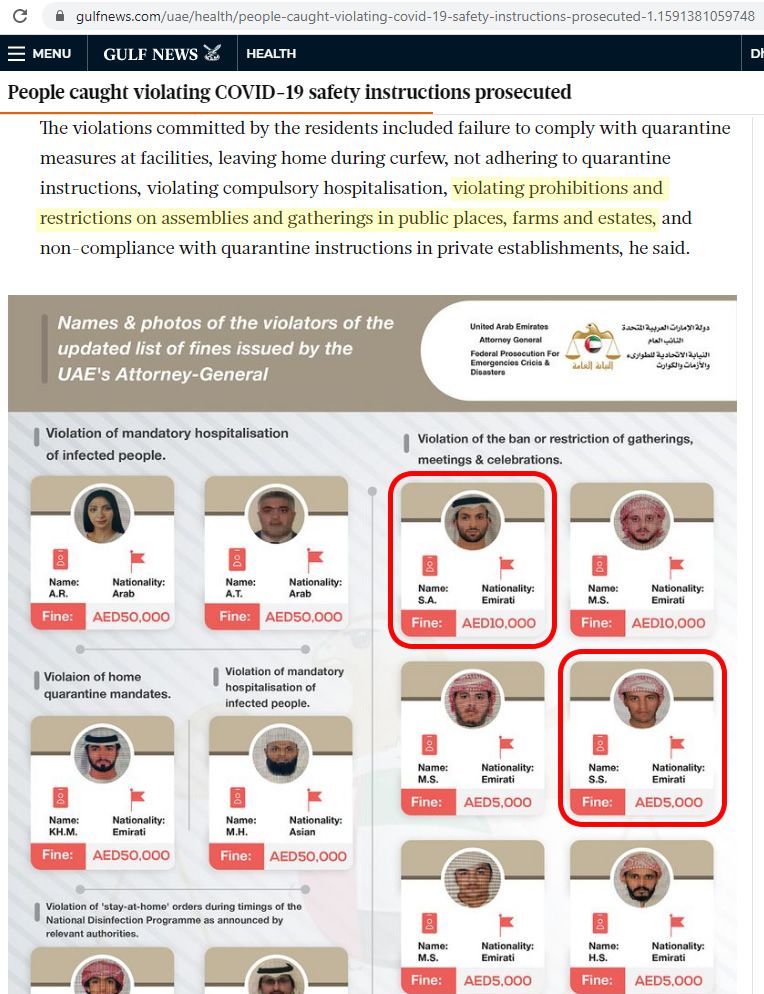
As we have been respecting authorities guidance & Carnity COVID guidelines to resume desert drives with caution by keeping social distance and wearing mask at all times outside the vehicle Unfortunately few off-roaders have difficulty in understanding and abiding these guidelines. As published in the national newspaper of UAE, everyone need to understand that still there are no gatherings allowed and authorities are issuing fine for 10,000 AED for host and 5,000 AED for attendees. https://gulfnews.com/uae/health/people-caught-violating-covid-19-safety-instructions-prosecuted-1.1591381059748 If you spot anyone stepping out of the car not wearing a mask, please remind them on the radio immediately. As we all are in this together, so we all have to help each other to remind. Failing to abide below list of restriction will result in an immediate ban from Carnity Off-road Club: FIRST WARNING Minimum 1 month ban from joining any Carnity off-road Club drives. Written warning will be issued on your Carnity profile. SECOND WARNING Minimum 6 month ban from joining any Carnity off-road Club drives. Written warning will be issued on your Carnity profile. If you do not like these restrictions, please stay at home and do not join for any off-road drives. Every Carnity Off-road Club Member has to COMPLY WITH THESE COVID19 GUIDELINES FACE MASK IS MANDATORY, WHENEVER YOU STEP OUT - NO EXCUSES. LEARN TO CONFIGURE YOUR RADIO, before the drive. Nobody will teach you or exchange radios like before. Read the detailed instructions posted here - to configure. If you still cannot configure, ask on forum ahead of time. Click "TOTALLY AGREE" Emoji here before RSVP any drive or else trip lead will remove your name.
 1 point
 -
From my very first Carnity drive in 2018: @Rahimdad recovering Srini his FJ Cruiser. 2018-10-13_08_45_12.mp41 point
-
Correct, that was the same technique i did on your fourth video (crest recovery).1 point
-
In the recovery 4th one crest recover from the other side I couldn’t see off course but what I thought was this 👇( found it in you tube by Carnity 2018 )1 point
-
We all have seen the incidents and how bad it can go wrong if recoveries are not done in a proper (safe) way. There are a multitude of reasons for that: 1) Tugging too hard 2) rusted tow points 3) using poor quality shackles 4) using poor quality tow ropes instead of recovery ropes 5) Wrong angle etc... etc... etc.. HENCE we take recoveries very serious and educate others as much as possible about the potential dangers.1 point
-
Every time I see a tow rope getting tight on a sharp tug, it makes me wince. I've seen too many parts flying off cars and turning into projectiles. There was a video going around on whatsapp a couple of years ago showing the aftermath of where the rope broke and went through the windscreen and hit the guy in the face. It showed the guy rolling round on a hospital bed in pain with half of his jaw missing. I've seen a lot of bad accident videos but that one stuck with me.1 point






This leaderboard is set to Dubai/GMT+04:00